Often in private houses a basement is created. It is first or ground floor. Although, in fact, this is a basement. Work on it must be carried out in strict compliance with certain criteria. The law has specific criteria (from 2.5 to 3 meters). They touch the height of this space.
There are also taxes on the area built for living. This question interests everyone who is planning their home.
The disadvantages of a basement are the enormous costs, from digging holes to electrical wiring. The estimated cost is calculated after a geological and engineering study: the type of soil, level groundwater. There are situations when these factors categorically do not allow creating a basement floor - its construction and maintenance will be unreasonably expensive.

Tasks of basement premises
Basement rooms in private buildings need good drainage, powerful and insulating. Simply forming a continuation of the foundation is not enough. By neglecting the rules of waterproofing and using low-quality materials in your work, you seriously increase the risk of drowning.
Important! Work should be carried out only by highly qualified specialists.
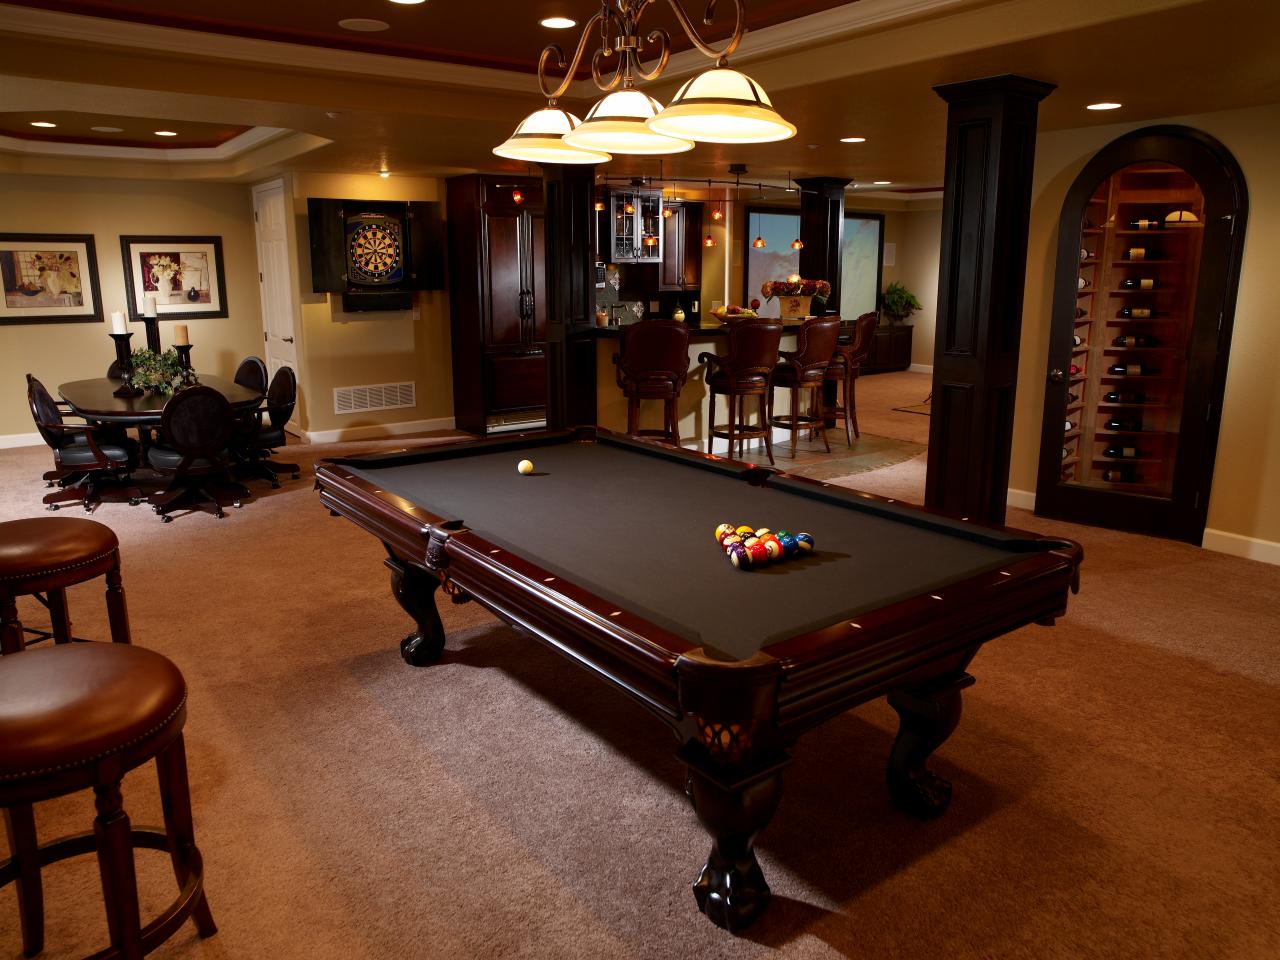
Usually windows in plinths are not suitable, it is almost impossible. Exceptions are in the photo below. But even if there are windows, there is no full natural light here. Therefore, such premises are not considered residential. Here, as a rule, they organize: sports facilities, domestic cinemas, saunas, etc. The issue of ventilation in the basement is especially relevant when building Gym. It is necessary to install pressure sewerage here if saunas and showers are created.
Usually, a plan to create a basement appears when it is not possible to create all the intended rooms in the house or their area is small for some of the owner’s ideas. Also, the need for a base is determined by when the site has a slope with a significant difference in height. But with proper construction, good savings can be achieved and the pace of work can be increased.
How to arrange this? First of all, it is useless to chase the number of residential square meters. It is better to choose small premises (the result can be up to 3 floors). But there should also be ideas about the purpose of the plinth. What is going to be there? A playroom, a warehouse-cellar, a recreation room or a place for other activities? Let's say building a storage room or shed separately, or attaching it to the house, is much cheaper. The basement or basement will definitely need to be heated, not every year, but still most owners of the basement are forced to take measures against increased dampness.
To correct a local natural disaster at the very bottom of the pit, it is advisable to look at this material:
Types of socles
- Buried. This is the most common type. It has very strong resistance to moisture. Water quickly leaves such a base.
- Speaker. It is usually arranged when the wall structures of the house are quite thin.
- On the same level as the foundation. Not the most rational option, because it has poor resistance to moisture and at the same time it becomes the beginning of the wall. We have to seriously strengthen the water protection, and this is an additional expense. Also, with this option, there is no way to improve the appearance of the building.
Base materials
The base continues the foundation. And the material used for it is similar. It is rare to use the materials that were used to create wall structures.
The most popular options for materials for the base:
- Already created blocks.
- Bricks.
- Monolithic concrete.
Whatever option you prefer, work always starts from calculations. Particular care is required calculate wall thickness. Concrete screeds and slabs usually form the floor. The base can be created from already formed reinforced concrete slabs. Wood materials are used for cladding.
If the base is much higher than the ground level, then there, in the upper part, entire windows and doors are made. They should not go north. Thus, frames can become deformed due to significant accumulations of snow. 
The initial stage of facing is the creation stairs in the basement. The most commonly created options are:
- Classical march. It is arranged only if the area is sufficient for this.
- Screw. It is created when the conditions of the base do not allow the first option to be arranged.
Water protection
For the base you need to do double-sided waterproofing. It is not necessary to isolate components that are concentrated above ground level.
The most powerful protection is provided only if the base is based on a concrete monolith. Again, the work must be carried out very efficiently, otherwise the slab will not adhere well to the walls under the influence of moisture. Do not forget about the standards for the height of the plinth - 250 cm. For this, a foundation pit of the appropriate depth is formed.
Creating projects
As already noted, it is very important to determine the required wall thickness. The type of soil, the location of the building, and the type and behavior of the soil are taken into account. If the soil is reliable, then the thickness of the basement walls can match the other walls of the house. If there are problems with the soil, their thickness increases by 20-30 cm.
If the building is built of wood, then the base can be created from concrete blocks.
The project must also reflect the position of groundwater. Since there is a requirement for the depth of the pit, it should not reach their level. The soil is studied in advance and the depth of these waters is determined.
For your information! A permit, or rather an update of the document, is needed if you initially submitted papers for individual housing construction without a base, but after some time you changed your mind in favor of the ground floor. And according to the law, if the area changes by 17% or more, documents must be submitted to the HOA for approval.
Pricing issues
They are determined by the following factors:
- Region of your residence (climate, soil, soil, etc.)
- Prices of materials in your region.
- Cost of services of specialists and workers.
- Conceived parameters of the plinth and foundation.

Example 1. Base parameters: 10x10. The foundation is strip. Its depth is 240 cm, width – 30 cm, elevation above the ground: 60 cm.
The following materials are involved here:
- Land sampling – 360 cubic meters. m. = 360 thousand rubles.
- Corrugated reinforcement, cross-section 0.14 cm. 5700 m involved. Cost about 205,150 rubles.
- Concrete. Expenses: 265,900 rub.
- Formwork, 10 cubic meters. Expenses: 62,000 rub.
- Water protection. Bitumen mastic. She demanded 60,000 rubles. This is the inner layer. The outer layer of roofing felt costs about 60,000 rubles.
- Insulation. Expanded polystyrene. One slab is 10 cm thick, 58 cm wide, and 26 cm long. 10 slabs are needed. Costs are about 32,000 -35,000 rubles.
- Materials for the layer (crushed stone and sand) + nails. Expenses: 42,000 rub.
Tools:
- For calculations: tape measure, pencil, level.
- For masonry: trowel, pick.
- Others: shovel, hammer, plumb line.
Their total cost is within 30,000 rubles.
Workers' services here will cost about 130 -140 thousand rubles. This includes their fee and expenses for accommodation and food.
If you carry out the work yourself, then other numbers appear here. Digging the necessary pit and filling it will cost approximately 50,000 rubles.
Example 2. The parameters of the plinth are 8 x 8 m. The walls are made of FBS blocks. The foundation is slab, monolith.
Materials:
- Waterproofing, roofing material.
- Insulation. Penoplex. Thickness – 5 cm.
- Change house. Parameters 2.5x5 m.
The list of tools is almost the same. There will also be costs for work, equipment rental, and delivery of materials.
The total price of all of the above is about 1,000,000 rubles.
Of this amount, approximately 64% is spent on the purchase of materials, 7% on their delivery, 3% on tools, 14% on work, 7% on equipment rental, and 5% on change rooms.
When a basement is built in a location where groundwater is high, costs increase significantly. We will have to build a very strong foundation. Usually in such cases they create pile foundation and the base on it. The costs indicated in the first example may increase by approximately 1.5 - 2 times.
Of course, you can save money on the construction of the basement. The main thing is to do this without compromising quality. It is especially not worth saving on concrete and waterproofing, as well as insulation. It is better to create a base with smaller parameters, but reliable and with a powerful base.
Also, do not skimp on high-class workers. If you yourself are not able to carry out high-quality work or you do not have time, then it is better to entrust this matter to specialists with the characteristics. Today it is quite popular to order a turnkey base. The price range here is very wide. Much depends on the parameters of the planned base, geological factors, prices of materials and services of a particular company. Below are some examples of turnkey plinths, taking into account various parameters and factors.
| № | Type of work | Footage | Price, rub.) | Amount (rub.) | |
| Works: | |||||
| 1 | Extracting axes | 100 m 2 | 40 | 4000 | |
| 2 | Excavation work (soil is not removed) | 252 m 3 | 329 | 82908 | |
| 3 | Creation of a separation layer (geotextile is used) | 210 m 2 | 20 | 4200 | |
| 4 | Creating a sand cushion. Its compaction using a vibrating plate | 36 m 3 | 529 | 19044 | |
| 5 | Creating a pillow from crushed stone. Its compaction using a vibrating plate | 18 m 3 | 529 | 9522 | |
| Cumulative: | 119674 rub. | ||||
| Foundation slab: | |||||
| 1 | Laying a waterproof membrane | 112 m2 | 30 | 3360 | |
| 2 | Work with formwork (installation, removal) | 40 m.p. | 300 | 12000 | |
| 3 | 2.12 t. | 15000 | 31800 | ||
| 4 | Vibrating concrete placement | 21 m 3 | 1500 | 31500 | |
| Cumulative: | 78660 rub. | ||||
| Basement walls: | |||||
| 1 | Eliminating axes | 100 m 2 | 40 | 4000 | |
| 2 | Work with formwork | 125 m2. | 300 | 37500 | |
| 3 | Creation and installation of reinforcement network | 2.69 t. | 21000 | 56490 | |
| 4 | 26.25 m 3 | 1500 | 39375 | ||
| Cumulative: | 137365 rub. | ||||
| Base covering: | |||||
| 1 | Work with formwork | 100 m2 | 320 | 32000 | |
| 2 | Creation and installation of reinforcement network | 2.12 t. | 15000 | 31800 | |
| 3 | Laying concrete. Its compaction using a vibrating tool. | 17 m 3 | 1500 | 25500 | |
| Cumulative: | 89300 rub. | ||||
| Cumulative: | RUB 424,999 | ||||
| Materials: | |||||
| 1 | Waterproof strip Megaizol GEO PRO 150 | 231 m2 | 40 | 9240 | |
| 2 | Sand. Sizes: medium and large. | 36 m 3 | 700 | 25200 | |
| 3 | Granite crushed stone (fraction range 20-40) | 18 m 3 | 1350 | 24300 | |
| Cumulative: | 58740 rub. | ||||
| For base plate: | |||||
| 1 | Geomembrane "Planter" | 123.2 m2 | 90 | 11088 | |
| 2 | Board 4 x 15 x 600 cm. 1-3 grades are used. | 1.22 m 3 | 8500 | 10370 | |
| 3 | Supports for reinforcement elements | 400 pcs. | 5 | 2000 | |
| 4 | Fittings, type d12 A500 | 2.05 t. | 33000 | 67693 | |
| 5 | Fittings, type d8 A500 | 0.06 t. | 33000 | 2139 | |
| 6 | Wire. Knitting type. | 19.08 kg | 360 | 6869 | |
| 7 | Concrete B22.5 | 21 m 3 | 3900 | 81900 | |
| Cumulative: | 182059 rub. | ||||
| For walls: | |||||
| 1 | Fittings, type d12 A500 | 2.69 t. | 33000 | 88770 | |
| 2 | Wire. Knitting type. | 24.21 kg | 360 | 8716 | |
| 3 | Vertical reinforcement clamp | 625 pcs. | 4 | 2500 | |
| 5 | Formwork. According to inventory. | 250 m2 | 580 | 145000 | |
| 6 | Concrete class B22.5 | 26.25 m 3 | 3900 | 102375 | |
| Cumulative: | RUB 347,361 | ||||
| For floor slab: | |||||
| 1 | Fittings d12 A500 | 2.05 t. | 33000 | 67693 | |
| 2 | Fittings d8 A500 | 0.06 t. | 33000 | 1980 | |
| 3 | Wire. Knitting type. | 19.08 kg | 360 | 6869 | |
| 4 | Chairs for reinforcement elements. | 500 pcs. | 5 | 2500 | |
| 5 | Formwork. Inventory view. | 100 m.p. | 280 | 28000 | |
| 6 | Concrete B22.5 | 17 m 3 | 3900 | 66300 | |
| Cumulative: | 173342 rub. | ||||
| Delivery: | |||||
| 1 | Formwork. According to inventory. | — | — | 14600 | |
| 2 | Materials | — | — | 15000 | |
| 3 | Tools | — | — | 1800 | |
| Cumulative: | 31400 rub. | ||||
| Total for materials: | RUB 792,902 | ||||
| Equipment: | |||||
| Concrete pump | 3 shifts | 14400 | 0 | ||
| Residential trailer | 13 shifts | 1000 | 0 | ||
| Conducting electricity to the work site | 13 shifts | 1000 | 0 | ||
| Overhead 2%: | RUR 24,359 | ||||
| TOTAL: | 1242260 rub. | ||||
Table. Calculations based on data in central regions
| Material. Parameter type | Meaning. |
| Foundation slab (PF). Square | 100 sq.m |
| PF perimeter | 40 shoulder straps m. |
| PF thickness | 20 cm |
| Sand pillow. | 15 cm |
| Crushed stone pillow. Thickness. | 10 cm. |
| Laying the foundation. Average depth | 150 cm. |
| Basement walls. Length. | 50 shoulder straps m |
| Basement walls. Thickness. | 20 cm. |
| Base height. | 250 cm |
| Total area of openings | 0 sq.m. |
| Floor slab (PP). Square | 100 sq.m. |
| PP perimeter | 40 shoulder straps m |
| PP thickness | 16 cm |
| Distance from the Ring Road: | 10 km. |
| Total price of a turnkey base: | 1242260 rub. |
Should I do it or not? What they say on the forums
The most often advised is the following:
- If you have free funds, then you can implement your plans. If there is a lack of money in the process, it is possible to put off the finishing work on the plinth indefinitely.
- As a rule, a basement is always planned on expensive and small plots in order to increase space.
Identified disadvantages during the construction process:
- The price of building a foundation with a basement or ground floor increases by 35-40%. This is significant money, especially if there is no foreseeable need for space.
- Sometimes they forget about insulation and waterproofing, but the sprinkling has already been done. It is necessary to re-prepare the external trenches, attach polystyrene foam or come up with something new with waterproofing.
A selection of arguments for
One of the most popular videos on the topic. The author is distinguished by both academic and worldly savvy, judging by the level of elaboration of the topic. In addition, the author is obviously a supporter of the construction of a basement floor and quite convincingly proves the practicality of its arrangement.
The ground floor (ground floor) is a room whose floor level is located below ground level. Thus, this structure can be considered as an underground room, which can be used for a wide variety of purposes, and is furnished cozy and comfortable in accordance with the wishes of the owner.
Of course, building a house with additional underground space requires a lot of material resources and effort, since it simply cannot be done without the help of special equipment. But the result is worth the effort and investment. In the article you will find information about all stages of construction, as well as the price of materials and work.
Purpose
As already mentioned, an underground room can be used for a wide variety of purposes.
It all depends on the owner’s imagination:
- Firstly, you can make a sauna or a swimming pool here. To do this, you should think through the water supply system in advance.
- Secondly, you can arrange a home theater where you can have a great time.
- Thirdly, it can be used as a training room. In this case, it is worth thinking through and planning the ventilation system in advance.
There are a lot of options. The main thing is to think about this in advance and fulfill all the necessary requirements during the construction stage.
One of the main reasons for building a basement is lack of space. For example, if the owner decided to build a house, but there is not enough space, then an underground floor can be built. Then use it for specific purposes.
Pros and cons of the design
Some consider the construction of a basement to be too expensive, while others, on the contrary, consider the underground floor to be an essential part of the building. In this regard, the following pros and cons can be highlighted.
So, the pros:
- Additional area. As mentioned above, you can arrange anything you want in an underground room. In addition, it can be used to store perishable foods. If, for example, the owner has a car, then the ground floor can be turned into a garage, and then there will be no need to buy or rent a garage.
- The role of the buffer. When building an ordinary house, there is a need to insulate the floors of the first floor, but if there is a basement, then this need almost disappears, since it will be a kind of buffer between the ground and the floor of the first floor.
And now about the cons:
- Large expense of funds. This is the only and most important disadvantage of this design. During its construction, one cannot do without hiring workers, the services of a concrete mixer, concrete pump, excavator - all this requires large investments. But in any case, the result will justify such expenses, so if your financial condition allows you to have such luxury, then you can safely get down to business.
Stages of construction of the basement
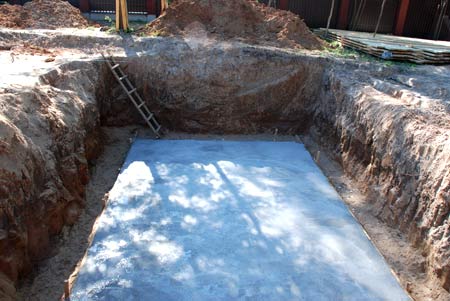
The construction of such a structure includes a series of sequential actions. First you need to use an excavator to dig a pit, the depth of which is about 2 meters (average value).
Immediately during digging, the soil must be taken to the side so as not to interfere with the work of equipment that will be hired later. After the pit is ready, you need to get rid of excess moisture. To do this, you can simply wait until it dries (about 2 weeks), or you can pump out all the water from the soil yourself.
After this, you can begin construction:
Construction of the foundation
 Strip-monolithic foundation
 The foundation is built in the same way as for a house without a basement. But as a result, the walls of the basement can, to some extent, serve as a foundation for the overlying layers.
In general, there is a wide variety of types of foundations, but the most common of them are:
- tape-monolithic;
- columnar.
Experts give preference to the first option, and for certain reasons advise against the second.
But in this article, in any case, both types will be considered.
So, the procedure for constructing a strip-monolithic foundation is as follows:
- At the bottom of the pit you should make a cushion of crushed stone and sand approximately 10 cm thick. The layers should be compacted tightly. The sand can be filled with water several times until it gains sufficient density.
- Now you need to apply reinforcement to the resulting pillow. Their length should be about 6 meters, that is, the standard length. 4-meter ones are also sold, but experts recommend the first option.
- After the reinforcement is applied, it all needs to be poured with concrete. Lightweight concrete is needed here, so M100 grade concrete is considered the most suitable option. This entire structure is poured with a thickness of about 5-10 cm. Now you need to wait about two weeks until the concrete hardens. If the work is carried out in the summer, then 12-13 days will be enough. All this plays the role of waterproofing and serves to level the base.
- Now the hardened surface must be reinforced. But before this, it is necessary to apply roofing felt to the surface, which acts as waterproofing. When reinforcing, standard length reinforcement should be used. They must be arranged in the form of a grid, connecting them by welding. In those places where there will be load-bearing walls, it is also necessary to install reinforcement in a vertical position, that is, perpendicular to the bottom of the pit. This is necessary so that in the future the connection between the floor of the basement and the walls will be strong enough.
- Now you need to make formwork from wooden planks and fill it all with M250 concrete. The height should be about 20 cm. Then you need to wait 25-30 days for the concrete to completely harden.
At this point, the foundation of the strip-monolithic type is ready.
But the columnar type base is built differently:
- Piles must be inserted into the bottom of the pit to a certain depth. Only a specialist should calculate the height and depth.
- Then the floor of the basement is installed on these piles, which will also act as a grillage.
The second type of foundation has many disadvantages; in addition, this will require a lot of equipment, and this in turn entails material costs. Therefore, in this case, the first type is more suitable. With this, the foundation is ready. Now you can proceed to the next stage.
Construction of basement walls
This stage, like the previous one, includes a number of sequential steps:
- It is necessary to make formwork for the walls of the basement floor. It comes in two types:
- Removable. This formwork is made of wood. It will need to be removed after the concrete has hardened.
- Fixed. This type is quite difficult to make, so it is better to leave this work to specialists. It will not need to be removed once the concrete has hardened. Another advantage of this option is that the material will subsequently act as insulation.
- Formwork is made to fill the walls of a room. After it is ready, you need to reinforce it from the inside. When reinforcing, you should weld the reinforcement with the reinforcement already protruding in a vertical position.
- Now the formwork is filled with hard concrete. In this case, you can choose the M500 brand. Then you need to wait about 25 days until it hardens, after which you can remove the formwork. Then you can begin the construction of floor slabs, which will be the floor of the first floor.
Construction of basement floors

Waterproofing floor walls
To do this, you can buy at any hardware store waterproofing material. There are a huge variety, but the best is roofing felt. It is applied to the outside of the walls, secured with special glue. There is another way: when making concrete, it is mixed with a special substance that repels water. You can learn more about this from a specialist, or from the company that manufactured the concrete.
What affects the cost
The following factors influence the cost of work:
- Groundwater. This is quite a big problem when digging a pit, since they have to be pumped out, and this entails equipment costs.
- The nature of the soil itself. If the soil is of poor quality or hard, then when digging a pit you also have to resort to special procedures, which also costs a lot of money.
- Reinforcement density. Sometimes a large amount of reinforcement is required, and this material is far from cheap.
- Expensive waterproofing materials.
Cost of work
All calculations presented here may not be accurate as prices for materials are constantly changing, or due to certain reasons, costs may increase.
So:
- Excavator services can be expensive, approximately 38,000-39,000 rubles.
- Reinforcement on average can be estimated at 130,000 rubles.
- Pouring concrete costs an average of 90,000 rubles.
- Assembly of formwork – 160,000 rubles
- All waterproofing work costs an average of 80,000 rubles. But this amount can increase to 100,000 rubles, depending on the area of the walls.
Cost of materials
This value will depend on the amount of materials required, but average values will be given here.
So:
- For an entire house, on average, about 7 thousand fittings are needed, the cost will be approximately 220,000 rubles.
- The cost of concrete will also exceed 200,000 rubles.
- On average, materials for a pillow can be estimated at 50,000 rubles.
- Waterproofing materials – 80,000 rubles.
These are the tips and recommendations for those who want to own a house with a basement. The main thing you should know is that before starting construction you need to consult with a specialist, clarify the cost of work and materials, and hire only qualified workers who know their job and will do everything to the highest possible quality.
When planning the construction of a residential building, a lot of thoughts and doubts arise about whether it makes sense to include the construction of a basement in the plan. To make the right decision, you need to immediately figure out whether you will need a basement floor in the future. According to experts, the construction of residential buildings with a basement will be as economical and rational as possible. But how does one build a basement floor with one’s own hands without violating any requirements or standards that apply in the construction industry?
Purpose of the ground floor
The construction of houses with a basement is classified as economical construction. First, it’s worth understanding what the basement floor is. There are various explanations on this matter. Architects say that ground floors are nothing more than basements that tend to occupy the space of the first floor. Builders have a different point of view: they decipher the ground floor as a floor that is located below ground level.
The height of this floor, according to standards, must be at least 2.5 meters. The basement floors can be used as a basement, cellar or utility room. It can also be used to make a living room or other living room. In addition, a building built with a basement floor looks more respectable, and the thermal insulation performance of the house increases.

If you are building a house in the city, then extra square meters. Using these surpluses at your own discretion, in the future you will be able to quickly recoup all the costs that were incurred during the construction of the basement. The basement floor allows you to forget about the loads exerted by the walls of the house, which is important for a certain type of soil.
Types of base
In construction, there are 3 types of plinth: protruding, recessed and plinth flush with the foundation. The most common type of foundation is called buried, but not for the reason that it looks the most beautiful. The fact is that it is this type of basement that is least exposed to moisture, because water drains from it faster and this protects the foundation, basement and walls of the house from destruction.

If the walls of your residential building are thin, then in this case a protruding plinth will suit you best. This type of basement is the most justified if you want to arrange a basement room, which is located almost underground and, of course, should be warm. But if you plan to use the basement floor after construction for storing unnecessary things, then it is quite possible to make the basement thin.
It is highly not recommended to make the base flush with the foundation, as it will serve as the beginning of the walls and will not provide you with the necessary protection from moisture. Such a base also needs to be covered with waterproofing material, which will be uneconomical, and it will not add beauty to your home.
Construction of the basement
We have already noted that the height of the basement floor should reach 2.5 meters, which is regulated by the relevant documents. But many developers are trying to increase it even more in order to turn the ground floor into a full first floor. To increase the height, the technology most often used is to dig the earth to a certain depth, determined by your personal needs.

Wall thickness
So, you started building your house by building the basement. And the first point that you need to decide is the thickness of the walls. If your house is located on solid ground, you can make the thickness of the basement walls similar to the thickness of the building walls.

If you plan to build a house on unfavorable soils, then make the walls of the basement a little thicker - 20 centimeters will be enough. When constructing a wooden building, you can construct the basement using solid concrete blocks.
Base depth
If the site contains groundwater in the soil almost all year at a distance of one meter from the surface level, then it is recommended to deepen the ground floor no more than one meter. In the place where the house is located, it is possible to lift the soil by pouring soil around the house. As a result, a raised platform is formed, but this technology for constructing a basement floor will cost you a little more.

If there is too much groundwater under the house, you can resort to procedures such as draining the area and draining water from the foundation of the house. If under a residential building groundwater is formed exclusively seasonally, then you can use a method to protect the foundation from the effects of lateral forces if the soil freezes and lay a drainage line at a special angle.
Pit preparation
At this stage, it is highly recommended to install a standpipe, since during the construction process an extremely large amount of water will be consumed. Immediately prepare the terrain and dig a pit with an excavator. For example, a house that measures 14 by 11 meters requires a pit almost two meters deep. Remember, when you dig a hole with an excavator, you need at least two machines that will transport the soil to the side.

If you have to dig a pit in early spring, you may see accumulated water at the bottom, so in this case you should wait until the water goes away on its own. You can also try to pump out the water. The excavator does not dig the hole very smoothly, so you will need to level the bottom and corners of the pit.
Pillow
After this, it is necessary to build a concrete pad. Make a mark at the bottom of the pit and indicate the dimensions of the house. Where the load-bearing walls pass, trenches must be dug. If you plan to build a basement floor with your own hands, then you need to do this work yourself, as shown in the video about the construction of a basement floor.

Be sure to monitor the depth of the trench so that it is at least 30 centimeters. It wouldn’t hurt to strengthen it with boards. Fill it with crushed stone, reinforce it with metal rods and fill it with concrete. After this you need to wait 3 weeks.
Waterproofing
Next, you need to move on to work related to waterproofing, because the construction of the basement floor is connected with the foundation, and in this case it is important to do everything correctly. Otherwise, moisture will enter the basement, and this may ultimately even cause the collapse of part of the house or the building as a whole.
From the outside of the house along the entire perimeter, to protect the foundation, it is necessary to make a sufficiently wide blind area of concrete mixture. To avoid foundation destruction and basement masonry, buried in the soil, they must be protected from the outside using a special rolled waterproofing material, preheated and fused to the building structure material.
In this process, waterproofing is now widely used - a practical and easy-to-use material that can be bought everywhere. In addition, the cost of building a basement using it will pleasantly surprise you. Perform waterproofing under the foundation as follows: first lay a layer of bitumen mastic, then place the waterproofing and after that place another layer of mastic.
To reliably protect a residential building from moisture, it is not enough to do just internal waterproofing. Qualified experts advise not to neglect external waterproofing. About half a meter from the wall of the basement, dig a deep hole and fill it with pre-prepared materials: a layer of clay, then a layer of crushed stone, then a layer of concrete mortar with the addition of crushed stone and sand.
Foundation
The construction of the basement foundation involves the use of large-sized foundation blocks. It is impossible to manually place such blocks in their places; this process requires the use of special equipment for the work. When building a basement yourself, most often you choose a strip or prefabricated foundation.

When calculating its parameters, the depth of its placement is of great importance. If you have calculated that the foundation should have a height of at least 2 meters, then this means that you need to make the depth of the foundation 2 meters 15 centimeters. But not level with the soil. When the foundation has become 80 percent strong, that is, ten days after pouring, you can begin to build the base.
Foundation blocks
The best way to build a basement for the price is to use foundation blocks. Blocks are usually placed around the entire perimeter of the house. The foundation blocks should lie as level as possible, this allows the plastering process to be carried out faster in the future.
Attach the blocks to each other using cement. In between foundation blocks you need to arrange special holes for water and wiring. Make sure that the windows in the ground floor are quite large, otherwise there will not be enough light in the basement.

Don't forget about the holes that are required to ventilate the space. They must be done at a distance of at least 15 centimeters and at the same level with the ground. Cover the holes themselves with a mesh to prevent debris from collecting in them, and in winter, cover them with thick cloth. The final row of blocks should eventually rise to a height of about one meter above the ground.
Next, it is necessary to lay the ceiling of the first floor on these blocks, but it is recommended to make a belt on top of the blocks. It performs two functions: aligning the entire tier horizontally and connecting the blocks to each other. Bricks are often placed between slabs and blocks, but it is best to build a reinforced concrete belt - lay reinforcement in board formwork and pour concrete.
Bricklaying
The lower basement rows will act as the basis of future walls, take on the entire load from the house and the objects in it and transfer it to the foundation blocks that are located below; the highest demands are placed on them. Therefore, bricklaying patterns should satisfy these requirements as much as possible.
The number of rows of bricks that are necessary to achieve a certain height of the ceiling of the basement should be determined in advance. When building a basement yourself, you need to know and adhere to some simple rules. The basis of all further work is the construction of the first row.

Before installing bricks on cement mortar, it is recommended to lay the first row “dry”, without using a binder. The procedure for laying the first row of bricks is carried out on a layer of waterproofing, which is previously laid on the upper surface of a monolithic or block foundation.
Do not forget to comply with the necessary geometric parameters of the future structure. When laying out corner bricks, you need to periodically measure the diagonals and achieve the ideal rectangularity of the walls. You cannot carry out work without checking the straightness and flatness of the rows, as well as without checking the horizontal and vertical surfaces of the row.
The above described is especially relevant if there are various complex elements in the walls of the house, for example, multifaceted bay windows, the use of which in the design gives the entire product an attractive, interesting look, but significantly complicates the process of constructing a base with your own hands.
Overlap
The construction process of the basement floor is completed with the installation of reinforced concrete slab floors on its upper rows. Instead, you can use wooden beam floors, making rough and finishing floor coverings and always laying roll or slab insulation.
The formwork itself can be purchased ready-made or erected yourself. For formwork under the ceiling, take boards and boards. Plane the required planed boards on the side that you will attach to the concrete. After this, make shields from them, which will need to be secured properly.

Maintain millimeter gaps between boards and millimeter differences in height between two boards. Remember that the formwork should not be made vertical for the foundation, but horizontal.
And finally, I would like to add that the ground floor can also be built from natural stone, but this process requires great skill from the developer because the stones come in different sizes and shapes. Therefore, we advise you to give preference to the construction of a red brick plinth, which can be plastered to give an aesthetic appearance.
During the planning stage country house many critical questions arise. One of them is whether it is worth it. Therefore, before starting construction of a basement floor, it is necessary to take into account the costs of its construction and its indispensability during operation. The construction of cottages with basement floors is considered the most economical option in the construction of country houses.
A properly constructed basement floor should be at least 2.5 meters high.
The ground floor is a kind of basement. But its fundamental difference is that the basement can be used as a living space and occupy an entire (below ground level) floor.
Types of socles
The plinths can be used both as basements and cellars. If certain conditions are met during construction, the basement can become a full-fledged living room.
Another thing that speaks in favor of houses with plinths is that if they are present, the building acquires special respectability, and the thermal protection factors are significantly increased.
In addition, when building a house within the city, the basement adds significant (never unnecessary) space. An important feature of the basement floors is the absence of loads that can be caused by the floors of the house.
From a construction point of view, the base can be:
- speakers. This is the best option if the walls of the future house are supposed to be built thin. Due to their quality characteristics, protruding foundations work well when located below ground level, while heat does not escape on this floor. And if the basement will be used only for storing food, then the walls can be built thin. If the walls are pre-coated with waterproofing mixtures, the moisture resistance indicator increases;
- flush with the foundation. These types are less common because their ability to protect the walls of a house from moisture is zero;
- in-depth. One of the most common types because it is the most reliable. When constructing a house with a recessed base, the foundation, ground floor, and floors of the house will be maximally protected from destruction by moisture. Water falling on the walls of the house will not stagnate, but will flow safely along the base of the base.
Return to contents
Measuring work
Throughout all stages, the construction of the basement must comply with the following parameters:
- Height. The height of the basement should not be lower than 2.5 m. However, in order to make the basement a full-fledged living space, some builders are trying to increase this figure. For this purpose, a technique is used to excavate the earth to a certain depth, based on the parameters required by the consumer.
- Thickness. If the house is planned to be built in a safe place with solid soil, then the thickness of the basement floors can correspond to the thickness of the remaining walls of the building. If the house is being built on unreliable soil, then the walls should be made much thicker (at least 20 cm). During construction wooden house Solid concrete blocks should be used as basement walls.
- Depth. If the area where the house is being built suffers from surges in groundwater, then you should first find out the water level. And only after this operation determine the possible depth of the base. To reduce the risk of water entering the house, the construction site is first filled with additional soil. Thus, the area of the future building rises considerably in height. It is possible to drain and remove the flow of water from the site with significant ground flows. If it is determined that the appearance of groundwater is a seasonal effect, then a special protection technology can be constructed. When the soil freezes, a drainage system is laid at a special angle.
In general, the following tools and materials are needed to build a basement:
- excavator;
- shovel;
- concrete;
- boards;
- reinforcing rods, mesh;
- waterproofing materials;
- foundation blocks;
- shields.
Return to contents
Construction of a foundation pit
The first stage of construction of the basement floors is the organization of the foundation pit. But before that, it is best to build a water pumping station. So, work begins with the arrangement of the area. Next, a pit is dug. With a house size of 15x10, the depth of the pit cannot be less than 2 m. After the excavator work, you will have to decorate the edges of the pit yourself.
Next comes the turn of the concrete pad. To do this, markings must be made at the bottom of the pit according to the dimensions of the future house. In the place where the supporting structures will be, it is necessary to dig trenches. Their depth should be at least 30 cm. Next, they are strengthened with boards and covered with crushed stone. Next, the pit is reinforced with metal rods and filled with concrete. You can proceed to the next work only after 20 days (this is the time needed for the concrete to harden).
The next stage is waterproofing work. To do this, a wide concrete blind area is constructed along the outer perimeter of the house. If the base goes deep into the soil, then a special roll of protective material is laid on the outside. This waterproofing material (hydroisol) must first be heated and, in a molten state, attached to the base of the structure.
Waterproofing work is also required under the foundation. First, bitumen mastic is laid, waterproofing is placed on top of it, then mastic again. It wouldn’t hurt to do additional external waterproofing. It consists of digging a deep hole 0.5 - 1 m from the building. Next, the pit is filled with a mixture of clay, crushed stone, concrete mortar based on sand and crushed stone.
Return to contents
Construction of the foundation
The next step is the construction of the foundation. First, you need to decide on the type of foundation (strip, prefabricated). Preliminary calculations should determine the permissible depth of the foundation. If the figure is 2 m, then the foundation needs to be lowered to a depth of 2.15 m. But you should not lay it flush with the soil. You can start directly only after 1.5 weeks (the time required for the concrete to harden).
The construction of a foundation for a plinth involves the use of large blocks. These blocks must be placed evenly throughout the entire area of the house. It is worth laying them as evenly as possible (in the future it will save time when plastering). The blocks are attached to each other using cement mortar.
Openings must be left between the foundation blocks. Wiring and plumbing will be located there. At this stage you should think about window spans. The width of the window should be sufficient to provide light in the room. For ventilation, it is necessary to make special holes at a distance of 15 cm from the floor, as well as at the base of the ground.
Next, the holes should be covered with mesh. There should be a distance of 1 m from the soil to the outermost row of blocks. A reinforced concrete belt is constructed on top of the blocks. Why is reinforcement placed in board formwork, which is then filled with concrete. After this, the slabs for the base of the first floor are laid.


A considerable number of people still do not understand the special need for the construction of a basement floor, while others, in turn, simply cannot imagine how this reliable and functional home can do without this room. Despite the fact that the basement cannot be classified as either a full-fledged first floor, it is increasingly taking its place at. So what is the reason for his popularity?
This is what the finished basement of the house looks like
By building a basement floor, you get the following benefits:
- A noticeable saving of space on your plot of land, which is essential when the area is not too large;
- Possibility to arrange in this room or a number of other services (sauna, billiard room, etc.);
- Ideal for terrain with complex multi-level terrain;
- Possibility of using the roof as a terrace;
- Increasing the architecture of the whole house.
The disadvantages of the ground floor include high financial costs and the complexity of construction work.
When building a basement, as a rule, materials with a porous structure are used to get rid of excess moisture. Otherwise, once inside the structure, the water quickly freezes with the onset of frost, which will eventually destroy the base surface, and, accordingly, the structure in general.
 Existing types plinth
 To cope with this danger, the base is covered with paints and varnishes. This not only prevents the destruction of the base from atmospheric influences, but also makes it attractive in appearance.
When choosing the appropriate paint and varnish coating, it is important to consider the degree of vapor permeability.
The paint used to cover the base should serve as a reliable moisture-proof film: this will prevent water from getting into the substrate. At the same time, it will allow water vapor to pass through, which serves to additionally eliminate excess humidity. Also, when purchasing a paint coating, it is important that it is light and weather resistant, and also meets fire safety requirements. The coating must remain visually attractive for at least three years.
Before painting the base, you need to apply a strengthening primer to its surface.

This will provide good adhesion and increase the strength of the surface. When painting, it is advisable to use only water-soluble alkali-based paints with an acrylic resin base that fully meet all the requirements regarding the processing of bases.
If the structure of the surface to be coated is porous, you will also need to apply a special water-based acrylic impregnation.
As a result, the mineral base will effectively repel water.
The basement floor is not only beautiful appearance building, but also expanding its functionality. The basement can become a space for utility purposes; a bathhouse can also be located here, it can be turned into. Light pits provided for basement windows are a kind of additional rooms that serve for good heat retention.
 Pit installation diagram
 Typically, the ground floor of a private house does not involve the arrangement of living quarters. However, if the ceilings are high enough, a billiard room and a sauna can be installed here. If the level of the room in the basement is at the lowest point of the relief, it would be advisable to arrange a garage here. Thanks to this, you will get maximum free space and save on work on arranging the entrance to the garage.
When rooms are designed, their lighting options are carefully thought out. In addition, proper design will save energy. If rooms for non-technical purposes will be located in the basement, it should be taken into account that windows that let in sunlight will be an excellent addition to electric lighting.

The relevant standards stipulate that the ceiling height in such rooms should be no less than 2.5 meters. Due to this, the building will acquire a more pleasant appearance, and thermal insulation will improve several times.
There are several ways to build a basement under a house:

How to prepare a construction site for work
Laying a foundation with the simultaneous construction of a basement floor requires a thorough soil analysis at the construction site, as well as determining the location of groundwater. If they are found at a depth of one and a half meters, then the base should be built no higher than one meter.
When properly leveling a construction site, it may be necessary to apply an additional layer of primer. If groundwater is located near the surface of the earth, preliminary drainage will be required. land plot. Drainage systems designed for this purpose will help you easily cope with this task. Their use will allow you to lay yourself more deeply.
 Scheme drainage system during the construction of the basement
 How to prepare a pit on a construction site
All work begins with the appropriate marking of the construction site, after which, guided by the house design, the foundation pit is dug using an excavator. If construction works are carried out in the spring, there is a possibility of water accumulating in the pit, which in the future will have to be disposed of using a pump. Another way is to wait until it is absorbed into the soil naturally.
As soon as the required depth is reached, the bottom of the pit is carefully leveled, and the alignment of the corners requires special attention. When the pit is dug, markings are made on the base. Trenches for load-bearing walls must be dug to a depth of no less than 30 centimeters. When the trench is ready, crushed stone is poured into the bottom, then reinforcement is laid, and only then concrete is poured. It takes approximately three weeks for the concrete solution to dry completely.

How to waterproof
The waterproofing device provides reliable protection of the foundation from moisture. It consists of pouring a concrete blind area around the perimeter of the proposed building, while the foundation itself is protected from the outside with rolled waterproofing material. In most cases, waterproofing is used for this - it is enough efficient material, which has a very reasonable price.
The efficiency of this system can be increased, for which experts propose an additional drainage system with external waterproofing. To do this, you need to step back half a meter from the base and dig a hole into which clay, crushed stone and concrete mortar are then placed. This must be done with the utmost care, because reliable waterproofing- This is the key to the durability and reliability of the entire house as a whole.
 This is how the basement waterproofing is installed
 How to make a basement from foam blocks
- one of the most common materials chosen for the construction of a “living basement”. It allows for high-quality network engineering and makes it possible to leave space for windows. It is better to use special equipment to work with it: doing the work manually will require considerable time. When using foam blocks, a choice is most often made in favor of a prefabricated foundation or a strip foundation.
If the house is supposed to have a basement floor, then the foundation is poured half a meter thick or more. To increase the strength of the walls, masonry is done with bandaged seams. A cement-sand composition is used for bonding. The blocks need to be laid as evenly as possible, otherwise, over time, difficulties will arise with finishing work.

It is also worth noting the size of the windows and making them as large as possible: more street light will penetrate into the basement.
It is necessary to leave ventilation holes, for which holes are left between the blocks at level with the ground surface.
Ventilation holes are left between the blocks at the same level with the ground surface. They should be properly covered with nets, and then garbage will not get inside the room.
The foundation of the basement should be about a meter above ground level. The blocks are connected to each other using a so-called leveling belt. And now, finally, the floors of the first floor can be laid.
Most often, reinforced concrete is used when arranging the belt, but you can get by with brickwork. The first option, when reinforcement is laid on board formwork and poured with concrete, is considered more reliable.
 Example of formwork installation
 This results in a strong semi-underground structure. It serves as a reliable basis for the subsequent construction of the floor.
How to build a monolithic basement
The basement, which is built from monolithic concrete, has several advantages: it has good moisture resistance, high strength, and short construction times. In addition, it is possible to arrange a room for almost any purpose, including a garage or a swimming pool.
Properly installed waterproofing allows you to build a basement and install a basement, even if the soil environment is wet. However, for this, the foundation walls must have the most rigid adhesion to the floor slabs of the basement.
Construction technology:
- First, the site is marked for upcoming construction work, after which a pit is dug for future construction. The pit is dug to a depth that is approximately half a meter below where the underground part of the foundation will be located.
 This will make it possible to lay a waterproofing sand and gravel cushion in the future. When selecting soil using an excavator, you should minimize the uneven depth of the foundation, for which it is recommended to manually remove the last soil layer. Areas that are too deep should not be backfilled, as this may lead to further deformation of the floor slabs.
 - Then comes the turn of arranging the drainage system. If there is quicksand, a drainage device must be provided to avoid stagnation of water. For this, a 10-centimeter bedding is made: gravel and sand. These layers must be rolled carefully. To compact the sand as much as possible, it is also filled with water several times.
- Concrete grade M50-M100 is poured onto the leveled pad. The concrete layer should be five centimeters: the base is leveled in order to lay the floor slab, while waterproofing functions are performed.
 Example of a waterproofing cushion for the basement
 Rolled waterproofing (for example, roofing felt) is laid immediately after the concrete has hardened. Waterproofing must be laid in two layers and fastened using a floating method or using bitumen mastic.
- After preparing the base, the external formwork is built. First, the floor slab is poured, it will serve as a support, and the foundation walls will “grow” from it. Wooden panels or boards are used to make formwork. Self-tapping screws and bars are used to connect them together. To increase the strength of the base, the slabs are reinforced. This is done in two directions - longitudinal and transverse - the reinforcing rod must be embossed, with a diameter of 10 centimeters (the exact dimensions are determined during preliminary calculations). Special guides are used for laying the reinforcement; they are fastened with wire.
 In order for the walls to be rigidly and reliably connected to the floor slab, reinforcement bars are used (attached vertically).
 - After installing the formwork and when the reinforcement is fixed, the foundation slab is poured with M250-M300 concrete (its thickness is at least 20 centimeters). Moreover, it is recommended to do this immediately. If desired, concrete can be poured in small parts, but the slab will become less durable and seams with increased tensile stress may appear. It is advisable that concrete joints in such cases be located along the wall that is longer. After pouring the concrete, the surface must be leveled and left for about a month until it fully matures. At this time, the formwork for the plinth and foundation walls is being built.
- Wall formwork is built in the same way. Non-removable polypropylene panels are used during its construction, and this will simultaneously solve the issue of insulation. The reinforcement is laid in the longitudinal direction relative to the walls.
 Scheme of laying reinforcement for pouring
 Reliability is given by tying horizontal rods and vertical ones that are already fixed. With a foundation depth of three meters, strength is imparted by two strapping belts, which are made both in the upper part and in the lower part.
- During the process of arranging the formwork, door and window openings are laid where this was previously provided for by the house design. Special metal pipes – sleeves – are being laid.
- Concrete is poured either immediately or in separate layers. The rule is this: a new layer must be poured before the previous layer begins to set. Otherwise, you will have to wait another three days: if the concrete does not gain the required strength, it may collapse under the pressure of the layers covering it. Then you can lay the floors.
- From the outside, waterproofing of the basement floor is carried out using the pasting or coating method. On the inside, it is best to use penetrating waterproofing: the concrete becomes noticeably stronger and vapor exchange is not disrupted.
 Scheme of penetrating waterproofing of the base
 The insulation of the basement floor from the outside is carried out with polystyrene foam boards, which are attached with the glue intended for this purpose. To secure parts that protrude above the ground (optional), dowels specially designed for foam plastic are used.
- To fill the underground part, the soil that was formed when the pit was dug is used. The presence of solid particles in the soil is unacceptable, since they can damage thermal and waterproofing, and are covered with coarse sand.
- The materials used to decorate the walls of the building are suitable for finishing the basement floor.
How to properly waterproof a basement and choose the right material
Why is it necessary to waterproof the basement?
During the construction process, many people for some reason give waterproofing work almost the very last place, believing that reliable protection against moisture can be done after the house with a basement floor is completely built. Of course, waterproofing can be done from the inside, but the best option is to protect the walls from the outside.
External waterproofing will allow:

The most commonly used types of waterproofing are penetrating, pasting, roll and coating.
Penetrating waterproofing
Penetrating waterproofing allows you to most thoroughly protect “underground housing” from high humidity. It is laid to a depth of approximately 90 centimeters in the thickness of the concrete, filling small cracks, so that moisture has nowhere to seep. Once in the concrete, the insulating material that has penetrated there immediately forms a chemical reaction with its constituent elements, resulting in the formation of solid crystals. They fill the pores in the concrete, and there is nowhere for moisture to penetrate.
Pros of penetrating waterproofing

How to make penetrating waterproofing of a basement
The working surface is thoroughly cleaned of dust and debris beforehand. Then the dry powder is mixed in water until smooth. Before laying the first layer of waterproofing, the surface concrete structures moisturized. The next layer is poured after the first one is absorbed. After this treatment, the structures should be moistened for several more days.
Insulation should only be applied to the slab after it has been dampened, otherwise the material will not be able to penetrate to the required depth.

When it comes to waterproofing old buildings, it is necessary to clean and moisten the slabs as thoroughly as possible. In this case, the penetration of waterproofing into concrete will be extremely deep. To apply the penetrating insulating layer, use a brush with synthetic bristles or a mortar pump designed for this purpose. Moisture insulation work is carried out when it is warm outside.
Polymers, bitumen and synthetic materials are what roll lining materials are made from for waterproofing the basement.
Absolutely all plinth structures must be carefully covered with roll insulation, while several layers of material are used for external walls. If the groundwater level is too high, up to five layers of waterproofing can be laid.
 Example of installation of adhesive waterproofing
 The process of installing a waterproofing structure:
- The walls of the basement are covered with layers of waterproofing from the outside, and the sheets of material should overlap.
- To prevent the waterproofing material from being damaged, this is done by installed block made of reinforced concrete or a wall built in half a brick (located somewhere a centimeter from the surface).
- The resulting space is filled with bitumen mastic.
- The waterproofing structure is protected by an iron mesh; it is plastered on the outside.
Disadvantages of this type of basement waterproofing: complex installation, the need for auxiliary protection of the material from defects, the possibility of pasting at an outdoor temperature of at least +10 degrees.
Coating waterproofing
This kind of waterproofing requires not only external, but also internal walls of the basement.

It carefully seals the slightest imperfections in the working surface, which significantly increases the resistance of the walls to moisture.
External protection of the wall with mastic will prevent moisture from seeping into the room. Coating waterproofing is represented by the following materials:
- Bitumen mastics;
- Polymer-bitumen mastics;
- Cement-polymer waterproofing.
The most economical option would be to use bitumen-based mastic as insulation. True, it will last no more than five years, after which it becomes unusable, and moisture can penetrate into the base. Therefore, periodically you will have to resort to re-waterproofing the room.
Cement-polymer and polymer-bitumen mastics are distinguished by their significant resistance, including to sudden temperature changes. But these materials are afraid of mechanical damage: careful protection is required.