A stone grill, made in compliance with all construction standards and architectural norms, will become a real decoration of any suburban area. The structure is best built from natural stone, using natural materials– sand and clay. Any summer resident or home owner can construct such a structure with minimal financial investment, and the benefits from it will be significant. The structure can be made in the style of decorating a recreation area, which will further decorate the area country house or dachas. The grill is very convenient and multifunctional; it perfectly prepares dishes from meat, vegetables and fish. The amazing decorative and functional properties of natural stone are perfect for any landscape and will optimally complement it.
Selecting a location
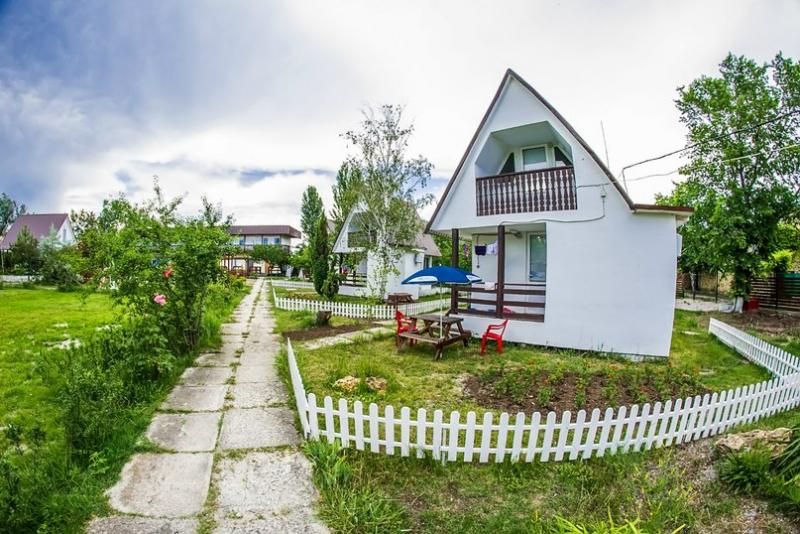
Before you start building a stone grill, you need to find a suitable place for it. The structure may be located near the recreation area, in a convenient part of the site. It is very good if there is a reservoir, pond, pool or alpine slide nearby. The grill itself with an ensemble of gazebo and decorative elements can decorate anyone personal plot and become a center for landscape architecture. When choosing a location, it is necessary to take into account the fire safety of this structure. Therefore, you should evaluate in advance the priority wind direction in the construction area, and also pay attention to the level groundwater at the location of the barbecue and the topography of the site.
Preparatory work
Having chosen a place to build a barbecue, you should decide on its parameters in terms of height, width and length. The dimensions directly depend on the volume of food that you plan to cook, namely, you need to calculate the maximum number of skewers for one bookmark and take into account their length. To make the work easier, you can sketch out a small drawing, which will not only help during work. It is convenient to calculate from the drawing required amount consumables and building materials. If you plan to attach it to the grill cutting surface, you can provide in advance and supply water for washing to the fireplace. This is very convenient for further operation of the structure.
Construction of the foundation
You need to start building a barbecue by preparing the site and building a foundation for the structure. The foundation is necessary so that during periods of temperature and humidity changes the grill does not fall apart or move from the designated place. The foundation for the barbecue is a monolithic slab of concrete about 10 cm thick. A base is first prepared for it, a small pit is dug, which should be 20 cm wider than the planned barbecue on each side. First, crushed stone and sand are poured into the finished trench. They are carefully compacted, constantly watering them with water. Along the perimeter of the trench, formwork is erected from boards or plywood. A reinforcing frame is mounted on the prepared base from any pieces of wire, reinforcement, residues and metal. Such a frame is needed to strengthen the foundation and its strength. A concrete mixture of sand, cement and water is poured onto the prepared base. You can add a little small crushed stone to the solution. The finished surface is allowed to stand for several days for the concrete mixture to set. Before continuing work, the concrete base is covered with roofing felt or other waterproofing material.
Construction

It is advisable to use stone that is resistant to high temperatures and large temperature changes for the construction of the barbecue. The frame of the building can be laid out from natural bricks, and the firebox itself can be made from refractory bricks. If this is not found, an ordinary red building brick or a natural stone well soaked in water, which is not afraid of significant temperature loads, will do.
When preparing the structure, you must remember to leave space below for a blower. You can also provide a separate compartment for storing firewood, coals and other necessary accessories.
Brick or stone laying is carried out using clay mortar. To do this, the clay is soaked in water for several days and then mixed with sand in a ratio of 1:3. If you plan to make a canopy over the barbecue from a metal canopy, you should pre-install embedded parts into the structure for future fastening. Before laying, the brick should also be thoroughly moistened in water.
Decorative cladding

Stones for cladding are placed on cement mortar. The stones are first washed from dirt, chips are removed, and during the installation process they are fitted to the installation site so that the structure looks more dense and beautiful. You can lay out a small area with stone near the fireplace so that everything looks harmonious and natural. Outside the grill, you can provide special metal hooks for important accessories.


Every trip to the dacha is rarely complete without barbecue. Cooked meat on coals is not just food, it is spending time together, communicating with loved ones, playing with children. All this brings true pleasure. For interesting communication surrounded by nature and near a barbecue, you will need a good grill. You can buy it or make it yourself.
 |
Preparing the base |
 |
Facing |
 |
Exhaust device |
 |
Alternative options |
Today, metal structures for cooking meat and barbecue are very convenient. But the best option is to make a stone grill with your own hands, photos and drawings of which you can see below. Despite the simplicity of its design, this is a very convenient structure that can be used for frying meat or vegetable products. This barbecue is distinguished by its round shape, ease of construction and operation.
After studying the materials on our website "Remontik", you can easily make a grill that has a beautiful appearance. It is perfect for a small number of people. The fact is that such a grill will be more convenient to clean, and there will be much less garbage from it. It can have a diameter of 1 m and a height of 65 cm. You don’t have to wash it, assemble it, and you won’t get burned on hot iron handrails. Only after cleaning it slightly, you can use it again. If you make it yourself, it will cost much less than buying it.A stone brazier, built with your own hands, which is permanently located on the territory of a country house, can be used for many years.
We offer you a diagram of a barbecue made of stone
Attention! When laying out a stone cylinder of a barbecue, it is worth leaving a small hole for cold air, which will create draft.
Choosing essential equipment and tools
Among the tools that you will need to build a barbecue made of stone, it is worth highlighting the following:
- pitchfork, shovel and bayonet shovel;
- bucket and wheelbarrow;
- carpenter's hammer;
- trowel, pick and mason's jointer;
- concrete mixer;
- level;
- hand jigsaw;
- saw;
- sledgehammers with long and short handles;
- chisel with protection, socket, tongue and groove;
- measuring tape and chalk;
- grinder with a set of diamond blades.
Attention! Before you start building a stone barbecue with your own hands, you need to process the source material (stone) hand tools. This process is quite labor-intensive and low-productivity.
But be that as it may, the tool for such work is inexpensive, which means that if it breaks, you can quickly replace it.
Drawings of a barbecue made of stone, made by yourself
Every project requires a project, and a stone barbecue is no exception. This task is easiest for any stove maker to handle. If you do not have such knowledge, we recommend ordering a project by contacting a specialized organization. In addition to the drawing itself, you will receive a technical specification, which will step-by-step description working with diagrams.
After studying the drawings and approving the project, you can begin the construction itself. With the help of a drawn diagram, you can imagine the future structure, which will save your time during the construction of the structure. The picture is taken on two sections from the inside.
Photo of the barbecue in section
The project should also contain descriptions of procedures. For effective work, carefully study the provided drawing, as all the stones are clearly marked on it.
Attention! When performing procedures, follow the instructions of specialists. Otherwise, even deviations that seem insignificant to you can cause a lot of trouble during operation of the barbecue.
How to make a stone grill with your own hands
- Pouring the foundation.
Whatever barbecue you choose: an indoor building or a rectangular structure, you should take care of building a high-quality foundation. If you are planning to equip a simple structure, then you can make a base of cobblestones on a cement base. If you plan that your barbecue will have a height of more than 1 meter, then the foundation will have to be built below the freezing level of the soil. Otherwise, the upper part of the structure will tilt and swelling of the frozen soil will occur.
If on plot of land clay soil, then pour the concrete solution into the dug hole. Do not reach the edges of the hole by about 15 cm. Then install the formwork to create a smooth, rectangular structure. If the soil is sandy, install the formwork immediately. Once the foundation has hardened, you can remove it. If we talk about waterproofing, it must be done using white, red or yellow clay.
- Preparing the base.
When building a barbecue with your own hands, do not forget that you must be able to lay bricks. Otherwise, it's worth hiring someone who understands this. The entire construction process should begin with the construction of the base of the barbecue.
To do this, you need to dig holes with a diameter of 120-130 cm and a depth of 80 cm. Place a layer of crushed stone on the lower bottom part, and a layer of sand on top. After this, fill everything with concrete mortar. Next you need to reinforce the base using steel reinforcing mesh. When this part is built in, it will look like a vertical cylinder with a diameter of 1 meter.
Foundation diagram for a stone barbecueAfter ten days, when the concrete hardens and becomes strong, inside the embedded mesh you need to lay it out using a cement mortar consisting of fragments of parts of bricks or stones. The inner surface should not be embossed. The smoother it is, the better.
When this part is covered with natural stones, problems may arise due to the relief. The stone structure resulting from the work described above has the shape of a cylinder. It is necessary to add soil inside the building, then immediately compact it. After such work, a depression resembling a bowl remains, 55 cm deep.
- Facing stage.
The outside of the future kebab house should be finished with natural stone, but using only profile or specialized glue. Otherwise, after the firewood burns out in the barbecue several times (if the tiles are not installed with special glue), they will simply fall off and there will simply be no visual appeal. This good glue, having a dry consistency, purchased at any hardware store.
It is very helpful for holding stones together and forms waterproof joints. Such a grill may be exposed to snow or rain, but the facing tiles will not fall off and will last a very long time.
During installation, individual tile parts must be selected, like a mosaic or puzzle. They should be adjacent to each other's base. Stones located on the outside must be tied in a checkerboard pattern with other stones laid out inside. They need to be fixed with a steel thread.
- Preparing the hood.
When you lay out a stone cylinder, you need to leave a hole at the bottom for cold air, which creates draft. Needs to be laid down metal structure in the form of a circle to burn and accommodate the fuel. A metal circle can be cut from a sheet of metal using a grinder. Any metal can be used, even unnecessary and old. There will be a removable grill at the top, through which cold air will penetrate, ensuring the frying process.
A steel hoop, the size of which is 6x60 mm, is secured in the internal focal perimeter. This will be used to protect the stone edges and will act as a support and base for laying down the net or skewers. You can also add an additional function – grill. For example, it is convenient to grill chicken, meat dishes or fish, and bake vegetables on a grid.
This will require installing racks on a steel hoop. A spit that will rotate and be placed on such racks. We recommend using reinforcing steel to make the rod. This material is fire resistant and has a long service life. When the masonry is finished, line the perimeter of the installation with refractory bricks where the brazier will be located.
For this layout, it is better not to use a solution, but to resort to the “sand cushion” method. Just pour sand and lay the bricks. This is done so that if a tile cracks or breaks, it can be replaced with a new one. You can build a barbecue structure with a firebox. However, this will require an exhaust pipe. It is worth noting that this is quite a troublesome job that requires skills and abilities.
If a person does not understand this, nothing may work out, since homemade stone barbecues cannot provide normal draft in chimneys.
Alternative to a stone grill
To make a more complex structure with normal draft and chimney, you can make a steel fireplace, which is subsequently trimmed with stone on all sides.
Whatever fireplace you decide to make, it is important not to forget that stone or brick should not be afraid of fire. Otherwise, a serious blast wave may occur from the fire, causing stones to fly off into small pieces and possibly cause injury. As a result, your picnic will go down the drain. And the appearance of the grill may suffer.
The lower part near the fireplace must be tiled. It is both more beautiful and fits well on the grill. You have the option of creating a square fireplace with a stone cladding, but with steel guards for high strength.
The method described above for building a stone barbecue with your own hands is inexpensive and effective. Every man can make this design, the main thing is to decide on right place and strictly adhere to the instructions. It is better to choose a place for the fireplace where there are no drafts, otherwise the heat will be regularly blown away by the wind.
In the minds and consciousness of the majority, a dacha is certainly associated with a place of relaxation and quiet pastime; a cozy gazebo and barbecue become attributes of relaxation. One of the options is a stone grill, which will be discussed.
Executed in compliance with all building codes and rules, using high-quality natural materials, it serves as the pride and decoration of a landscaped suburban area.
In contact with
Preparation
 Before starting construction, you should think in advance about the place where it will be installed, the design and dimensions, accompanying structures, as well as the materials that serve as the basis.
Choosing a location. Ideally, the grill is equipped in close proximity to the gazebo, dining area, or covered terrace. This makes it easier to prepare food, cook meals and serve the table.
Important! A brazier built independently must meet a number of safety requirements:
- protection from gusts of wind;
- distance from trees and bushes;
- absence of flammable objects near the barbecue.
In addition, from an aesthetic point of view, a country grill should be organically combined with the design of the landscape of the site.
Design and dimensions
 Regarding the configuration, the grill can be very simple, consisting of a base and a roasting pan, or multi-tasking, including a smokehouse, stove, and countertop.
The choice of design is purely individual and depends on the functions assigned to it and the preferences of the owners:
- The dimensions of a stationary barbecue are calculated depending on the height of the people who will use it. So, for people of average height the following values apply:
- Height. Not lower than 80 and not higher than 1 meter. For better orientation, it should not exceed the height of a person’s arms, bent at the elbows and standing on their feet. That is, the height of the grill should allow you to easily rotate skewers and turn dishes on the grill.;
- Width. As a rule, 400 mm is sufficient to accommodate the standard number of skewers (8-10). However, it is recommended to have a reserve for quiet operation, therefore the internal width of the roasting pan is at least 50 - 60 cm.
- The depth of the grill is calculated by the length of the skewers and the dimensions of the grill. Most often these are values from 30 to 40 cm. The heat located at the bottom of the fryer should cover the entire portion of food.
- The space under the broiler. It is advisable to use the remaining space under the brazier for storing firewood, coal reserves, and equipment.
Video of the construction process:
Selection of materials
 One of the main advantages of building a barbecue made of stone is the availability of materials. Having at your disposal natural stones, you can create true masterpieces of architecture and design. Traditionally, they build from two types of stone:
- natural;
- artificial.
Natural stone, on the one hand, is easier to obtain, but on the other hand, it takes much more time to process and adjust it to each other. Therefore, if funds are available, artificial stone is often used. Thus, for the equipment of stationary grills and barbecues use:
- granite;
- processed sandstone;
- slate;
- natural cobblestones;
- flagstone;
- brick;
- facing tiles.
Choice artificial stone gives the building neatness, elegance of lines and is combined with the facades of permanent buildings made of siding and facing bricks. The use of “wild” stone and cobblestones allows it to be combined with houses and gazebos made of natural wood and logs.
Video selection of different options for stone barbecues:
Construction of the foundation

Construction of a barbecue. Step 1.
Building a foundation is a mandatory task that should not be ignored. If it is absent, you may encounter the fact that after some time, rains and meltwater will erode the soil under the foundation, and the structure, at best, will become warped. Therefore, preparing the site and pouring the foundation is the first step.
To do this, dig a pit with a depth of at least 80 cm and a width of at least 30 cm from the width of each side of the planned structure. An expanded clay cushion is poured into the pit and carefully compacted. Then, mixing, layers of crushed stone and sand are poured. If the water content in the soil is high, it is recommended to build a reinforced frame. This will help maintain the structure of the grill when the soil structure changes. Then formwork is built along the entire perimeter of the pit. Traditionally, it is made of boards or plywood and protrudes 15 - 20 cm above ground level. The resulting step will be the base of the barbecue.
The next step is to pour a concrete mixture of water, sand and cement in a proportion of 1 part cement to 3 parts sand. Fine crushed stone is also added to the mixture to increase the amount of binding substances. The poured foundation is left to completely set for several days and then the construction of the grill itself begins.
Construction of the structure

Construction of a barbecue. Step 2.
The laying of the barbecue is carried out on the foundation plinth. When constructing it, an indispensable tool is a level - laser or bubble. It will help achieve even vertical and horizontal construction. The principles of masonry are not very different from pure brick. A binding solution is applied to the lower plane of the stones placed on top of each other.
Important! For laying stones or bricks, use a specially prepared mixture of clay and sand, soaked in water for 2 to 3 days, or special oven adhesives for stone. Ordinary cement mortar is not helpful in this case, since under the influence of high temperatures, cracks are very likely to appear in the masonry.
The main structure is laid out with stone, which, due to its characteristics, will withstand repeated sudden temperature changes. In this case, the brazier and firebox must be made of fire-resistant material, for example, brick. They immediately think through the elements for installing the dome and chimney, if any are included in the project, and also install metal brackets in the inner perimeter of the brazier, on which the mesh or skewers will be installed.

Construction of a barbecue. Step 3.
The design of a stationary grill should include a hole in the bottom of the roaster to create air draft. It is also advisable to organize smoke removal if space allows. Arranging a small dome will add comfort to cooking and eliminate annoying smoke in windy weather.
The finished main structure should be faced with stone. This is the most creative part of the whole event. Carefully selected stones of different sizes and shapes are carefully coated with special glue and placed tightly together. In this case, two rows of stones of the outer and main structure are periodically connected to each other using thin metal rods or wire. In this way, an overall integral structure is obtained that will not fall apart into its component parts over time.
Photo examples
These examples can become the basis for creating your own original ideas.


The simplest version of the barbecue (video):
conclusions. Creating a stone barbecue can transform a neglected area and dining area into the most enjoyable place to relax. Built tastefully to suit everyone technical standards, using natural materials, it will become not only an outdoor decoration for your dacha, but also a traditional fireplace where you will want to cook the most delicious dishes of meat, fish and vegetables.
“In the master class presented to your attention from the author, you will be shown how to independently build a stone barbecue in the country house or in the courtyard of a private house.
Today, the topic of building and creating all kinds of barbecues, smokehouses, and barbecue stoves made of stone is very popular. Let's look at another rather unusual type of stone barbecue, and its peculiarity is that its shape resembles a “tandoor” but has natural cracks in the walls through which air flows to the combustion center. According to the author, you can start frying meat on it without waiting for the wood to burn out and turn into coals, you just need to turn the skewers or grill a little more often.
A stone barbecue does not require a serious foundation; a small depression with compacted gravel backfill is quite enough. Stones can be obtained completely free of charge: in a quarry, along the banks of rivers and reservoirs, along the sides of roads. The collected stones should then be thoroughly washed with water and a wire brush, so the solution will adhere more firmly to the stone surface. For masonry, the author used a special masonry mixture for stoves and fireplaces that can withstand high temperatures.
So, let's look at what exactly is needed to create a stone barbecue?
Materials
1. stone
2. coarse gravel
3. masonry mixture for laying stoves and fireplaces (heat-resistant)
Tools
1. shovel
2. trowel
3. roulette
This type of barbecue was recommended to the author by his friend, and he saw such a miracle while on vacation in the south. We consulted and decided to repeat it on our native soil) We went to the quarry, picked up more stones (a freebie))) How many are unknown exactly, just by eye) It was decided to place the grill closer to the recreation area next to the gazebo, so that when cooking and frying shish kebab, everything would be side by side. As already mentioned above, it is not necessary to fill the foundation here; a small recess on the bayonet of a shovel with dimensions of 1x1 m is quite enough.
First, we prepared and laid out the stones so that it would be convenient to choose a pebble that was suitable in size and configuration.
The top layer of soil is removed, the soil can be used in the beds.

We go deeper by 25-30 cm.

This is quite enough, but if you wish, you can pour a small concrete slab.

A couple of buckets of coarse gravel are poured into the bottom of the hole and compacted thoroughly.

Then the first row of stones is laid out. For the base, select the largest stones and place them in a circle on a gravel bed.

The next row is laid out from smaller stones on a special masonry mixture for stoves and fireplaces.


Each subsequent row is narrowed.

Of course, everything was done with an assistant))

A temporary lid was made for a 200 liter barrel.

And here is the gazebo itself, overgrown with grapes, the dacha is still under construction and the gazebo is the main place to relax after a hard day.


As was already mentioned above, there is no need to wait for the wood to burn out and coals to form; we start frying right away, just turn it over more often.

But the fire naturally should not be strong, otherwise everything will simply burn)) A diluted fire should maintain a slow burn.

After the kebab is all fried, you can simply burn the wood and use it as a fireplace.

Outdoor recreation in a country house or dacha cannot be imagined without barbecue or barbecue. A do-it-yourself stone grill can be an indispensable assistant in this. Firstly, it is quite simple and inexpensive to make, and secondly, such a barbecue will become an organic addition to the garden landscape. It can be of different shapes, heights, widths or diameters, but in such a way that the required number of skewers fits on it.
Materials
So, you will need:
- natural stone;
- refractory brick (if you decide to make the inside of the grill out of it);
- crushed stone, sand, cement, clay;
- reinforcing mesh;
- steel strip 5x50 mm;
- a metal circle with a removable grille or a piece of old roofing iron;
- steel wire for tying stones;
- fragments of stone or brick;
- glue for stone.
Foundation for barbecue made of stone
 Rubble and sand are poured onto the bottom in layers, then everything is compacted thoroughly.
 To prevent the future stone grill from falling apart and “floating” along with the soil, it is necessary to fill the foundation as follows:
- Dig a hole for the foundation with a diameter approximately 10 cm larger than the size of the barbecue itself and a depth of about 30 cm.
- Place a layer of gravel on the bottom, then a layer of sand, thoroughly compacted and watered. Fill with cement mortar.
- Until the solution hardens, insert the reinforcement mesh rolled into a cylinder into it about 70 cm in diameter and leave to dry for about 7 days until the foundation is completely strengthened.
- Inside a cylinder made of reinforced mesh lay, using cement mortar, stone fragments or bricks. Let it set for a few days.
Construction of the barbecue and its cladding

It is advisable to line the area around the grill with bricks or stones. You can lay them on a sand bed so that you can easily replace them later if they crack.
The grill can be improved by making a rain cover for it. Its shape can be any, but the most important requirement is that water does not accumulate and flow down.
On the outside you can install hooks for the necessary accessories.
Now you can be proud of your work and feel free to invite your friends to a barbecue. It will be especially tasty in such a stone grill!