Before you start making a house, you need to first of all think about the functionality of the structure, and only then about the decor. Birds don’t care how you decorate their home; they care about the size of the entrance hole and the internal volume of the birdhouse.
The location and size of the structure must be selected in accordance with different features birds.

Let's look at the standard sizes of birdhouses and examples of drawings for different types birds.

Housing parameters for starlings
Width x depth of bottom (roof) - 90 – 110 x 90 – 110

- height 300 – 400 mm.
- The diameter of the hole in the birdhouse for the starling is 45 – 55 mm
- The hole in the tap hole is made round, the inner edges are carefully processed, and burrs are removed.

Parameters of the house for tits
Width x Depth - 100 – 120 x 100 – 120

Minimum – maximum value in mm.
- Height 240 – 310 mm.
- The diameter of the tap hole is 30 – 40 mm.
- The shape of the tap hole is round.

Wagtail housing dimensions
Width x Depth - 300 – 350x 400 – 450

Minimum – maximum value in mm.
- Height 110 – 150 mm.
- Taphole width 35 – 40 mm.
- The shape of the tap hole is rectangular.
- Threshold (special platform) width from 80 to 120 mm

In general, the design of a birdhouse may differ from standard models. So, you can make bird houses with several rooms so that several bird families can live in them at once.

The roof can consist of two tiers. Reinforcement must be done reliably and correctly. You can’t tilt it back; it’s better to tilt it slightly forward, so it will be easier for the birds to get out of the hollow.

Manufacturing methods
Let's look at some of the most common ways to make a bird house with your own hands.

Making a birdhouse from wood
Making a birdhouse out of wood is perhaps the most classic, traditional way. The algorithm of actions is as follows:
- Choose a material, preferably hardwood boards.
- Make a drawing, then transfer the diagram to the blanks for the house.
- Prepare necessary tools and available materials: screws, nails; waterproof paints; hammer, screwdriver or screwdriver, hacksaw, wood glue, ruler, brushes, pencil.
- Cut out the blanks according to the drawings. It is advisable to leave a rough surface on the inside of the board.
- Drill a hole in the front wall. Attach the bar that will secure the birdhouse to the back wall.
- Now you need to assemble the structure. Fasten the facade and side walls with wood glue, and while it dries, secure the parts with nails or self-tapping screws.
- Try to do so that there are no gaps left. Next, connect the bottom to the side and front walls in the same way. The back wall is glued and fixed last. Secure the perch.
- Make a protruding roof to protect from rain and wind. It is better to make it removable to make it easier to clean the birdhouse. Connect the smaller roof part with the larger one using self-tapping screws.
- The house can be painted and then securely fixed in the chosen location.

Making a birdhouse from a plastic bottle
There is also a very simple way to make a birdhouse from plastic bottle. To do this, you need a plastic bottle; it is convenient to use a two-liter container; waterproof acrylic paints, preferably brown, green or beige; brush; stationery knife; scissors; glue for plastic things; drill and drill bits 1/4 and 1/16; pliers; wire; scotch. So, the algorithm of actions is as follows:
- First you need to make a round hole in a two-liter bottle. To do this you need a stationery knife. The hole should be made at a distance of 3 cm from the bottom.
- Next we install the perch. To do this, drill a hole with a drill, just below the finished hole and insert a long dowel there.
- Then we paint the bottle house with harmless paints that are resistant to moisture. It is advisable to choose dark colors (green, blue, brown). Feathered friends prefer the house to be dark. To add brightness to the birdhouse, you can decorate it with beautiful bright ribbons.
- The next step is to build a loop with which we can attach the house to a tree or pole. To do this, we drill two small holes in the bottle cap, through which we thread a wire and carefully twist the ends.
- Natural bedding material should be placed at the bottom of the bottle. This can be sand or twigs; hay or scraps of fabric will also work.
- The roof is made in the form of tiles. It can be made either from plastic blanks or from unnecessary disks. To do this, you need to cut out the desired shape of the workpiece and glue it one by one and paint it with paints.
- The bottle should be hung high on a thick tree trunk, where the birds will not be disturbed.

This is very interesting way invention of the bird house. It can be done quickly within an hour; children really love to take part in making such a simple home for their feathered friends.

At the same time, a birdhouse made from a plastic bottle perfectly protects birds from wind, rain, and withstands external temperature changes.

Exclusive models of birdhouses
Of course, a bird house is a great decoration for every garden, personal plot. DIY birdhouse ideas can be very diverse and daring in their execution. When choosing an aesthetic design, remember to consider the birds' immediate needs. So a straw hat will look very nice as a house. Due to the fact that it is made of natural straw, the birds will feel very cozy and comfortable there.

You can make an original birdhouse with your own hands from stones. Many birds will like such a home; it will reliably protect our friends from external environmental influences.

There is a wide variety of carved wooden birdhouses. These can have complex, tall, intricate designs. Here the imagination of creative people has no limits. There are also no restrictions when choosing a color palette or accessories. The roof of this wooden house can be dismantled with metal sheets. This will give it additional protection. If you wish, you can make a concrete composition using cinder blocks.

A birdhouse made from an old aluminum teapot or samovar looks unusual and exclusive. Such a bird house can become a highlight in any interior of your garden or plot.

All constructed structures can be decorated with unusual drawings, paintings, and ribbons. It is very interesting to decorate in the form of windows, doors, chimneys, fences and other details that imitate a real house. To decorate a birdhouse, you can use any available materials and, of course, your imagination. Do not forget the main rule that all decorative elements must be reliable and safe for birds.
Drawings and diagrams for birdhouses


If you have your own plot, then attracting birds that destroy harmful insects is a great solution. For these purposes, a birdhouse will be very useful to you. It can even be made from various available materials. To do this you will need the dimensions of the birdhouse and a drawing. For starlings and other birds, the dimensions of the product will be different. And it is important to take this into account in your construction work. Let's look at design options for such products, and also select the right materials.
You can make a beautiful birdhouse with your own hands from various available materials. But the best option, of course, is wood. But only deciduous trees will do, because conifers are too resinous. In this case, the resin can stain the feathers of birds, which will provoke their death. It is not the best solution to use plywood, OSB or. Birds rarely live in such structures. It is better to assemble blanks using screws and nails. Adhesives should not be used.

You can make the structure from boards or from logs. The photo shows what such products look like. It is important to take into account the dimensions of the birdhouse and the drawings and model of the product.
Manufactured from boards with a thickness of at least 20 mm. Such parameters are important for maintaining the required temperature for breeding. It is recommended to use unplaned boards. In this case, the inner surface should be rough. It is recommended to specifically scratch the front part under the tap hole. This will make it easier to lift the birds up.

birdhouse
You can build a structure from scrap materials, but it is important to follow certain rules.
The birdhouse device must have an elongated cavity, with a solid bottom and a removable lid. Under the roof there is an entrance, a special hole for birds.

The cover should be removable for easy inspection and cleaning of the product. In addition, unwanted animals can get inside.
The bird house must meet the following requirements:
- be opaque and durable;
- the walls must be rough so that the chicks can move for food brought by their parents;
- the material should retain heat well, be moderately sound-permeable and there should be no cracks in it.

The table shows standard and original materials for making a bird house.
| Image | Material | Peculiarities |
 | Plastic bottles | It looks original, but not the best solution. Birds do not like such smooth, transparent and unnatural material. You can only make a feeder out of bottles. |
 | Pumpkin | An unusual option is a pumpkin house. It is hung from branches or placed on special stands. This option will not last more than 1 season. |
 | Branches | From thin shoots you can weave a small basket with a lid. You need to leave a hole in it. Thick and massive branches can be connected using self-tapping screws. |
 | Log | Not a bad option. The structure can be made from a single log or from separate parts. |
 | Box or cardboard | This option is very unreliable. It is intended rather for decorative purposes. Before use, such a product is treated with special impregnations. |
 | Plywood and chipboard | Such materials can be harmful to birds and also do not retain heat well. It is better to make decorative structures from plywood. |
 | Tree | An ideal solution, but only hardwood. Coniferous varieties cannot be used. |
Birdhouse made of wood: naturalness and reliability
In nature, many birds settle in hollows made by woodpeckers, so artificial dwellings should not be large.
When deciding how to make a structure with your own hands, first of all, you need to choose the right material. Hardwood boards are most often used. The best option: alder, birch or aspen.

Other materials have different disadvantages. For example, fiberboard and chipboard can emit toxic substances, and plywood does not hold heat well.

In the photo you can see how to make a simple design. Before work, make a drawing with dimensions. High quality and simple circuits and drawings you can find on the Internet. This will reduce the consumption of materials, as well as perform correct cutting.

The diagram can be transferred to wooden blanks. Then prepare the following materials:
- untreated hardwood boards;
- long and thin nails;
- special impregnations and safe paints;
- The tools you will need are a hacksaw, a tape measure, a pencil and a brush.

All blanks are cut according to drawings. The boards should only be planed on the outside, leaving the inside rough. A hole is drilled in the front wall. A plank is mounted to the rear wall, onto which the house is secured in a suitable place.

For your information! The roof needs to be made protruding so that it protects the entrance from rainwater.
birdhouse
Birdhouse made of cardboard: ease of manufacture
This option is often used as a decorative house. This is more of a toy for children. A cardboard house is good for one season. It is better to choose thick corrugated cardboard to create it.
So, let's find out how to make such a design with your own hands. In addition to corrugated, you will need twine, starch and laminated paper. A pre-made template with dimensions will greatly facilitate the work.

The order of assembly of the product has its own characteristics:
- The blanks are marked, and then the parts are cut out in double quantities;
- made from starch;
- All parts are glued together in pairs. A hole is made in the front part. And holes are cut in the back wall for twine;
- all walls are glued end to end;
- the roof is made of two elements.
Birdhouse made of paper: decorative functions
Many people are interested in how to make a simple birdhouse out of paper with their own hands. This material is only suitable for decorative ideas. There are different schemes of unusual models.
Such houses are decorated acrylic paints. You can make a whole composition, for example “seasons”. In addition to drawing, you can use techniques or applications. All this beauty can be varnished.
The Christmas theme is suitable for the January holidays. This can be a wonderful garden decoration. You can make feeders this way, but not housing for birds.

Birdhouse from a bottle: an option for temporary housing
To make any birdhouse, the drawing and dimensions must be learned and prepared in advance. A handmade product made from a plastic bottle is considered the most affordable.
This option is best used as a feeder or as a decorative garden decoration. The choice of options for how to make such a device is not varied. Two holes are made in the lid for the wire. The outside of the plastic surface can be pasted over or painted.
You can see the designs of models made from plastic bottles in the photo.


Birdhouse made of plywood: is it a good option?
You can make a bird house with your own hands from plywood. This option is suitable as a temporary home or as garden decor. When deciding how to make such a structure, first think about the drawings and size of the product. All elements are transferred from the diagram to plywood. In this case, the upper part should act as a visor. All cuts need to be sanded. The elements are connected using self-tapping screws and glue. In this case, it is necessary to glue the side walls and the facade, and then additionally fasten the product with self-tapping screws. The roof must be removable, since the internal cavities must be cleaned periodically.
The product can then be decorated to your liking.

Birdhouse out of the box: convenience and simplicity
How to make a structure out of a box with your own hands will be interesting to learn for those who do not want to spend a lot of time on work. This is a simple option, but it doesn’t last long and it’s better to use it as a... You can buy materials or just take a small box.
First you need to secure a strong roof, and then cut the necessary hole. Its edges can be covered with tape. As back wall You can use plywood, as it should be especially durable. The product should be painted with moisture-proof paint, but odorless. Then the product is attached to the base.

Choosing the right birdhouse sizes
If you don’t know how to properly make a bird house, then first you need to find out what the dimensions of the structure should be according to GOST. We make the product taking into account the fact that the dimensions of the structure will differ for different birds.

When deciding how to build a product with your own hands, first choose a simple design that has standard dimensions for a birdhouse.
Before making drawings and dimensions, consider a number of certain conditions:
- the diameter of the hole in the birdhouse should be about 50 mm;
- the height of the structure varies between 30-35 cm;
- the length from the hole to the bottom must be at least 20 cm;
- the bottom must be at least 15*15 cm.

Using these parameters, you can build strong birdhouses for birds with your own hands. The drawings assume the designation of all elements. The sizes given are more suitable for birds such as sparrows and starlings. It is also necessary to indicate the dimensions of the tap hole on the drawing. In the photo you can see what similar structures look like.
Dimensions of a birdhouse for starlings
When making a birdhouse with your own hands for starlings, you need to take into account that this is a fairly large bird. This design should be deeper and larger than other options. To correctly complete the drawing, you need to find out the main dimensions of the product.
The size of the hole in the birdhouse is of great importance. It should be about 5 cm. The height of the feeder or birdhouse should be 35-40 cm. The bottom dimensions should be about 15*15cm. It is better to make the entrance round in shape. In this case, the diameter of the hole in the birdhouse for a starling depends on the overall dimensions of the structure.

Titmouse: drawing and dimensions, some features
How to make the design of a titmouse depends on the selected materials and its size. There are standard birdhouse sizes for tits. The bottom should have dimensions of 10*12 cm, the height of the structure should be 25-35 cm, and the dimensions of the taphole should be about 30-35 mm. The depth of the product should be about 50 cm. Using this data, drawings are made.

For your information! Such a house must be mounted on deciduous trees with a dense crown. This should be done at a height of 3-4 meters.
House for a wagtail: drawing and dimensions
When making a house for wagtail birds with your own hands, you will also need to know the recommended dimensions. The bottom must be made with dimensions of 10*8 cm, and the height of such a structure is within 20 cm. The taphole has dimensions of about 35-40 mm. When deciding how to make such a design, it is worth considering that the taphole should have the form of a slot, the width of which is no more than 40 mm.
The kids make similar products during labor lessons. In this case, special drawings are used. A special feature of this design is the presence of a platform at the entrance, the width of which is about 10 cm.

For your information! You can place such buildings not only on a tree, but also on the roof of a house or on the top of a fence.
How to make a birdhouse yourself
You can see how to make the simplest version for birds in the video below.
You can try making a simple, beautiful DIY birdhouse with a flat roof.
For this you will need unplaned boards. We make this design only with gloves. This will prevent splinters from appearing. The cuts must be smooth and there should be no gaps. Remember that hatched chicks do not have feathers, so they can die from a draft. To prevent the manufacturing process from taking much time, it is recommended to make a drawing of the birdhouse with dimensions in advance. A flat roof does not require much effort. It just needs to fit tightly.

At home, you can make a nest box or bird house from a log. This option is more like regular housing for birds. This can be seen in the photo. In addition, such structures are practically invisible on the tree, which makes them safer for living. Such a product can also be made according to the scheme. To do this, you can use a piece of dead wood. In this case, the core will have to be picked out by hand. It’s good if you come across a log with intact edges and a rotten middle. This will speed up the work.

Such wood has rotten bark that needs to be cleaned. The log is then sawn into suitable logs. For a bird house, the internal diameter should be 25-30 cm, and the external one 30-36 cm. For a titmouse, the internal size of the hollow should be 15-25 cm, and the external one – 20-30 cm. When sawing, the bevel at the bottom should be made even, and at the top parts at a slight angle. This will allow precipitation to drain from the roof. For the roof, use scraps from the boards. The middle of the log can be picked out with a chisel. To make the job easier, drill a few holes and then pick out the jumpers. The walls should remain 1.5-3 cm thick. The insides should be smooth without large chips. The bottom consists of pieces 2.5 cm thick. It is screwed on. Finally, the lid is nailed on.

For your information! Perches are not always a good solution for poultry houses, as cats can lean on them to reach the chicks with their paws.
How to build a birdhouse with your own hands
Let's find out how to make a birdhouse correctly. You can watch the working process in the video below.
How to make a birdhouse yourself and its design depends on where it will be hung. If the mounting will be carried out on a pole, under the roof of a house or, then it is worth planning special perches. If the structure is attached to a tree, then birds can walk along the branches.
To build a wooden house with your own hands, you will need certain materials. By the way, you can buy a birdhouse set with your own hands in a specialized store.
Here are the tools and materials you will need:
- boards and bars;
- carpentry glue, screws and nails;
- hammer, chisel, drill, hacksaw and drill;
- pencil and ruler.

You can see how to make a simple design in the photo. Drawings and diagrams will also help you make beautiful bird houses.
Before making such a design, you need to complete the blanks. To do this, markings are made on the boards according to the drawings. The correct house involves marking the dimensions of the roof, walls, bottom and holes. The following recommendations will help you when making preparations:
- since the roof is made with a slope, the front wall is made 4 cm longer than the others, and the side walls are cut with a bevel;
- the bottom is made in the form of a square with sides of 13 cm;
- the roof is made of two different elements. One part is made like the bottom, and with the help of the second a canopy is created.

Sawing is done carefully. All paired parts must be the same size. What did the house have outside? decorative look, the boards need to be planed. It is better to make the hole round so that it resembles a hollow.
Then the structure is assembled. To do this, you need to fasten the side walls and the front facade. This is done using wood glue. Nails and screws are used as additional reinforcement. Then the bottom of the birdhouse is attached. Finally, the back wall is attached. It is important to ensure that there are no gaps between the elements. If the roof is removable, then the parts are fixed only to each other. In this case, the roof is mounted using rubber or special hinges.
The finished product can be nailed to a suitable surface or tied with wire. To make it easier for the chicks to exit, it is recommended to attach the structure with a slight forward tilt.

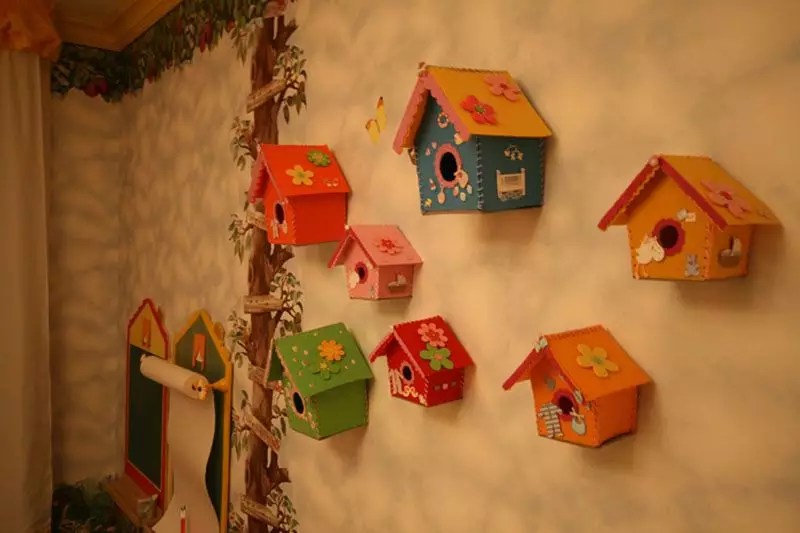
There are also unusual types of birdhouses. Decorative options can be used to decorate the garden, and even be included in kindergarten.
Here are some original solutions:
- An unusual bird house can be made from an old barrel. In this case, you can make a hole and then decorate the structure;

- You can weave beautiful products from willow growth. The weaving technique is identical to the method of weaving baskets. But the house at the top should narrow. The roof should protrude 3-5 cm at the edges;

- For an unusual-looking nest, you can use plugs. They are dense, fit perfectly and retain heat. They can be used to finish the finished frame. You can glue the elements using hot glue;

- a decorative house can be made from a pumpkin. In this case, it is necessary to pull out the pulp, cut the necessary hole, and attach a canopy on top;

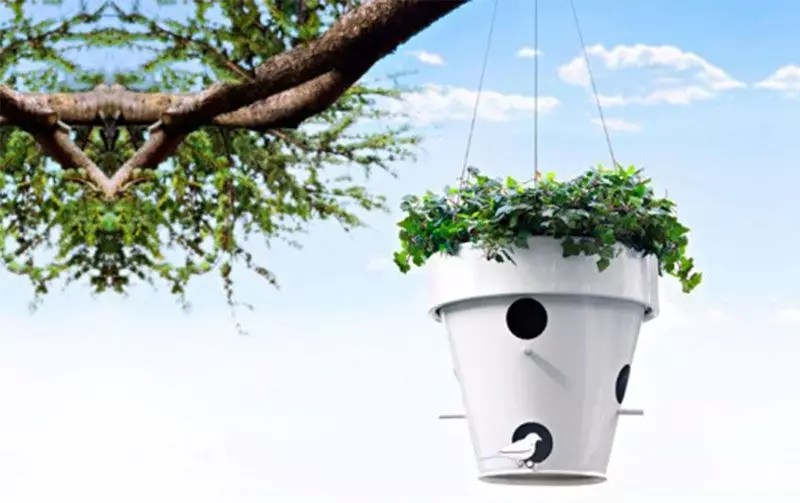
- a beautiful and decorative option is obtained from a flowerpot. To do this, you need to braid it with a strong rope;
- Among the most unusual options, we can mention a product made from old shoes;

- used vessels with necks. In this case, the neck turns down;
- It's a good idea to use tubes.

How to decorate a birdhouse with your own hands
A birdhouse can become not only a useful item, but also a wonderful one. Let's look at how you can decorate a bird's house.
Photos show how unusual birdhouses look. You can make similar products with your whole family. For children you can make a product with a picture. For example, beautiful flowers, ornaments will do, or you can depict how a starling looks out in a birdhouse.

Using original ideas, you must remember that such a product should not attract the attention of various predators. You should also not overuse it with various shiny and rustling parts that can frighten your feathered friends.

Unusual decor can be made using wine corks. This material has a porous but durable structure, which protects the structure well from moisture. In addition, such a coating allows you to retain heat. Cork is also easy and simple to process.
To make this option, you will need corks, a finished frame, a device with hot melt glue and twigs. You should not nail or screw such elements. Because the tips of the screws can penetrate the walls and injure the birds.
The work is carried out like this:
- the adhesive composition is applied to the plugs, which are glued in rows to the wall;
- the plugs are glued all the way to the roof. In narrow places you can use parts of plugs;
- on the front side, the central row can be laid out vertically;
- for the roof, you can cut the corks in half and lay them on the surface like tiles.
The sides of the structure and joints can be decorated with twigs, moss or pieces of cork. You can see in the photo how beautiful the birdhouses are.

Not everyone knows whether such structures can be painted. It is better to use odorless, moisture-resistant compounds. You can see in the photo how to paint surfaces with acrylic paints.
Article
Studying the habits of birds and listening to their singing is a fascinating activity. It’s easy to attract birds by making a birdhouse and placing it in a convenient place. On summer cottage This will have an additional benefit - insectivorous birds will destroy pests in the garden and garden.
For those who have children, this will teach them something useful and bring them joy. After all, what a pleasure it is to make a birdhouse out of wood together with your parents, and then watch how the birds inhabit it and the grown chicks fly out.
Materials for production
It happens that birds nest in an old basket, a dried pumpkin, a cardboard box, even in a mitten or boot. But the material familiar to birds, natural to nature, will be wood.
True, there are limitations here. Coniferous wood is not suitable. Even when dried, it releases resin that can damage feathers. Although sometimes they take pine boards, checking that there are no resinous streaks on them. Of the deciduous species, birch, linden, and aspen wood is preferable, since it is softer and easier to process.
You should not take wood boards and plywood glued with formaldehyde glue. In general, birdhouses are made from thick plywood.
Note! The most common unplaned boards are best suited for construction.
There should be no smooth surfaces inside the birdhouse. You can specially apply serifs. The thickness of the walls, bottom and roof is at least 2 cm. Thin walls will not retain enough heat, and this is important when hatching chicks.
It is better to fasten all the elements together with nails or screws. Glue mounting is used if the composition does not have a strong odor. Due to the smell, it is not advisable to paint the birdhouse. If you still want to decorate it, then it is advisable to use water-based paints.
Sizes for different birds
It is clear that a birdhouse is a general name for a home for any small birds; it is not at all necessary for only starlings to live in it. But the right bird house should attract the species that are found in the surrounding area.
Birds react differently to the size of the birdhouse and the hole for entering it - the entrance, trying to choose what is more familiar to them. Approximate sizes that are attractive to certain species have been empirically determined.
It is worth mentioning separately about such a cute bird as the wagtail. The design of the wagtail looks unusual. It looks like a birdhouse laid on its side. 25–30 long, 10–12 high, and also 10–12 centimeters deep. The entrance is not round, but rectangular - full height and 4 cm wide. There is a flat shelf along the front wall so that the bird can approach the entrance on foot, without clinging to the perch with its paws.
Hanging Rules
Making a good birdhouse out of wood is only the first stage. The house still needs to be located in a “prestigious area” without offering a ground floor. When placing a birdhouse, there is no need to take into account the wishes of different birds, although wagtails prefer houses located near the roof of the building.
- hang away from crowded places. In the city there will be problems with this, but you should try to find a remote place in a park, garden, quiet alley;
- location height – at least 3 meters. In the city it is better to hang it even higher - 4–5 meters;
- do not place it in a place exposed to sunlight, do not place it deep in the crown of a tree. Access to the tap hole must be free;
- location along the cardinal points is not critical, but it is better to direct the entrance to the southeast, towards the rising sun. It is much more important to determine the direction of the prevailing winds, to turn the birdhouse so that they do not blow inward;
- You need to install the birdhouse by slightly tilting the front wall down from the tree trunk. This will make it easier for the chicks to get out.
There are different methods of attaching to a tree or pole. For example, a plank or board is nailed to the back. Then this plank is nailed to the support on which the house is attached. If you don’t want to spoil the wood with nails, you can fasten it with wire or rope. The original way is not to attach the birdhouse, but to hang it, but there is a risk that not every bird will want to live in a swinging house.
Protection from predators
The main enemies of birds are cats, squirrels, and weasels. IN rural areas There are also woodpeckers that break the walls or entrance of the birdhouse and eat the chicks.
One of the cat protection measures is to lengthen the roof of the house so that the cat does not reach the entrance. By the way, such a roof will additionally protect from slanting rain.
But what’s more important is to prevent the cat from getting near the birdhouse itself. There should be no strong branches or other supports next to it from which you can jump onto the birdhouse. To prevent the cat from climbing up the trunk or post, they can be wrapped in sheet iron or other material that does not allow the claws to cling to the tree.
If woodpeckers pose a danger, then there are techniques against them. It is necessary to paint over or cover with plasticine the knots on the walls of the birdhouse. And to protect the tap hole, it can be covered in a circle with tin. You can also increase the length of the tap hole by stuffing an additional spacer around it with a longitudinal arrangement of fibers. But the birds themselves may not like the elongated entrance.
The simplest option
A flat pitched roof and a square base – it couldn’t be simpler. The drawing is made schematically so as not to make mistakes with the dimensions. Sloping and gable roofs, decorative design, and other tricks are unlikely to be appreciated by starlings.
Material: unplaned hardwood board 25 mm thick and 15 cm wide; nails 50 mm. The screws hold more firmly, but there won’t be any special loads on the product (a starling weighs 75 g on average).
The diagram for making a wooden birdhouse with dimensions for small birds is as follows:
- the boards are sawn into pieces 30 cm long - these are the walls, 4 parts are required;
- Another piece that needs to be cut 20 cm long is the roof. This size will provide a protrusion above the tap hole;
- two squares with a side of 10 cm - the bottom of the birdhouse and a spike for a removable roof;
- In one of the workpieces, a hole for the tap hole is drilled using a drill with a feather drill with a diameter of 30 mm. Drilling location – 21 cm from the bottom edge, in the middle of the width;
- the front wall with the taphole is nailed to the sides, 3–4 nails on each side;
- The structure is turned upside down. The bottom is inserted, the front side and sides are also nailed to the bottom;
- cover the top with the remaining long piece and nail it to the sides and bottom;
- another square 10 x 10 cm is installed on one edge of the roof of the birdhouse so that 25 mm remains on the sides. Then they nail it to the roof, which is now removable;
- The roof is tightly inserted into the birdhouse. You may need to do a little work with the chisel.
The birdhouse is ready. The removable lid will allow you to clean it at the end of the season, when the starlings fly to warmer climes. There is no need to make a perch in front of the entry hole, since it will provide additional support for the cats, and starlings do not sit on it anyway. You can decorate the structure by painting it with soft green, white and brown paint.
Birdhouse nest
The nest box imitates a real hollow in a tree and is made from scraps of logs. It is best to choose aspen; although the wood on the outside is strong, it usually has a weak or rotten core - it will be easier to remove it.
The dimensions of the logs are selected in accordance with the desired type of house, taking into account that the thickness of the outer walls must be at least 20 mm. A block of wood of the required length is sawed off, and then the core is selected with a chisel. This is not difficult, but long, monotonous work. The inner surface remains rough, but without large scuffs.
The bottom and roof are made of boards. To make the house beautiful, you must try to cut a round bottom. The tap hole is drilled anywhere at a distance of 2/3 of the length of the log from the bottom.
Such a house, installed on a tree, does not catch the eye; tits and sparrows like to live in it. The nest box additionally attracts birds due to its shape as a safe home.
Is it necessary to decorate a birdhouse?
When a bird house is installed on a summer cottage or in a city with direct visibility from a window, then, of course, you want it to look beautiful. You can see birdhouses that look like works of art - original shape, decorations made of various materials, carved ornaments and other beauties. But the main beauty of any birdhouse is the birds living in it. Why do you need a wonderful but empty house?
Building birdhouses is a long-standing and very useful tradition. Step-by-step instruction How to make a birdhouse with your own hands will help you make it quickly and easily. You can also start building houses with children; this is a great way to keep your child busy and teach him to do manual labor.
How to make a birdhouse with your own hands from wood
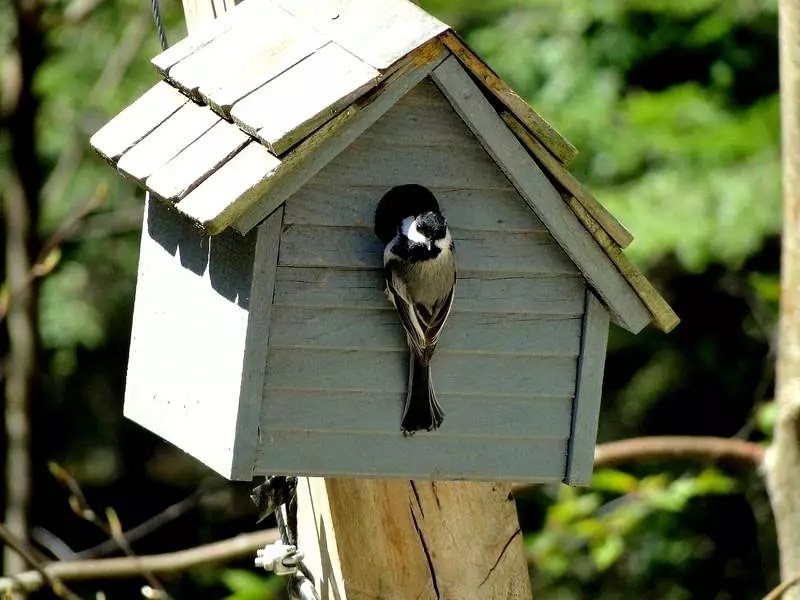
This is what classic wooden birdhouses look like
A wooden birdhouse is the most durable and reliable house, but the work to create it is also the most labor-intensive. But the result can exceed your wildest expectations.
To build a wooden birdhouse, you will need:
- pine planks 1.5–2 cm thick and 12, 16 and 20 cm wide;
- round rail for the perch;
- electric jigsaw or hacksaw;
- drill;
- Phillips screwdriver or screwdriver;
- sandpaper or sanding machine;
- ruler;
- marker;
- self-tapping screws;
- carnations;
- hammer;
- paints, varnish and brushes (for decoration).
It is better to take hardwood boards
Manufacturing instructions
How to do:
- Create a drawing of the future house and mark the wood according to it. First make markings for the front and back walls.
If you decide to trim a tree before marking, do it with glasses so that sawdust does not get into your eyes, and with gloves so that you do not have to remove splinters
- Then - the side walls.
This optimal sizes birdhouse
- Mark the roof. This birdhouse has a gable roof; you need to make two parts. All parts are cut out using a jigsaw or hacksaw.
The future roof of the birdhouse can be gable or single-pitch
- Mark the mounting holes. The boards are quite thick; the center of the holes should be 7–10 mm from the edge. In this case, the screws will accurately hit the middle of the end of the adjacent part.
Sawing and marking of parts should be done sequentially
- On the front wall, mark a place for the entrance (entrance to the birdhouse).
The diameter of the taphole should not be less than 4.5 cm, and the height from the bottom edge should not be less than 20 cm
- A little lower, mark a hole for the pole-perch on which the bird sits before entering the house. Using a drill with a drill bit of the same diameter as the self-tapping screws, drill the intended holes.
- You can start assembling. First, the pole is attached using a thin self-tapping screw.
Instead of a perch, you can make a shelf
- Assemble the walls of the birdhouse, fastening them in any order with self-tapping screws.
The boards must fit tightly together
- Install the bottom.
The assembled structure must be checked for strength
- Assemble the roof and attach the pipe using a self-tapping screw screwed in from the inside.
Screws or self-tapping screws are used
- Reinstall the roof.
A pipe on the roof of the house will look elegant
- To attach the birdhouse to the tree, attach two loops to the back wall. Decorative details fastened with nails and narrow slats. For reliability, you can glue them with moisture-resistant glue.
It is best to attach a birdhouse to a tree with wire
- Paint the product as your imagination dictates.
It is best to use odorless paints
By the way, bird houses first appeared in Russia during the time of Peter the Great, and the idea of artificial nests was discovered in Western Europe.
Making a birdhouse out of a box
A cardboard box may become wet when exposed to rain, so you will have to additionally cover the surface with laminated paper or varnish.
Such houses are easier to make than wooden ones
Required tools and materials
It is better to take very thick corrugated cardboard
To create a birdhouse from a cardboard box you will need:
- corrugated cardboard;
- glue;
- carpenter's tape;
- self-adhesive laminated paper;
- stationery knife;
- scissors;
- ruler;
- marker;
- compass or circle with a diameter of 4.5–5 cm.
Manufacturing instructions
It is easier to make a birdhouse out of cardboard than a wooden one, but the cardboard house will also serve less.
How to do:
- In accordance with the selected dimensions, all parts are cut out of corrugated cardboard in duplicate.
Such blanks are made faster than wooden ones, but require no less attention
- Using glue, identical parts are connected. This is done to increase the strength of the structure. An entrance is cut out in the front wall with a utility knife, and holes are made in the back wall for string, with which the birdhouse will be hung from a tree.
Finished parts are glued together in pairs
- The body parts are glued together. To increase strength from the inside, the joints can be glued with carpentry tape.
The walls are glued together end-to-end
- The roof is assembled from two parts. The smaller one is located inside the case. It should protrude 1.5–2 cm beyond the body. For strength, cover the edges of the roof with colored plastic tape.
Be sure to cover the roof; in this case, the birdhouse will honestly serve until the end of the season
- To make the house last longer, it needs to be covered with self-adhesive paper or varnished.
You can entrust the finishing to your child
You can also make a bird feeder at the same time. The photo below shows an example of the simplest feeder. While you will make a birdhouse from more complex materials, a child can make such a feeder.
Tell your child what feeders are for and how important they are for birds in winter.
The entrance to the birdhouse should be directed to the south, east or southeast so that the wind does not blow into the house.
This option is the easiest and most affordable
If you don’t want to tinker with wood or cardboard, then in a few minutes you can build a bird house from a plastic bottle. Of course, it will not be as cozy as the options described above, but the birds will be quite comfortable in it. Three- or five-liter containers are best suited for making a birdhouse. But if there are none, then you can get by with a standard one and a half liter bottle.
Required tools and materials
A plastic bottle is one of the lightest and most affordable materials.
It's better to remove the label
You will need:
- two one and a half liter and one liter bottles;
- about two meters of wire with a diameter of 2 mm;
- scissors or stationery knife;
- dye.
Manufacturing instructions
How to do:
- Wash containers thoroughly. Cut a small container in the middle or near the neck in its widest part.
Only food-grade plastic bottles are suitable for the birdhouse.
- Also cut the one and a half liter bottle at the place where the neck is widest. In this case, only the top part is required.
- Make holes in the lid. Pull the wire through them and secure them carefully. But it is much safer to hang the structure by the body. To do this, make two holes in the roof on the sides of the future entrance, stretch a wire through them and attach the body.
Don't forget to use odorless paints
- If you use artistic paints, then you need to coat the structure with varnish on top so that the paints do not wash off due to moisture. After the paints have dried, all that remains is to place the tree house and wait for residents.
This birdhouse is a great idea for a craft for kindergarten or school.

Make sure that the top does not block the entrance
The total height of the birdhouse should be from 30 to 35 cm. The size of the bottom should be made from 10*10 to 15*15 cm. The distance from the bottom to the tap hole should be 15–20 cm. The diameter of the entrance hole (taphole) is 30–40 mm. It is worth noting that different sizes of the entrance will be optimal for different birds, so for a starling it is 32–35 mm, for a nuthatch it is 28–30 mm, for a tit or sparrow it is 25–29 mm.
Despite the general opinion that wild birds can eat anything, birds should be fed with caution, since they absolutely cannot eat some foods.
Ideal for feeding birds:
- sunflower seeds;
- millet, millet, oats and wheat;
- unsalted lard and meat;
- dried rowan and hawthorn;
- maple or ash seeds;
- nuts, cones and acorns;
- pumpkin and watermelon seeds.
You can give calcium supplements, for example, crushed egg shells.
It is strictly forbidden to feed birds rye and wheat bread, as the yeast in them can ferment. Birds should not eat seeds or skins of citrus fruits. And also you should not feed the feathered inhabitants with salty, fried, spicy and sour foods.
Making a bird house is not difficult, especially since modern industry provides a wide selection of materials. Making a birdhouse with your own hands is a fun activity. If you and your children liked to do construction, then you can provide housing for many inhabitants of the park or forest.
Attracting birds to the site is both useful and pleasant. It is useful because they destroy insect pests, it is pleasant to listen to their singing and observe the behavior of birds. That’s why many people come up with the idea of building a birdhouse with their own hands. People over 40 years old can remember their school days: during labor lessons, boys made houses for birds. But it’s not just property owners who make birdhouses. Often residents apartment buildings They hang them on trees near the house, on balconies and loggias.
What to make from
The answer is clear - from wood, and deciduous trees: conifers are too resinous. The resin can stain the plumage, resulting in the death of the bird. You should not use plywood or. Rarely does anyone live in such birdhouses: glue and binders scare away birds. For the same reason, we assemble and fasten the workpieces only with nails or screws, we do not use glue.
Most often, birdhouses are made from boards. The thickness of the boards is at least 20 mm. This thickness is enough to maintain a stable temperature inside, which is important when hatching chicks. Moreover, the boards need to be unplaned; in any case, the inner surface should be rough. The front part under the entrance is also specially scratched: along these notches, chicks and birds rise to the entrance.

To prevent the boards from cracking during assembly, we pre-drill holes for the screws. The diameter is slightly smaller than the diameter of the screw.
Sizes of birdhouses for different types of birds
To attract different types of birds, the size of the house should vary. It is mainly the proportions of the “body” itself and the entrance that change. The goal is to create nesting conditions that are more familiar to this species.
| Bird species | Bottom dimensions | Birdhouse height | Taphole dimensions | Note |
|---|---|---|---|---|
| Starlings | 10*10 cm | 30-40 cm | about 5 cm | a taphole is preferable to a round shape |
| Titmouse - tits, flycatchers, redstarts, sparrows, pygmy owls | 10-12 cm | 25-30 cm | 30-35 mm | round entrance |
| Lesser titmouse or flycatcher (flycatchers, redstarts) | 10*8 cm | 25-30 cm | 30 mm | |
| Poluduplyanka | 10*8 cm | 20 cm | height 33-50 mm across the entire width of the wall | taphole - a longitudinal slot across the entire width of the front wall |
As you can see from the table, basically only the height changes. The width remains more or less stable. There is no point in making birdhouses anymore. They will stimulate the laying of more eggs, and the birds will not be able to fully feed a large number of chicks; as a result, the offspring will be weak and, most likely, die.

If you want to attract wagtails, make a birdhouse laid on its side: its height will be 10-12 cm and width - 35-40 cm, with the same small entrance located approximately in the middle. Wagtails have weak legs, and they cannot climb a high wall to the entrance. That is why there is such a choice of nesting sites. in the shaker it is also advisable to make a ladder about 10 cm wide in front of the entrance - so that they can enter on foot.

The semi-duplyanka requires some explanation. Some birds are accustomed to nesting not in hollows, but in recesses between branches. They rarely settle in completely closed artificial nesting areas. If you want to attract, for example, a gray flycatcher, make it a small box in which the entrance runs the entire width of the front wall.

Just keep in mind that some types of squirrels also like to live in such houses.
There is another nesting site that birds often like better - a nesting box. This is a birdhouse made from a piece of log. Often dried wood is cut into logs of suitable size, turning it into apartments for birds. The height and diameter are selected based on the dimensions that were indicated for a regular birdhouse. The bottom and roof of the nest are made from a piece of board.

Duplyanka - birdhouse made of logs
Safety
It's a shame and a pity when birds' nests are destroyed. This is mainly done by cats, and also by woodpeckers. Therefore, when you make a birdhouse with your own hands, increase the roof overhang. In almost all drawings it is drawn 5 cm long. In order to protect the birdhouse from the cat, it is necessary to make sure that he cannot reach the entrance. To do this, the roof must protrude by at least 7 cm, and it is better to add a couple more - for large specimens. This ledge will also protect from slanting rain: the likelihood that the chicks will get wet becomes even less.
Another option is to put nails on the lid. The cat is unlikely to get hurt, but he won’t be able to sit comfortably - the nails won’t let him.

There are several ways to protect chicks from woodpeckers:
- beat the taphole with tin:
- drive several nails around the tap hole;
- nail a piece of wood on the taphole area, the fibers of which run horizontally.
All this will prevent the woodpecker from expanding the entrance and getting to the eggs or chicks. The last trick - the cover - will also complicate the cat’s task: it is more difficult to reach the chick through a long entrance.

Measures against enemies: 1 - against woodpeckers, 2.3 - against cats
They still escape from cats and possible invaders with the help of protective belts. They are made either from tin strips or from “brooms”. You will understand everything by looking at the picture. Please note that the distances must be maintained within 3-4 cm. Then the animals will not be able to jump over the protective belts. There should be no twigs, feeders or other possible supports between them and the birdhouse.
Where to hang
Where to hang a birdhouse is also a science. If you are going to set it up on a tree, then at a height of at least 2.5-3 meters. There should be no paths or busy places near the selected tree - a well, a bench, etc.

When choosing a place on a tree, keep in mind that there should be no large branches in front of the entrance: the approach must be free. At the same time, you need to unfold it so that the “window” faces south. All this increases the chances that residents will move into your birdhouse.
Another point: you need to tie or nail it so that the “house” is tilted slightly forward. This will make it easier for the chicks to get out, and less rain will clog them.
How to make a birdhouse with your own hands: photo report
We will do the easiest option - with a flat roof. As already mentioned, we take unplaned hardwood boards with a thickness of 20 mm or more. To avoid splinters, it is better to work with gloves. According to the drawing, we cut the blanks. Try to keep the cuts straight and at right angles: there should be no gaps. Immediately after hatching, the chicks are without feathers, and the slightest draft can kill them. Therefore, all edges must be smooth.

We take long thin nails - diameter 1.5-2 mm, length 4-5 cm and a hammer. Let's start assembly. We nail the sides to the front part at right angles. For each - three to four nails.

Turning the workpiece upside down, take the bottom, insert it, and level it. We nail it to the sides. We cover the top with the back wall and also nail it. Don't forget about connecting the back wall with the sides.

Turning the tap hole upside down, we nail the bottom on this side as well. All that remains is to assemble the roof. We take the remaining square - the double of the bottom, nail it so that the visor sticking out in front is at least 5 cm (preferably 7-10 cm, as they said before). If the nails stick out, bend them.

The roof just needs to fit tightly. If something gets in the way, we use a chisel. That's all, the birdhouse with your own hands is ready.

Often a perch is installed under the entrance. Is it needed or not? If there are enough branches around, it’s better not to do it. If there are no branches, you need to either make a perch or a small shelf, although you can do without them. Why? Because cats also rely on them and it is easier for them to reach the chicks with support.
How to make a titmouse, watch the video
Making a nest - a birdhouse from a log
If the feathered people have a choice - to live in a nest box or a birdhouse made of boards - they will choose a nest box. It is more similar to the usual “housing” - a hollow, there are no cracks on the sides and, therefore, it is warmer. They are less noticeable on the tree, which means there is a greater chance of raising offspring. These are advantages from the birds' point of view. Now about the advantages from the point of view of the “manufacturers”: a fallen tree is used for work, and it is free. If you find a suitable one, it will be enough for a large number of birdhouses. About the disadvantages - making nest boxes takes longer and is more difficult: you have to manually pick out the core, leaving the walls intact.

Now about how to find a suitable tree. Aspen is best suited: it usually rots from the inside, but remains hard along the outer edge. Therefore, we go in search of an aspen forest, and there, among the fallen trees, we look for something suitable: we cut several trunks. It is important to find one with a whole edge and a rotten middle - the work will go faster.

It is advisable to find such aspen - with a rotten core, but strong edges
Often such trees have rotten bark, which makes them look unsightly. We peel off the bark and drag the log to the dacha or house. There we cut it into logs of suitable size. Dimensions are determined by diameter. For a birdhouse, the inner diameter of the nest should be 22-30 cm, respectively, the outer diameter - 27-36 cm. For the titmouse, the sections closer to the top are suitable - the inner diameter is 15-22 cm, the outer diameter is 19-26 cm.
The height of the log also depends on the type of house - a titmouse is 20-40 cm high (but they are more willing to settle in low ones), a birdhouse - from 30 to 45 cm. When sawing, try to make the bevel that appears at the bottom level, and at the top - at a slight slope - so that sediment flowed from the roof. To make roofs and bottoms, you will need cutting boards; you can use unedged boards and slabs.
We take the cut log and begin to pick out the core with a chisel. The task is to dig a through hole. After this, even hard wood is easier to chop. To make the process go faster, you can drill holes with a drill, then break out the jumpers with a chisel.

The task is to dig a through hole
As a rule, the rotten core runs out quickly, then you have to chop off pieces of wood using a chisel and a hammer or mallet. But with a hole in the center it is much easier - the longitudinal pieces are chipped off, the work proceeds at normal speed.

The walls should remain about 1.5-3 cm. We try to work on the middle more or less smoothly, without large chips. When the walls are selected, we make a taphole. If there is a knot, you can hollow it out. Or take a crust and a drill, drill in a suitable place. If there is no crown, take a regular drill, drill holes in a circle, then, using the same chisel, cut through the remaining jumpers.

A piece of board 2-2.5 cm thick goes to the bottom. It is nailed or screwed onto self-tapping screws. The protruding parts are cut off as close to the walls as possible.

All that remains is to nail the roof. The same board or slab will do. Before screwing in the screw, drill holes, otherwise the board may split.

Actually, you have already made a birdhouse with your own hands, all that remains is to secure it from attacks by woodpeckers. If there are knots on the walls, it is advisable to coat them with plasticine (regular, children's). They can also be used to seal the gaps that remain between the bottom and the roof and walls: it is rarely possible to fit everything neatly. If you don’t want to cover it with plasticine, you can caulk it with hemp rope. It is applied to the crack and driven into it with a flat screwdriver (actually there are special blades for caulking, but they are large - this is the time, and for “one-time use” you should buy them...). If it doesn't go well, you can hit the handle with a hammer.

Caulking the “seams” with hemp rope
How to decorate a birdhouse
While the birdhouse is new, it looks relatively good, but after a couple of months it will darken. This is good for the birds - it will become less noticeable and they will only benefit from this. But not all homeowners like to look at such an unsightly “decoration”. To improve appearance, the birdhouse can be painted, but you need to choose “natural” colors - brown, gray, shades of green. You want your birds to survive, right? This means their nest needs to be camouflaged, and not painted in all the colors of the rainbow, attracting all possible predators.


And this one is just ideal - no cracks in the floor))

Titmouse is inhabited

Beautiful decoration and disguise
We hope that now you can not only make a birdhouse with your own hands, but also decorate it competently (from the point of view of the birds).
Drawings with dimensions
Some drawings of birdhouses are in the text, we are posting a few more in this section. Adjusting the dimensions to suit the planned “tenants” is probably not a problem. Also note that the layout is given for a 2 cm thick board. Adjustments are necessary when increasing or decreasing the thickness.

Birdhouse with a triangular roof: drawing, dimensions


Birdhouse with a sloping roof (front wall higher)