Increasingly, staircase structures appear in apartments and suburban buildings of Russians. Their main component part is the railing, consisting of supports and handrails. The main function of the railing is protective, but it also plays an important role in the interior design of the room. Thanks to the railings, we feel completely safe on the stairs, they make it much easier to climb the stairs. In order for the work on the construction of a flight of stairs to be done efficiently and accurately, you need to know how to install balusters on the stairs.
What are balusters
The transverse supports, installed strictly vertically, which serve to fasten the handrails, are called balusters. They are attached to steps, stringers (the side of the stairs), bowstrings. The configuration of the crossbars depends on your imagination, the design of the room, the engineering features of the staircase. In addition to their main purpose, balusters can transform any simple flight of stairs. Various materials are used for their manufacture: metal, wood, concrete, stone, glass, gypsum.
In the construction of railings, various materials are often used. The main thing is that they harmonize and complement each other. Very often this determines the choice of mounting options for the transverse supports.
Mandatory requirements

In order for the entire staircase structure to be distinguished by longevity and reliability, during its construction it is necessary to observe established rules and recommendations:
- transverse supports are mounted with a step width of 15 cm;
- safety rules require that the height of the railing be at least 90 cm;
- the baluster is attached in two places - these are handrails and any part of the staircase structure;
- the handrails are well processed and should be comfortable.

Note! The most responsible approach is to fasten the upper and lower balusters, since they perform the main protective function, but the rest of the supports must be fastened very high quality. The railing of the flight of stairs must withstand a person leaning on it, weighing one hundred kilograms.
The procedure for the installation of stair railings

The entire process of installing railings can be divided into several stages:
- installation of extreme balusters;
- mark the location of the supports. This can be done with a strong twine or level. The quality of future work largely depends on the correctly made markup;
- identify and mark the middle of the balusters with a chalk or construction marker;
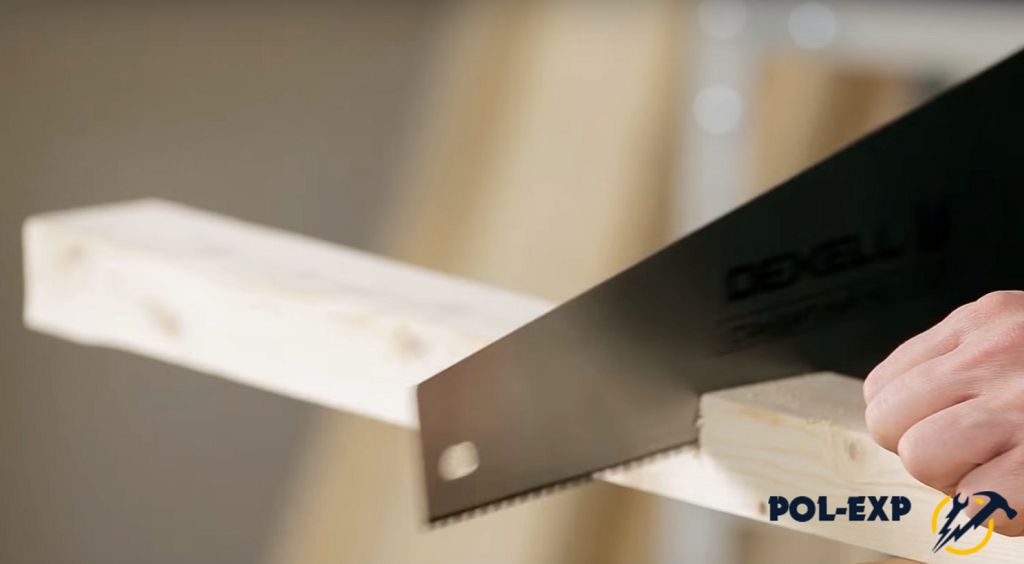
- prepare the upper sections of the supports by sawing them at the same slope under which the entire staircase is located.
If required design features stairs, or balusters are attached to the top of the bowstring, then it is necessary to adjust the lower sections.
Wooden fence
Experienced craftsmen advise using three proven methods of fastening balusters: studs, dowels, self-tapping screws.
Note! Do not use nails to install the main load-bearing elements of wooden railings. After a while, the whole structure will begin to loosen and it will become unsafe to use.
Installation of supports with studs

To mount the support with a metal stud, a hole with a diameter of 12 mm and a depth of 80 mm is prepared in the middle of the baluster. The surface of the stud must be covered with a layer of zinc, then rust will not form on it. Install the stud in the prepared hole so that it protrudes from it by at least 50 mm, then fix it with glue.
Installation of supports on dowels

Holes for dowels are prepared with a drill on the sections of the balusters and in the steps. Install them in the prepared holes using glue. Install the supports on the dowels (having previously processed the holes in them with glue). The supports must be vertical, check their position with a plumb line or level. Wait for the glue to dry and only then begin the installation of handrails.
Installation of supports with self-tapping screws

The easiest and least time-consuming option is to install supports using self-tapping screws. Make sure they are made of stainless steel. Screw a self-tapping screw into the baluster installed vertically at an angle so that its part that comes out of the support is screwed into the step.
Note! The head of the self-tapping screw should be slightly recessed; when performing finishing work, you can easily close this recess, and the cap will not be visible.

Metal balusters look organically on stairs of any design and made of different material. Wrought iron railings give the room sophistication, but not all Russians can afford to have such a railing in the house.
Balusters made of stainless steel or other metal are equipped with fasteners that are suitable for concrete, wood, metal and glass. Such fasteners can be made in the form of hidden screws.
Video
How to prepare balusters for installation and carry out installation correctly:
The staircase design includes a huge number of different parts and elements. If you wish, you can bring the interior of your home to your conditions by installing handrails and balusters with your own hands. This will be a good experience, and in this way you will be able to bring a pleasant atmosphere into your own home. In addition to the main structure, which, of course, will also require the installation of railings, balusters, stringers and many other elements. Do not be afraid, intricate names, there is nothing complicated behind them, the entire installation process can be performed even by a person who is not the most experienced in these matters. If you do not know how to do everything right, then you can always contact the specialists in the sale and installation of stairs nn-lestnica - professionals will install the stairs and make the necessary measurements.
Installation of balusters
It is important to know and strictly adhere to certain GOSTs when attaching balusters with your own hands. Yes, it didn’t seem to you that there are a lot of nuances in the process of installing stairs, but don’t worry, if they are consistent and applied, your staircase will be brought to the final look with high quality and reliability. Many are faced with the problem of balusters after all the installation processes. It is often thought that balusters have the property of supporting posts - this is not so. Eli elements differ in their functionality, and purpose should be distinguished. Racks perform the only role, this is a reliable and stable fixation of the structure and nothing more. But the balusters, just play the role of more decorative details.
Their installation is only necessary to create an attractive image of the entire structure and perform some protective functions. After all, in fact, stairs without installed balusters looks dull and unimpressive. The fastening of balusters occurs depending on the type of the staircase itself. For the safety of flights of stairs, you should use balusters with a height of 85-90 cm, and a cross-sectional size of not more than 8 cm. Also keep in mind that the distance between the elements should not exceed more than 20 cm. According to GOST, it is the distance up to 15 that is considered standard and should be followed.

There are many different installation methods. Any method of fastening is simple, and here everyone makes a choice at their own discretion. When following simple recommendations, installing balusters with your own hands will turn out to be a trifling matter for a novice master. One of the most popular and durable fastening options is using studs specifically for the bowstring. In such cases, the balusters are attached without screws, which gives more aesthetics to the structure. Self-tapping screws will not stand out from the general plan and will give a noticeable individuality. You can dwell in detail on fastening with studs or bolts. Structurally, the difference between these parts is not great, which allows you to do the same steps for both.
A small master class that will allow you to do similar work on your stairs yourself. So:
- balusters need to make an axial hole, you can use a drill for this;
- a hairpin will need to be screwed into it, the approximate diameter must be calculated based on the baluster, but the standard size is 8 mm, and what would still be about 6 centimeters left on the ledge;
- for additional reliability, the hairpin can be fixed with wood glue;
- at the installation sites of balusters, above and below, you will need to tighten the screws;
- between them, one should pull a thread, only of dense quality;
- already seeing an approximate trajectory, you can outline the necessary places for installation, additionally marking with a ruler in relation to each other;
- using a drill with a nozzle, for perpendicular drilling, you need to make a hole for the key to tighten the stud or bolt;
- screw the balusters, and check the location and fixation on the square.

Do-it-yourself wooden railing installation
Do-it-yourself installation of wooden balusters and railings will require some actions that will facilitate and improve the design in terms of safety and durability. Here is a list of steps to help you with the installation:
- first to first, it is necessary to carve a groove in the handrail, and the groove must exactly repeat the cut of the baluster itself at the top;
- prepare a rail, taking into account the width of the lower groove of the handrail itself;
- carve a rail for decorative purposes, in size corresponding to the upper groove of the handrail;
- fix the rail, in this way, on the side of the balusters so that you can cut the top to match the flight of stairs;
- with the help of screws, fix the rail to the supporting part of the balusters;
- cut the handrail so that there are no gaps with support posts in the upper and lower parts;
- you can fix the railing with glue or self-tapping screws, you can also use both components for reliability.
wooden poles
Pillars, unlike balusters, already perform the function of the main support. The process of installation and fastening is similar. The principle of fastening is identical, it is necessary to drill a hole into which subsequently screw a stud with a diameter of at least 10 mm (this is important to consider, for greater reliability, depending on the pole itself, you can increase the diameter according to the size). For greater reliability, you can drop wood glue inside. The last stage involves twisting the column to the stop. With this method, fastening is carried out using an anchor, which can later be hidden under the pole itself. It is difficult to fix the support pole to the floor. It used to be popular and it was considered the most secure to fasten with the help of "grouse", but more and more craftsmen are inclined to use zip bolts.
Fastening with capercaillie bolts

For "wood grouses" more skill is required to work with wood or metal, there is no fundamental difference here. It is necessary to cut or drill a special groove so that the corner part is oblique, in order to be able to "crawl" with a key. Fastening using a zip bolt.
When mounting through a gear bolt, there are several nuances, such as:
- a technological hole should be made in the support;
- drill a hole in the floor for the stud;
- screw the pin onto the base with a key;
- attach a pole on top;
- install a gearbox in the technological hole so that the dash of the control mark coincides with the axis of the stud itself;
- use a hex wrench to pull a pole to the floor;
- optionally, you can install a cap in the color of the design to hide the details without spoiling the design.
The staircase in a private house performs 2 important functions. First of all, this is a way to get to the second floor. In the second - a design element that sets the tone for the entire interior. Stair railings provide safety and aesthetics. They can be forged, wood, aluminum, or stainless steel. How to install balusters and railings with your own hands according to the sketches? Photo examples and a useful video with assembly instructions will help you understand the topic.
Barrier elements of the stairs
Any ladder is supplied with barriers. These include:
- railings or handrails. Protect from falling, serve as a support for movement. Are established from one or from two parties;
- balusters. Support posts for attaching handrails;
- fence fillers. An optional element that serves to fill the space between the balusters, ensures the safety of children;
- crossbars. Additional guardrails installed parallel to the railing.

Interestingly, according to the law of the Russian Federation, any staircase with more than 3 steps must be equipped with a railing.
Types of railings, characteristics of materials of manufacture
The material from which the railing is made determines the appearance, functionality and cost of the stairs.
Handrail types:
- wooden. Comfortable, suitable for all styles. Even if the steps and balusters are made of other materials, builders recommend choosing a wooden fence. This material is environmentally friendly, pleasant to the touch and aesthetic, because. various design options are possible. For example, railings can be carved in the form of a wave, horses, lions or flowers. The only disadvantage of the application is the need to timely treat the surface with an antiseptic and varnish;
- metal. They can be made of cast iron, aluminum, brass, iron, stainless steel. Each species has its own characteristics. Aluminum is lightweight but not strong. Polished stainless steel - a more durable material, combined with glass and wood;
- forged metal. This material is isolated in a separate form, because. it is significantly different in appearance from metal counterparts. Forged handrails and balusters can have a unique pattern. They always look elegant, original and prestigious;
- PVC. Most often, plastic is used that imitates wood. It is a strong, durable material that is several times cheaper than wood;
- combined structures. Wooden steps with railings and aluminum balusters look interesting. It is possible to combine forging and wood, aluminum and tempered glass, plastic and stainless steel base.

Dimensions of the main elements
When preparing for the installation of railings and balusters, you need to know the standard dimensions of the elements. Then, based on the main indicators, calculate the individual dimensions of the future product.
Attention! When planning the installation, you should calculate the distance between the balusters so that the head of the child does not fit there.
The most massive should be the extreme balusters, because. they act as the main supporting element. The rest of the racks are more elegant. The optimal distance between them is 15-20 cm.
If fence barriers or crossbars are used, then it is allowed to install balusters at a distance of 80 cm - 1 m.

The standard height of the handrail for adults is 90-100 cm. Handrails for children are mounted at a height of 50-60 cm.
Preparing for installation
If you have decided on the material of manufacture, then you can proceed to the construction plan. The plan should include a drawing with exact dimensions, a calculation of the required amount of materials and an approximate amount to be spent.
Advice. In order to determine the desired height exactly to the centimeter, you need to install the extreme baluster and stretch the rope from it at the estimated distance from the steps. If it is convenient to climb, holding on to the rope, then you can leave this indicator. If necessary, correct.
Balusters, unlike railings, can be made of natural or artificial stone, as well as from cement, concrete or gypsum. This also needs to be taken into account when making a plan. The type of fastening of the balusters will depend on the material, and it is usually chosen based on the design of the room.

Self-manufacturing of the staircase railing does not mean at all that each element needs to be made by hand. The main thing is to correctly draw a sketch, or find a suitable drawing on the Internet. Then - purchase the necessary components and assemble them according to the plan.
Installation of wooden railings
When the material, appearance, dimensions are determined and all components are purchased, you can begin to assemble the structure. For this you will need:
- drill and screwdriver;
- wood saw;
- level, tape measure, pencil;
- sandpaper.
Action steps:
- Mark the installation locations on the steps.
- Install the outer balusters with self-tapping screws with a diameter of 10 mm, a length of 80 mm.
- Install the remaining supports at a distance of 15-20 cm.
- Drill holes in the railing in accordance with the location of the supporting elements.
- Pull the string to the correct level.
- Align the balusters to the level of the twine.
- Attach the railing to the support posts with self-tapping screws.

Before fixing with self-tapping screws, the craftsmen advise gluing the entire structure to give it additional strength.
Installation of aluminum railings
A significant advantage of aluminum - easy installation that can be handled by a non-professional.
Action steps:
- Drill holes with a depth of 100 mm and a diameter of 18 mm at the places where the balusters are to be installed.
- Fill the holes with glue.
- Insert the anchors into the adhesive so that they fit snugly.
- Fix the balusters on the anchors.
- Put on flanges through the top of the balusters (metal discs for fastening the ends of pipes) and glue them to the steps, and put hinges on the very top.
- Install the railing on hinges, adjust the height and screw to the supports with self-tapping screws.
You can connect the handrails of two flights of stairs using rotary elements.

Installation of stainless steel handrails
The assembly of the structure is similar to the installation of aluminum railings, however, there are slight differences.
Attention! Holes for installing balusters should be drilled in the middle of each step, departing from the edge of 35 - 50 mm.
Step-by-step instruction:
- Fix the first and last support baluster.
- Install intermediate support elements according to the sketch.
- After adjusting the height of the balusters, fix the railing on them using self-tapping screws.
- Muffle the edges of the railing with plugs, or use special rotary elements to connect with the next march.
The individual design of the staircase and its blocking elements consists in the choice of material and shapes of the railings and balusters. A competent installation depends on the careful calculation of dimensions and compliance with all stages of installation. Staircase with a well-thought-out design will be the highlight of the interior.
Installation of balusters and handrails - video
Installation of balusters and handrails - photo


Any ladder structure that has more than three steps must be equipped with railings that increase the safety of movement. There is even a GOST for a flight of stairs, but usually the standards, if they are observed, are with great violations (for example, the required height or width between the uprights is not adhered to).
In this case, one should not confuse the main racks, which are installed along the edges of the flight of stairs (in the center, if the march is large), and the balusters, which perform a decorative and protective function.
It must be understood that before wooden stairs, (as well as, by the way, any) should withstand all the standards that are characteristic of this design. This is not a whim and not a desire of manufacturers to take as much money from consumers as possible, but a norm that allows you to protect yourself, especially children, from accidental injuries.

- The height of the fence should not be less than 900 mm, measured from the surface of the step to the top edge of the handrail. Of course, it is adjusted on an individual basis, but it is in your best interest to make the stairs a safer place for children.
- The distance between vertical posts should not be over 15 cm, otherwise, the child will be able to stick his head in there, and this is very traumatic. If it is not possible to comply with this requirement by placing one baluster on one step (support), it is necessary to install two balusters on the same plane.
For your information! Such problems do not arise when wooden stairs with wrought iron balusters are installed, the absence of gaps makes the design the safest.

- The installation of metal balusters should be carried out on special fasteners, and in the case of wooden posts, you can use self-tapping screws or dowels and glue.
- Pillars can have different shapes: flat, square, round, oval and others, this parameter does not affect the design component. On the other hand, it is very important what material the balusters will be made of.
In our article, we will tell you about how to fix the balusters on a wooden staircase with your own hands, saving on the call of expensive specialists. The instruction will be described in stages, using various methods.
Available ways to install balusters
First, let's look at what a wooden rack consists of:
- central part- decorative component.
- Base- plays the role of a support, in the case of a wooden baluster, this element is made a little larger than the planned fence. This is necessary to adjust the desired height.
- railing support- fastened to the railing itself or the railing.
Now that you know what elements the baluster can be disassembled into, let's start learning how to install the racks:
Hairpins on a bowstring
One of the most common options when the balusters of wooden stairs are fixed without the use of self-tapping screws.
- The first step is to make a shallow hole in the middle of the wooden post, at the bottom end. Hole diameter 12mm, and the depth no more than 80 mm– depending on the studs used.

- Now you need to cut the baluster at an angle, it is better to use a miter saw with the ability to set the desired angle. Measurements are taken for each step, especially if there is a large height difference in the structure.
- Insert studs with M6 thread into the drilled holes, it is better to use galvanized products to avoid rust.
- Using PVA glue, fix the studs so that they peek out 5-7 cm.
- Now you need to drill holes in the string, diameter 13-14 mm, and a depth of about 80 mm.
- When all the holes are ready, you can put the balusters in place by inserting the studs into the finished recesses.
Note! In this process, the accuracy of marking is very important, so it is better to use a laser level, which allows you to determine a single line without any problems.

It remains for you to fix the handrail on the balusters for wooden stairs, this is done by gluing it to the railings fixed on the uprights. In turn, they are also mounted to the balusters with glue, although self-tapping screws can also be used.

Fasteners for dowels
Since the balusters, for the most part, are practically not under load, the entire weight is distributed between the support posts, they can be installed on wooden dowels.
- First you need to mark the steps and the bottom of the balusters.
- After that, holes of the same diameter and depth should be drilled in them.
- Fill the holes on the steps with PVA glue, insert the dowels and leave in this position for several minutes.

- After - install a baluster, the recess of which is also filled with glue.
- Wait 2-3 hours so that the glue is completely seized, only after this time, you can proceed with the installation of the railing.
The railing is attached in the same way to the dowels, here it is very important to drill the holes correctly, otherwise the design may be slightly uneven. Or technological holes will appear.
Important! When cutting the balusters, do not forget that a certain part of the rack will be recessed into the grooves of the railing and the bowstring, the height of the fence may change.
Self-tapping installation
The easiest way to install wooden stair balusters is to use stainless steel wood screws. They securely tighten parts of the fence with steps or support.
- First you need to screw the self-tapping screw into the column so that its sharp tip sticks out a few millimeters.
- Having prepared all the balusters in this way, starting from the very first rack, you should put up a pole, measure the level and screw the self-tapping screw to the end.
- Decorative balusters are installed according to the markings that are made by these sharp tips.
Note! It is better to screw the self-tapping screw at an angle and slightly sinking the hat. The recess is then sealed with wood wax.

Beginning of stairs - support post
We did not tell you about how the main part of the fence should be fixed, which will take on the entire load - support post.
To fix it, two methods will now be described:
- capercaillie- first you need to make a groove at the bottom of the rack. A capercaillie is screwed into the prepared hole (it is a hardware with a thread and a head, like a screw or bolt), its diameter depends on the size of the baluster. The complexity of this method lies in the preparation of the groove, which must have a non-standard shape with an oblique angle and at the same time not violate the strength of the rack.
- With bayonet nut- everything is much simpler, just a cutout is made and a nut is inserted into it. You just need a special tool - a segment washer and a key.
The price of both methods is different, but it is not possible to call any of them the most affordable and low-cost, in terms of labor.
Features of balusters and installation process
We have already talked about the fact that there are certain norms and standards for fencing, while we listed them earlier, but there are also points that you learn about only during work:
- Wooden stairs with forged balusters must be carefully treated with various protective agents, otherwise, there is a possibility of damage to the natural material.
- Plus, do not forget about the allowable load that will be carried out on the supports and steps - too massive railings can cause deformation of the structure.
- Check the integrity of the fastener before purchasing it. Even, it would seem, such "rigid" things as wood screws can have their own specific service life and often such a product is sold as a reliable hardware.

In the presented video in this article you will find additional information on this topic.
If it is planned to equip the stairs in the house, then it is important to think, first of all, about the safety and reliability of this design. Regardless of whether construction is underway right in a residential building or in a country house, all the details of the stairs must be fixed as tightly as possible to avoid accidents and injuries. This issue is especially relevant in a house with children, because they love to indulge and use the structure for their fun games. In many ways, the safety of the stairs depends on how securely its railings and supports for them are fixed on the steps and the floor. How to fix balusters to the floor?

The correct staircase always consists of several elements, and some are needed in large numbers - their number often depends on the length of the flight of stairs. The main details of this design are as follows:
- railings or handrails, for which you can hold on when lifting;
- steps, along which, in fact, a person rises to the floor above;
- balusters, which are special columns that support the railing and create a kind of fence on the stairs;
- may also have supporting pillars on which the entire structure is based.

Balusters, as mentioned above, are columns that are installed on the steps under the railing. They serve as supports for the railings themselves, and also act as fences. Any staircase that has 5 or more steps should have them.
On a note! These supports also have an aesthetic role - with their help, a staircase can be turned into a real work of art. After all, balusters can have a very different configuration and look quite beautiful.
Each rack has a support, a central part and a base. The center is usually done in a beautiful form to give the structure an interesting look and make the staircase part of the interior. And the support and base-end are needed in order to be able to attach the column to the floor and the handrail.

What are balusters
These elements can be made from almost anything. They are usually made of wood, glass, concrete, stone or metal alloys. For the manufacture of wood products, species such as birch, pine, beech, oak are used. Metal elements can be made of bronze, steel, various alloys.

Conventionally, all balusters made of wood can be divided into 3 groups.
Table. Types of wooden balusters.
| Group | a brief description of |
|---|---|
| They are made using lathes and usually resemble bodies of revolution in shape. |
| They can be made by hand or using a programmable multi-axis machine. |
| Such elements are decorated with a mass of carved elements, they have helical, longitudinal, oblique cuts. |


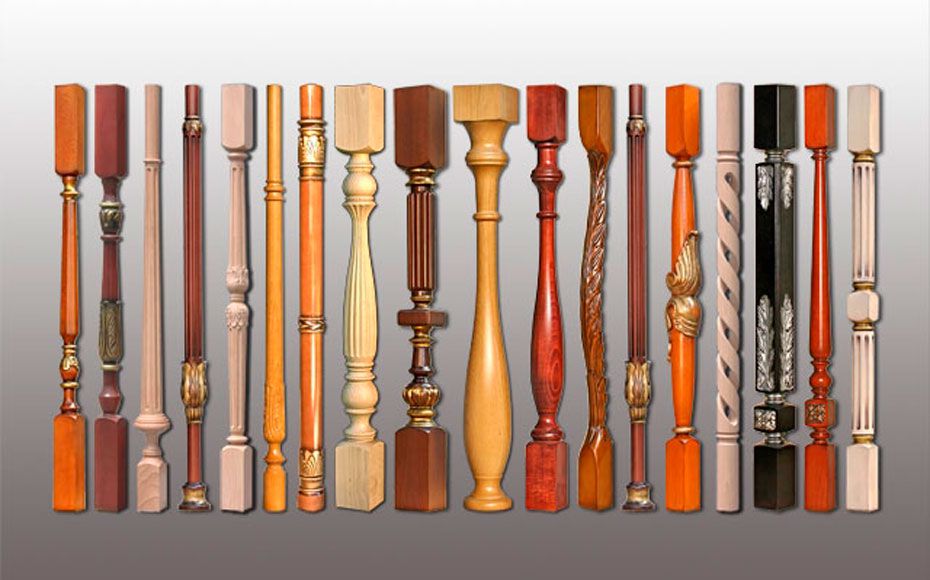

But concrete balusters usually have the shape of flowerpots or resemble small columns in appearance. In general, these elements of any material can be flat, dotted (round) or sculpted.

On a note! The distance between adjacent balusters should not exceed 15 cm, and the height between steps and railings (that is, the height of these elements) cannot be lower than 90 cm.
How these elements of the ladder structure will be attached will directly depend on the material from which they are made. But no matter how beautiful the balusters are, the most important thing is that they are securely fixed to the floor, steps and railings.
Prices for balusters for stairs
balusters for stairs
Why is it worth choosing and fixing balusters carefully?
Beautiful balusters are not only an opportunity to give the staircase a finished look and make it unique. They will help to make it a full-fledged element of the interior. But, despite this aesthetic aspect, balusters, first of all, must be strong, reliable and well fixed. Otherwise, there is a risk of injury to those who will move up the stairs.

Important! Glass balusters, even of the highest quality, usually perform precisely a decorative function - you should not rely on their reliability, therefore it is not recommended to install them in a house whose residents lead an active life.
Balusters must have solid foundation to be well anchored. It is also recommended to install them so that a child's head cannot pass between them. With other aspects of their installation and appearance You can now experiment as you wish. But you should not order them in the form of some unreliable or extravagant elements - in case of cardinal changes in the interior, the balusters will also have to be changed, and if they are thin, then there is a risk that in the event of a strong impact when a person falls on them, they simply will not withstand and break.

About fastening methods
So how to fix the supports on the stairs? There are three main methods:
- with the help of dowels;
- on self-tapping screws;
- with pins.
Sometimes balusters are fixed to the steps and the floor directly, and in the upper part - with the help of a baluster bar. But this element is optional.

Wooden balusters are usually attached using threaded fasteners. Some columns are also poured directly into concrete if the staircase is made from it. But for fastening supports to concrete, impact dowels can also be used. Also, to increase the reliability of the connections, mounting glue is used when assembling the structure.
On a note! Balusters made in production are usually sold with special fasteners already available.
How dowels are used
This is one of the easiest options for attaching balusters. Dowels are small wooden plugs or chopsticks, it is enough to insert them into the grooves prepared in advance, which are cut out both in the stairs themselves and in the balusters in their lower part. In another way, this connection method can be called "thorn-groove".

This method is used only for fastening props made of wood - it will not work for other materials. In the case of a bowstring, holes are created in the latter at equal distances, the diameter of which will be equal to the diameter of the dowels. The same holes are drilled on the base of each support. The dimensions of the grooves should be such that the dowel fits snugly into them.

Advice! To make the connections reliable, the grooves are smeared with glue (carpentry, assembly or PVA) before installation. Only after that dowels are inserted into them.
One of the balusters will also have the function of supporting the railing, so you need to fix it not on the dowel, but on the anchor, and fasten it directly to the floor. In this case, it is important to follow a simple rule - the inner wedge is not twisted, but hammered to the restrictive side. Installation of a bowstring or railing is usually done after attaching all the supports.

Stud fastening method
No less than dowels, studs are used to install and fasten balusters, which are metal products equipped with threads. Working with them is also not difficult: on the steps of the stairs, places are marked where the balusters will stand. Further, holes with a diameter of 12 mm and a depth of 80 mm are drilled on them, where the pin is screwed. Also, a hole is drilled at the end of the posts, right in the middle. It remains to put the baluster on the hairpin and you're done.

Two extreme balusters are installed at the same time. Only then can you proceed with the installation of the remaining supporting elements.
How to work with screws
Self-tapping screws are a truly universal fastener. They are used in almost all construction areas, including the installation of stairs. With their help, you can also fix balusters, moreover, both made of wood and made of metal.

In this case, it is best to use a plate to attach the balusters to the steps. It is attached to the base with bolts and holds the support. And if you use a baluster, then the tie-in points of the self-tapping screws are easy to hide at the base of the posts.

It is more convenient to make fasteners from below if the steps do not have a riser. In other cases, the connection points can be masked.
Features and installation rules
Before we talk about the exact installation instructions for balusters, we recommend that you familiarize yourself with some of the features of the installation of these products and the stairs themselves. If everything is done correctly, then the stairs will be completely safe to use.


Installation of metal balusters
It is worth mentioning some of the features of fastening balusters made of metal. We will talk about forged products. The fact is that it is important here to hide the attachment point so as not to spoil the overall impression of the design. Usually, such balusters are fastened with special screws, which will be decorated to match the general style of the products - then they will be almost invisible.

Sometimes hinges are also used during installation, usually on support beams for stairs. They can become an additional decoration element if used correctly.

How to fix the baluster?
To understand how the balusters are fastened correctly, let's get acquainted with how the entire staircase structure is assembled. This structure will be mounted on supports, and its upper part will be fixed to a reliable floor beam.
Step 1. First of all, it is calculated required amount stairs steps. For example, you need to climb to a height of 2 m. Then the height from the floor of the first floor to the floor of the second must be divided by the step of the stairs (for example, 20 cm); 2 m divided by 20 cm, resulting in 10 steps. Also, the staircase must fit into a certain place in the house in terms of its dimensions (2x2m). On one of the sections of the stairs there will also be a small platform measuring 1x1 m, overhang - 5 cm. Thus, the required size for the calculation is 95 cm. The length of the stairs is calculated: the platform size is subtracted from the length of the opening - 2 m minus 95 cm. The result is 105 cm. This value is divided by the tread (25 cm), the result is 4.2. This is how many steps will fit in the length of the opening.

Step 2 The site will be located at a height of 1 m from the floor. Before it from the first floor you need to place 4 steps. The location of the remaining steps of the upper march is also being designed.


Step 3 The site is being collected. For the manufacture of supports, a burs with a size of 90x90x3000 mm is used. 4 supports 960 mm long are cut out of the timber. And from a bar 3000x100x60 mm 8 pieces 950 mm long are made. Cross-beams for supports are made from these segments, which make the platform stronger.
Step 4 Before fixing the bars, the diagonals of the blank structure are checked.

Step 5 The bars are fixed to each other with self-tapping screws.


Step 6 The two resulting structures are interconnected by crossbars from a bar of 100x60 mm.

Step 7 This results in a rectangular structure with a height of 960 mm and a width of 950 mm.

Step 8 The site is being installed. Its size is 1x1 m. It is slightly shifted on the structure in order to get an overhang. Also in the site, cuts are made for fastening the bowstring.


Step 9 On the other edge of the site, a single bowstring is washed down, while in the previous step two washings were made.

Step 10 The location of the fence posts is marked.

Step 11 The bowstring and steps are being installed. The length of the march is measured from the edge of the structure. One edge of the bowstring is installed in this place, its other edge is placed on the platform. A mark is made on the string. A mark is also applied at the bottom of the bowstring, but in the middle of the vertical. From this mark, a horizontal line is drawn along the level to the edge of the bowstring. Excess pieces of string are sawn off.


Step 12 The bowstring is mounted to the poles with screws.


Step 13 To mark the fasteners of the baluster supports, they are installed on the site and circled with a pencil. The circled square is drawn with diagonals. A hole 20-25 mm in diameter and 100-150 mm deep is drilled at the intersection of the lines. The same procedure is done on the end of the fence post.


Step 14 Dowels with a diameter of 19-24 mm and a length of 190-290 mm are driven into the holes on the base. The column is being installed.


Step 15 The lower column will be attached to the bowstring. To do this, holes for bolts are drilled in it from the side.


Step 16 Steps are being installed. On the bowstring, the location of the steps is marked with a ruler, level and pencil. The distance from the floor is 200 mm. The mark is the top edge of the step.


Step 17 The length of the steps in this case is 80 mm. It is equal to the distance between two strings. Steps are sawn from the boards.

Step 18 Corners are attached to the steps with self-tapping screws. The steps are mounted to the bowstring. The top edge of the steps is equal to the mark.


Step 19 The handrail is installed. Its length is equal to the length of the string.


On a note! Balusters are usually installed before handrails are installed, but vice versa can be done.
Step 20 The distance between the balusters on the string is marked.

Step 21 A cut mark is applied to the balusters from above and below - from the bottom of the handrail to the upper edge of the bowstring. 5 mm is added to the mark obtained - this part will go inside the handrail if it has a groove on the back side. Balusters are sawn according to the marking.


Step 22 Balusters are being installed. First, they are fixed in the upper part, to the handrail, using self-tapping screws. In this way, the ladder is assembled completely.


Prices for wooden dowels
wooden dowels
Video - Installation of stairs
Video - How to fix balusters
You can assemble the stairs and fix the balusters on it with your own hands, saving significant funds on the work of specialists. If you follow all the recommendations and work according to the instructions, then even a novice master should not have problems.