Here is my new project - a drawer for a kitchen cabinet. You only need to purchase special mechanisms, some wood of any kind, as well as calculations. Your nightstand will become more comfortable and roomy, you can easily organize small items.
Make a drawer: step by step instructions
Step 1. To begin with, disassemble the nightstand with your own hands. You will need this for the convenience of further work. This must be done as carefully as possible.
Step 2 Measure the dimensions of your future drawer so that it fits perfectly into the cabinet. You need to take into account all the parameters: the depth of the drawer, the front panel, the sides, and also the bottom. Remember that this stage must be thorough and extremely careful. Of course, it all depends on the size of the bedside table in which you want to add a small drawer with your own hands.
Step 3 Cut out the support piece. Since your box is wooden, choose only high-quality material for it that will last you a long time. It should be absolutely free of defects, as well as debris. A good board is perfectly flat, so consider this parameter as well. The thickness of the plywood used for support is different in that it can support the weight of the items in the box.
Depending on your needs, all other sizes are selected. Check the parameters several times, adjust every detail, process. Make sure that the finished drawer will fit perfectly into the nightstand. The basis of the product is the bottom, which must be exceptionally strong, as well as correctly cut. Check the right angles and the quality of the cuts.
Step 4 Cut out the side panels of the drawer with your own hands. This must be done from the same material as the bottom. Your bedside table should look harmonious with the new drawer.

Step 5 Attach the side pieces to the bottom. To make fasteners with high quality, it is worth using special glue, as well as screws or construction clips. Remove excess wood glue with a damp cloth.

Step 6 The next step is to make the front and back of the box. This is easily customized by hand, given the dimensions of the bottom and the thickness of the side elements. Mounts also involve the use of not only familiar materials, but also glue. It captures all the details in the most efficient way.

Step 7 To make a quality box with your own hands, you will need a grinding machine or regular sandpaper. Follow this step carefully so as not to violate the concept of the whole structure, and the bedside table was neat and safe for each user.

Step 9 At this stage, the fasteners are fixed not only on the drawer itself, but also directly inside the cabinet. Use screws for this purpose, as the elements must be fastened with high quality and securely so that the box will serve you for many years. To complete this step quickly, prepare all holes in advance to remove excess debris and accurately fix all elements.
Step 10 Make sure that the parts are correctly fixed. To do this, try on a ready-made box, fixing it in the grooves of the mechanism.
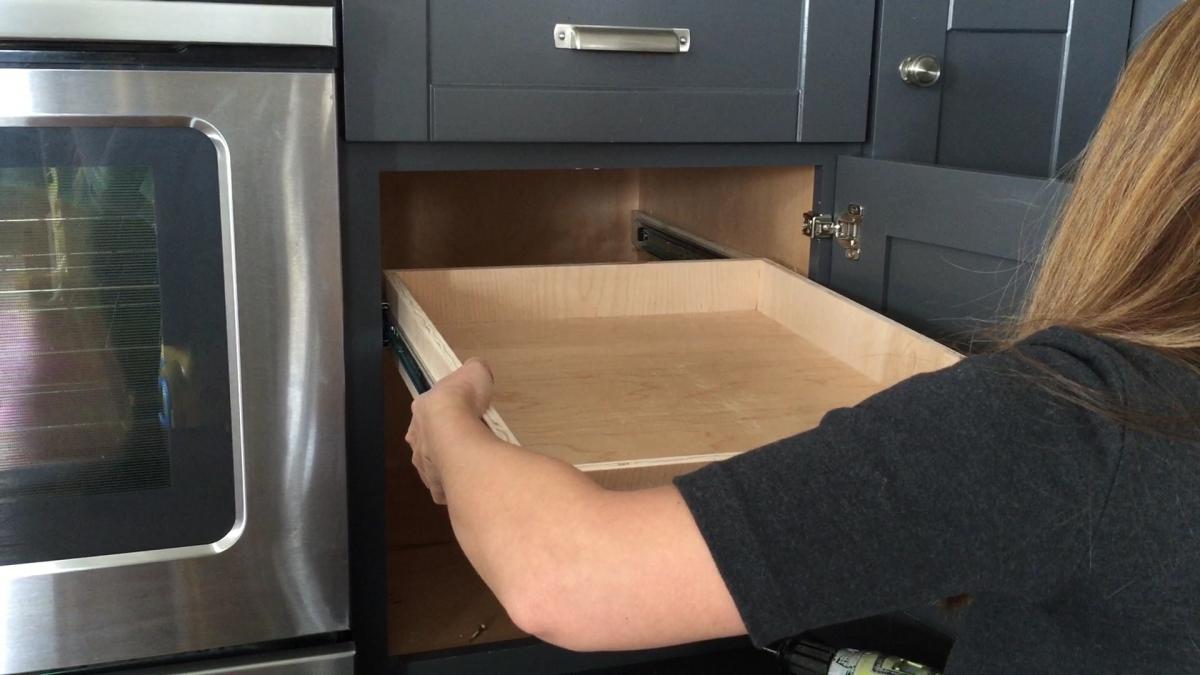
Step 11 Now you can use your drawer, slide it in and out at any time. Your nightstand has become more functional and comfortable for active daily use.
If you wish, you can varnish the drawer in several layers, but ordinary varnish will be enough to make the surface smooth and beautiful, and also safe to use. This is important because there are defects in wooden structures that can cause injury.
You can also tidy up your nightstand. If it is old, you can make it sparkle with completely new colors and become the highlight of a kitchen or room interior.
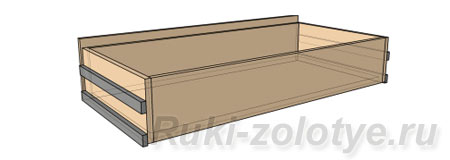
Increase the amount of storage space in your kitchen by making drawers with your own hands. This is a small retractable drawer that is attached to the bottom of a cabinet or cabinet.
Our drawer is made to fit a standard cabinet 60 cm deep and 80 cm wide, but can be made to fit any size cabinet or cabinet. For its manufacture, pine boards and 20 mm birch plywood were used.
DIY drawer ideas
Don't worry if you've never made anything with wood, here's a simplified model that's not hard to make with simple tools.
Tools:
Saw for cutting boards
Portable Circular Saw for Cutting Plywood
Roulette
Screwdriver with a set of nozzles
Countersinks for making holes of various diameters
12mm flat head drill bit for hole drilling
Thickness gauge for marking boards
Drawer Assembly Clamp
You will need:
Pine boards 25X75 mm for the side walls of the box
20mm birch plywood for drawer bottom
Sandpaper P120 and P180
30mm mounting screws
Guides cost about 600 rubles per pair.
Respirator
Wooden plugs to hide the screw heads
40mm screws for shelf assembly
Wood glue
Cardboard spacers
Cotton fabric
Protective glasses.
Review
The drawer is very convenient to use, you do not have to reach into the back corner of the shelf to get the right thing. Assembly and installation is a simple matter, and here we will show you how to make it.

Download original >>
The sides of the drawer can be easily cut with a saw, the bottom can be cut with a circular saw. The parts are joined together end to end, and fastened with screws and glue. Then the box is covered with quick-drying varnish.
There are factory wire baskets and trays available for purchase. But you need to use them carefully, as they can sag under the weight of pots and pans. But do not worry if you make a box according to our advice.
Instruction
Step 1
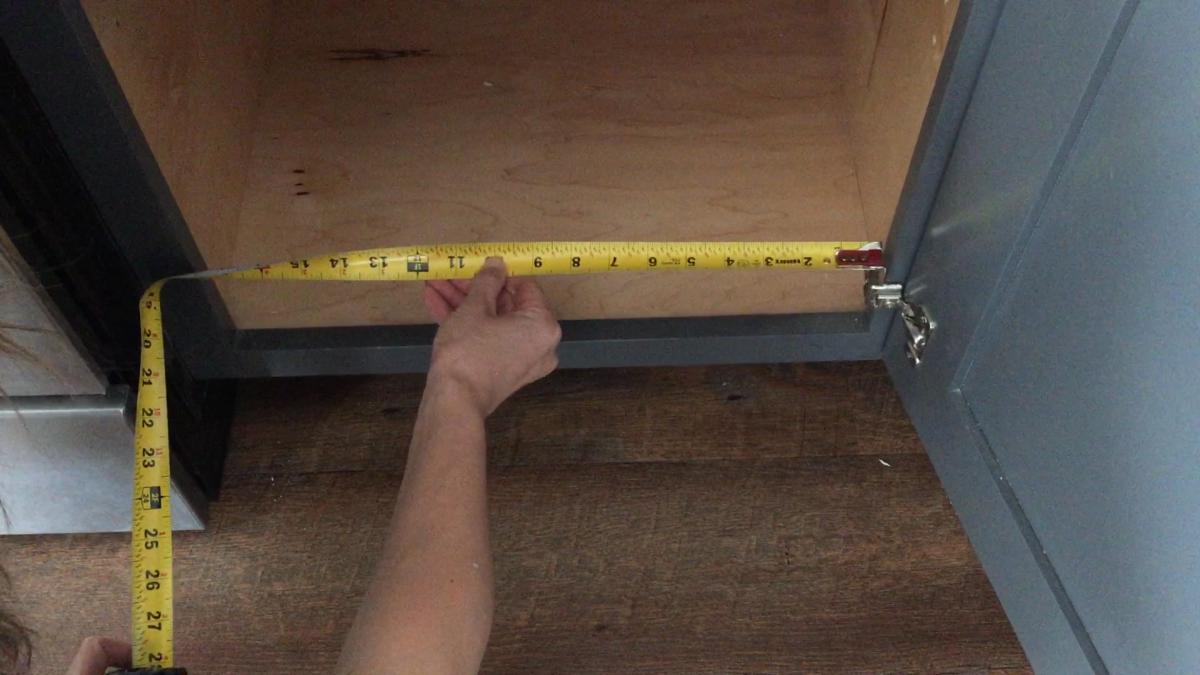
In order for the drawer to slide out freely, it is necessary to make accurate measurements.

Open the cabinet door and put 2 rails inside, measure the distance between the side of the cabinet and the edge of the drawer rail.
Cut two 5 cm planks of wood or plywood, they should be the same length as the guides.
Place two planks on opposite sides of the cabinet, measure the distance between them, and subtract 2.5 cm from the resulting distance, the size of the rails. The resulting value will be the width of the box.
The depth of the drawer is equal to the length of the guide.
Step 2
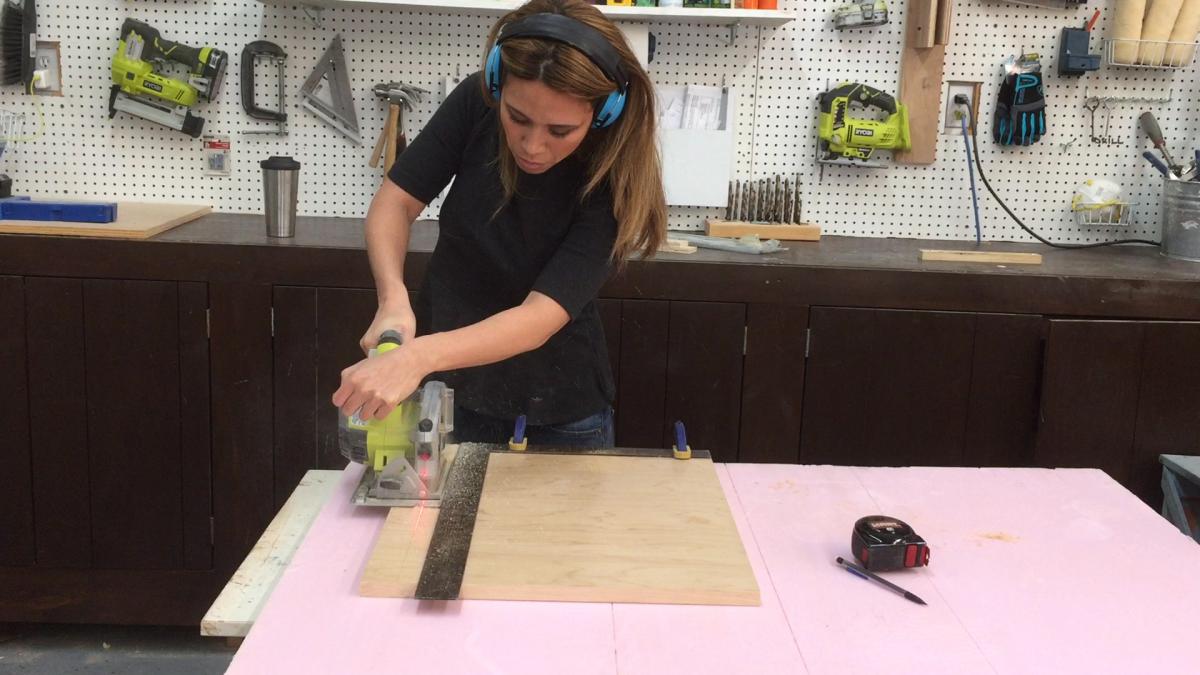
Subtract 3.7 cm from the width of the drawer and from the depth to determine the size of the bottom of the drawer. Cut out the bottom of the birch plywood with a circular saw.
Next, using an electric or hand saw, cut 4 pieces from the board for the walls of the box. The side pieces should be the same length as the depth of the bottom. The front and back must be 3.7 cm more than the width of the bottom.
Clamp the back and sides with the bottom of the box, the bottom edge of the walls and the bottom should be on the same level. Drill holes for screws through the side walls and bottom plywood, every 20 to 25 cm.
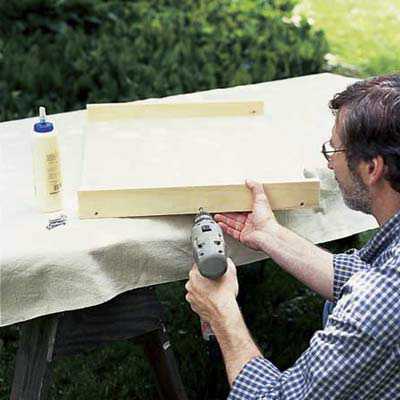
Also drill two holes at the ends of the back wall.
Attach the sides to the bottom with glue and screws. Then attach the back wall to the bottom.
Step 3
Using a flathead drill, drill a 6mm deep hole along the bottom and at the ends of the front wall.
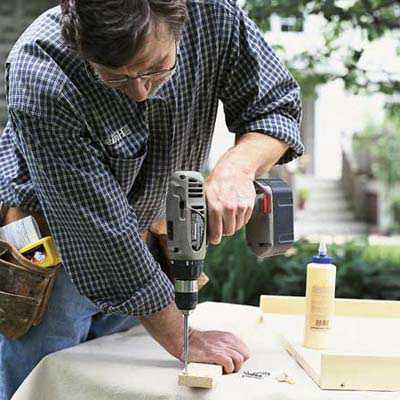
Attach the front wall to the bottom with glue and screws.
Step 4
To hide the screw heads, glue 6mm wooden buttons into the holes.
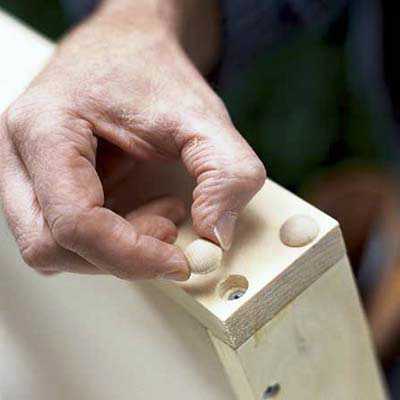
Advice: match the buttons to the color of your drawer.
Step 5
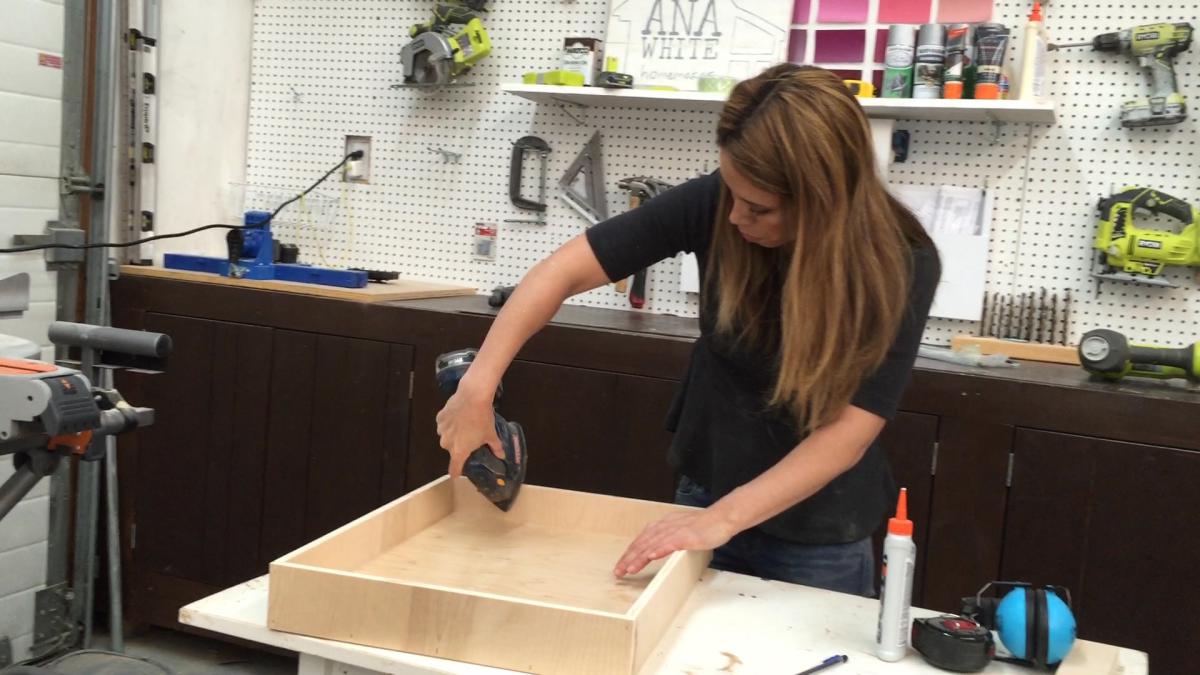
Sand the drawer sandpaper P120. Remove dust with a cloth after sanding.
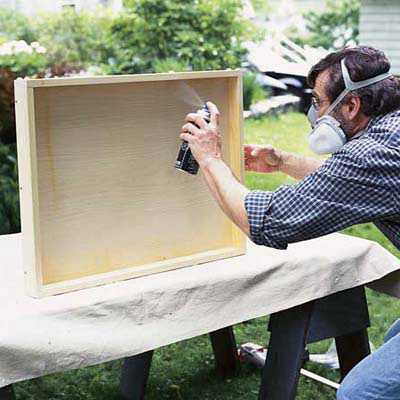
Go outside, put on goggles and a respirator. Apply a thin coat of varnish to the entire box.
Wait for the varnish to dry, this is about 30 minutes, then lightly sand with P180 sandpaper.
Wipe with a cloth and apply a second coat of varnish.
Advice: When spraying varnish, keep a clean rag nearby to wipe up drips and smudges.
Step 6
Prepare guides for installation.
Cut two spacers out of cardboard and place them on the bottom of the cabinet.
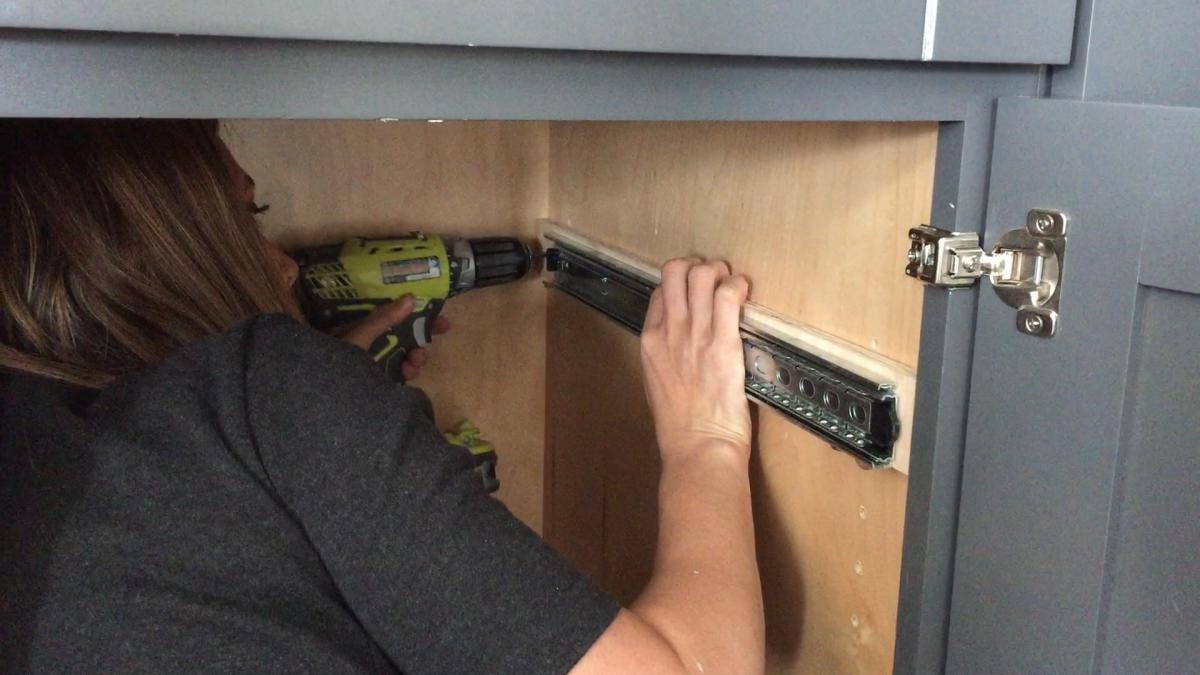
Place one plank you cut off in step 1 on top of the spacer. Fasten it with screws to the cabinet wall.
Place the inner guide on top of the plank and fasten it with screws to the plank.
Install the inner rail on the opposite side of the cabinet in the same way.

Advice: In most cases, it will be easier to install the rails and drawer by removing the cabinet doors.
Step 7
Take one drawer rail and install it on the side of the drawer.
Align the end of the rail with the front of the drawer. Attach the guide with screws to the drawer.

Install the second rail on the other side of the drawer.
Step 8
Remove the cardboard spacers from under the slats. Keep the drawer flush with the cabinet rails.
/ fromIn the modern market for furniture offers, you can find many types and designs of drawers. But we are not interested in their appearance. No matter how good the guides are and no matter how good the assembly is, there are so many cases where problems begin to arise over time. Most often this happens
- when the load is exceeded
- incorrect installation of guides
- exceeding the effective service life
- deformation of individual parts during operation
The problems cited relate to the operation of the mechanics that are used in modern furniture for pulling out drawers. With the box itself, the design - there are fewer problems. Let's take a look at them first.
Problems with the design of the box
The most common problem is the bottom of the box. There are two types of drawer bottom attachment. We can safely say that 90 percent of manufacturers simplify manufacturing and make a false bottom, which is attached to the bottom of the box. Attaches around the perimeter to the sidewalls. This greatly simplifies the technology, the bottom becomes another bearing part, which also takes on the role of a part that forms the geometry of the box box. What to do if there are problems with this type of bottom attachment.
Most often, the reason is insufficiently strong and thoughtful fasteners. The bottom is fastened with studs to the front and back, and guides hold it from the sides. At first, such a scheme works quite tolerably, but over time, the nails become loose and the bottom moves away, even if the box is not overloaded. The way out is to replace.
Nails - forget immediately. Today, only the lazy and frankly stingy use them. For repairs, it is most simple and effective to use furniture staples. A furniture stapler is very inexpensive, staples are even cheaper. If your drawer is not loaded "to the most I can't", 8 mm staples will be enough for you. They are easier to work without habit, they are less deformed and enter to a sufficient depth. But if you are ready to pre-practice and fix the bottom more confidently, take hardened staples 10 mm long. You can use hardened nickel-plated - they are even stronger and do not rust. After - the procedure is simple. We remove the old fasteners and “shoot through” the bottom along the perimeter with brackets. Under the guides too. It is not difficult to remove them - they are fastened with three screws on each side. In this case, it is necessary not to violate the geometry of the box, so break through the sides in sequence.
You can use screws if you have trouble getting the stapler and staples. You will need screws with a diameter of 3.5 mm. There are two generally accepted standards for the length of furniture screws of this diameter - 15 and 30 mm. In principle, 15 is enough. However, it may be that the box is made of low quality chipboard, which is porous inside, so it is better to use 30 mm screws.
Both of these methods are also suitable for replacing the bottom of the box - you will need to cut the material to the desired size and fix it on the box box.
The second type of bottom attachment is a mortise bottom. Most often it is thin plywood, which is glued into the slots on the walls of the box. Such a bottom very rarely causes problems, in most cases they are caused by its destruction. If laminated fiberboard is used, one may encounter a situation where, due to plasticity, the glued zones simply break out of the grooves. Such a “disease” can be treated a couple of times by re-greasing the groove and gluing the bottom in place, but it’s still better to change it right away. This is not an easy procedure, but with some skills it can be done.
- the box must be disassembled;
- clean the grooves without disturbing their shape and thickness;
- order or cut a new bottom part of the desired size;
- assemble the box again by gluing a new bottom;
- allow time for the glue to dry well. Do not load the box.
If the box is assembled using self-tapping screws or confirmations, this can be done easily. However, if spiked joints were used, it is better to contact specialists for disassembly if you are not strong in carpentry. The same actions are performed when you need to replace the plywood bottom. If it is cracked, damaged, deformed or has lost its appearance.
Problems with drawer fittings
Several types of rails are used in drawer pull-out mechanics today. Here we will look at two. Transitional types also exist, but only a few use them. Either as an experiment, or to improve functionality without reworking the main structure. We will not consider such types of fittings.
Roller guides and their "convenient" brothers - metaboxes
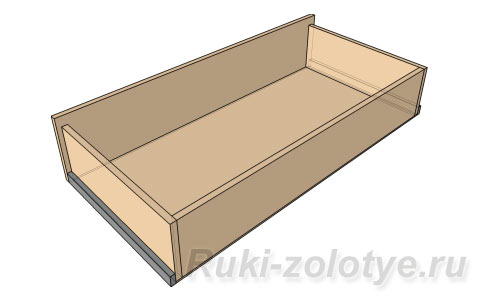
Advantage - simplicity, low cost, ease of installation, the design is such that the box closes under its own weight - the last few centimeters of closing - downhill. Due to this, such guides have become very widespread. The photo of the metabox clearly shows which part of the guide is intended for what. One is attached to the furniture wall (small parts in the photo, bearing), the second - to the design of the box. In the case of a metabox, the second part of the kit forms the entire side wall of the box. A box with roller guides installed looks like this
However, the main disadvantage of this type of guides is incomplete extension. The drawer can be safely pulled out to about 75% of the depth. Let's see what problems can most often arise with such guides. Naturally, we will assume that everything was fine in the “freshly bought” furniture.
Wrong installation
This problem is usually diagnosed immediately, even before purchase. A box with a roller guide correctly installed according to technical clearances moves smoothly, it has a fairly small horizontal play. It is easy to check - you need to try to "shake" the almost closed box to the right and left by the handle. If the play is more than three to five millimeters, the installation is incorrect. This may be due to errors in the dimensions of parts during design, or it may be a technological error of the guide itself. It is no secret that in the modern furniture market there is a sea of small firms that literally save on everything. And cheap guides from dubious manufacturers often “walk” along the thickness of the gap.
Over time, such a problem may arise due to deformation of the structure. A heavily loaded furniture box is deformed if it is made from a slab of inadequate thickness. Again - the manufacturer saved and used the material without thinking about the margin of safety.
Problems caused by changing the technical gap are difficult to deal with. Here it is already necessary to intervene in the design, it can be done in 90% of cases and is not very difficult, but this is another rather voluminous topic.
If the drawer does not close on its own when pushed in under its own weight, this is an incorrect installation of the bearing part of the guide. Most often it is not installed horizontally. You don’t need to touch the front part during such a repair - we don’t want to mess around with the appearance of the gables of the drawers. We unscrew the fasteners - except for one point near the frontmost roller, align it, screw it into place. We do this with a part of the guide, which is located on the furniture wall.
Excess load
This problem is not as rare as it might seem. The reasons can be both banal, like “the manufacturer saved money” or “well, they put a lot of things on,” and non-standard ones - children just love to climb the handles of chest of drawers like stairs or use them as a support to climb higher. And since the last thing they save on now is the handles, the guide suffers.
The problem can be solved in two ways. The main feature is the front wheel of the supporting part of the guide, the one on the furniture wall, “unscrews” - the plane ceases to be vertical, the metal in the attachment area is deformed and the wheel begins to cling to the second guide. You can return the wheel to its original position. It’s not worth hitting with a hammer, you can simply split the roller, but with the help of a vise, holding the sleeve, you can give the part its original position.
However, more often this problem is caused by the manufacturer. There are two main applied metal thickness standards for such guides - 0.5 and 1 mm. The manufacturer could just save. Replacing the guides with thicker ones is not a problem - all the fasteners match. Simply remove the old ones and replace them with new ones.
The same "diseases" and the older brothers of the roller guide - metaboxes. If it seems to you that this does not help either, replace the roller guides with telescopic guides. To do this is quite simple. Below we will talk about roller guides.
Exceeding the effective service life
There's nothing to be done here. The rollers are plastic, they just wear out over time. There is a backlash, the boxes are no longer so confidently opened. The only way out is to replace. You can, of course, use silicone lubricants for some time, but this will not solve the problem.
Deformation of individual parts
This can occur when the guides are carelessly installed. There are not enough fastening points at the load-bearing part on the furniture wall, for example. Then the guide bends, the connections become loose, this is tracked almost immediately. To avoid such a problem out of the blue, ask the seller to pull out the box and make sure that the rails are attached at all points provided by the design.
The same problem can occur when the load is exceeded. In this case, the lack of proper rigid fastening will only exacerbate the situation. It’s easy to “treat” - most often it’s enough for the details to return to their original shape and fix them properly.
The second type of guides - ball. Or the "telescope" type. And their older brothers are “tandemboxes”. They are more expensive, but devoid of all roller diseases. Therefore, they are often used by those manufacturers for whom quality is more expensive than economy. They look like this
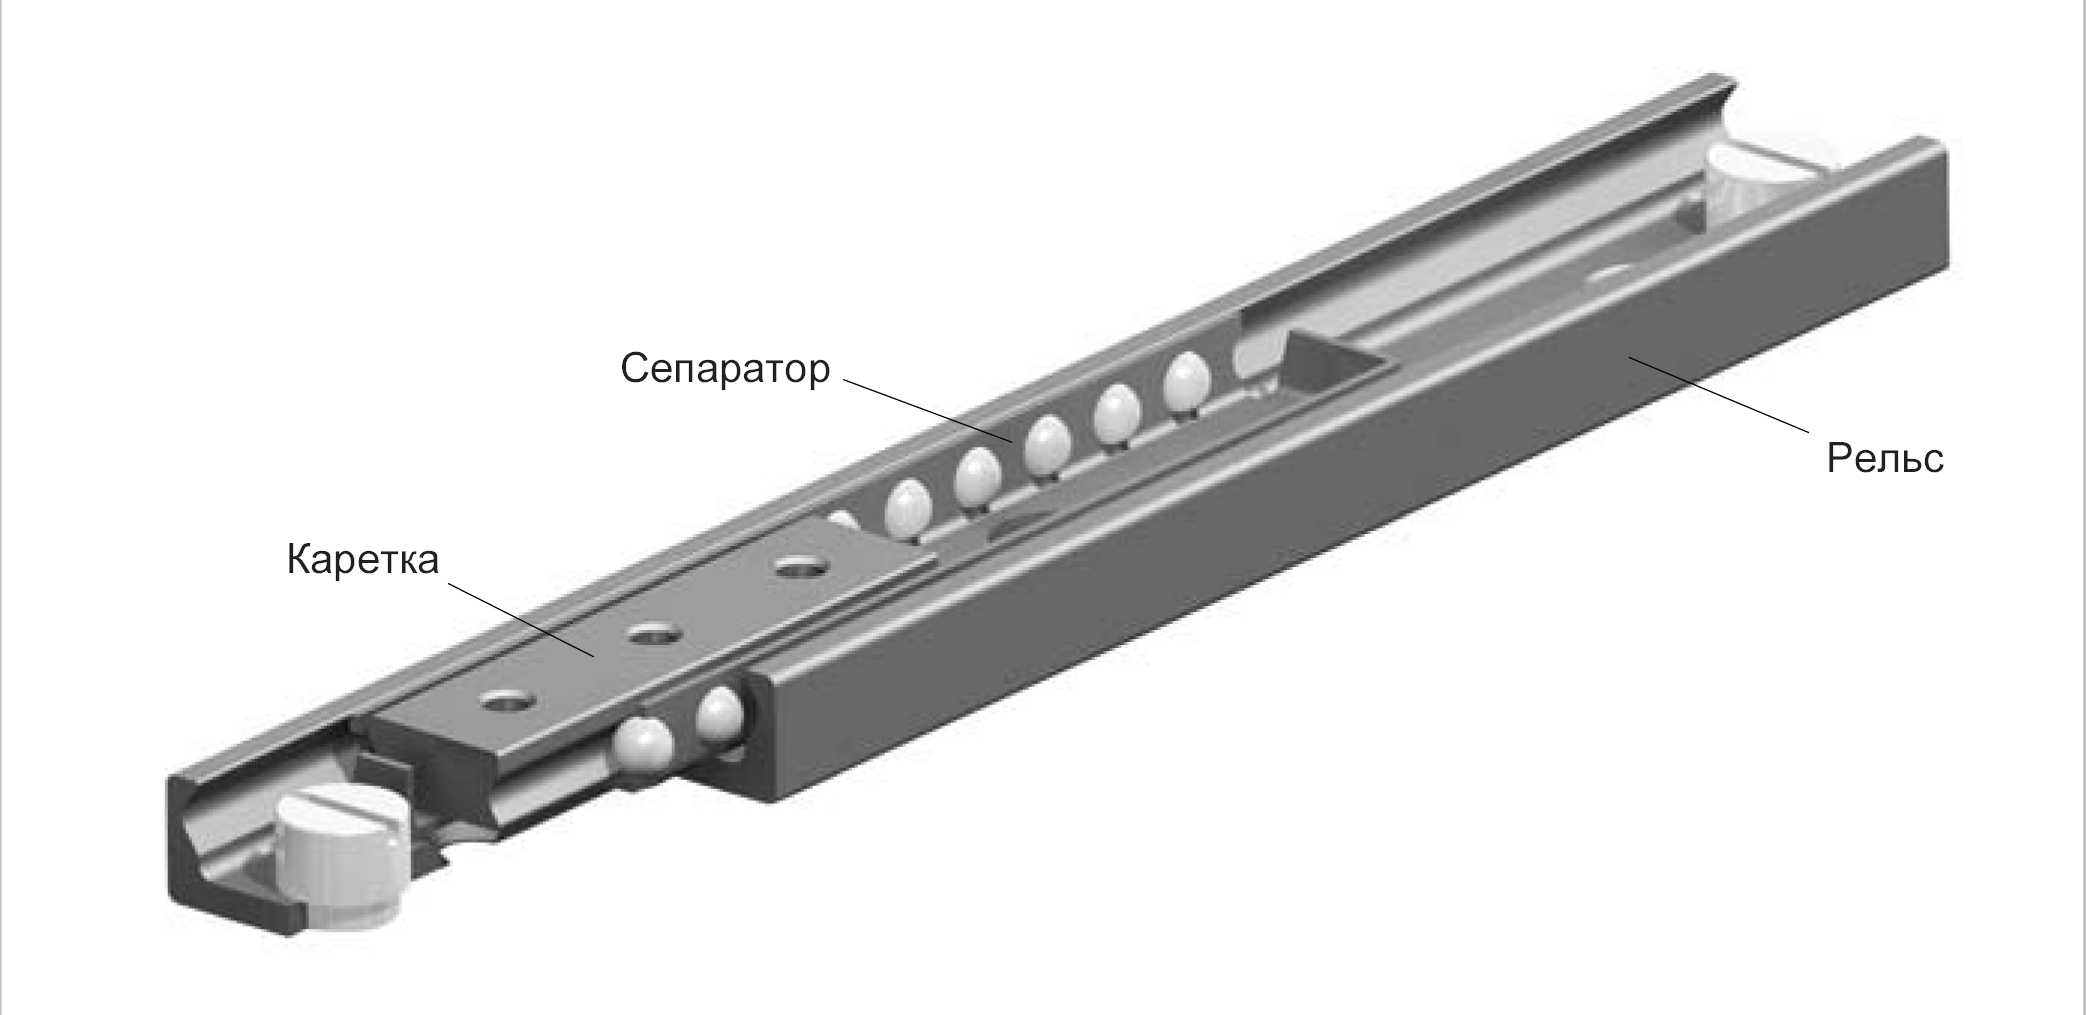
The ball guide can withstand many times the mass. In the roller one there are two points of support - the rollers on the bearing part and the part of the box. In a ball bearing, there is a whole block (middle), on which small balls are located according to the principle of a rolling bearing. Plus, the thickness of the metal from which the parts of the guide are made is much higher. Three more notable advantages - such guides are almost impossible to put wrong, they allow you to pull out the drawer to the full depth and make it possible to firmly fix the drawer in the closed state. In addition, ball guides can be installed at any height according to the design.
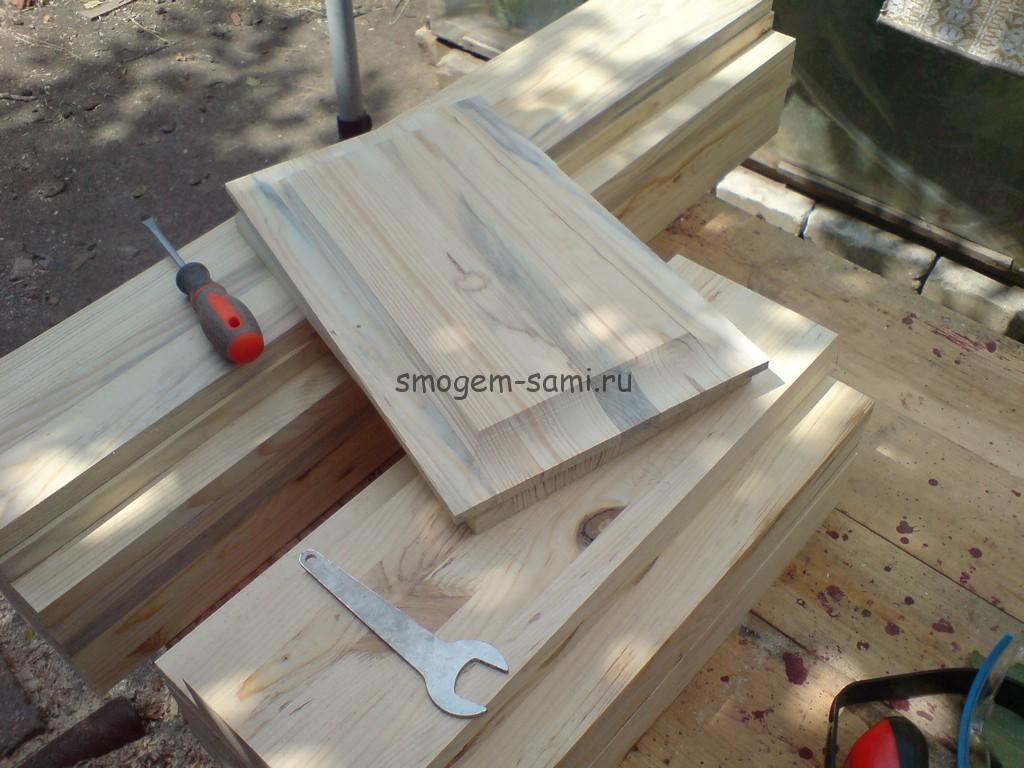
Drawers for a chest of drawers are made from the same glued board as described in the article. Blanks for the box are shown in the photo.
The top drawer in this chest of drawers will be smaller in size than the other three. The drawers consist of two long boards that make up the length, two short boards that make up the width, a front panel and a bottom.
 The edges on the front panel are selected using a panel cutter installed in the router table.
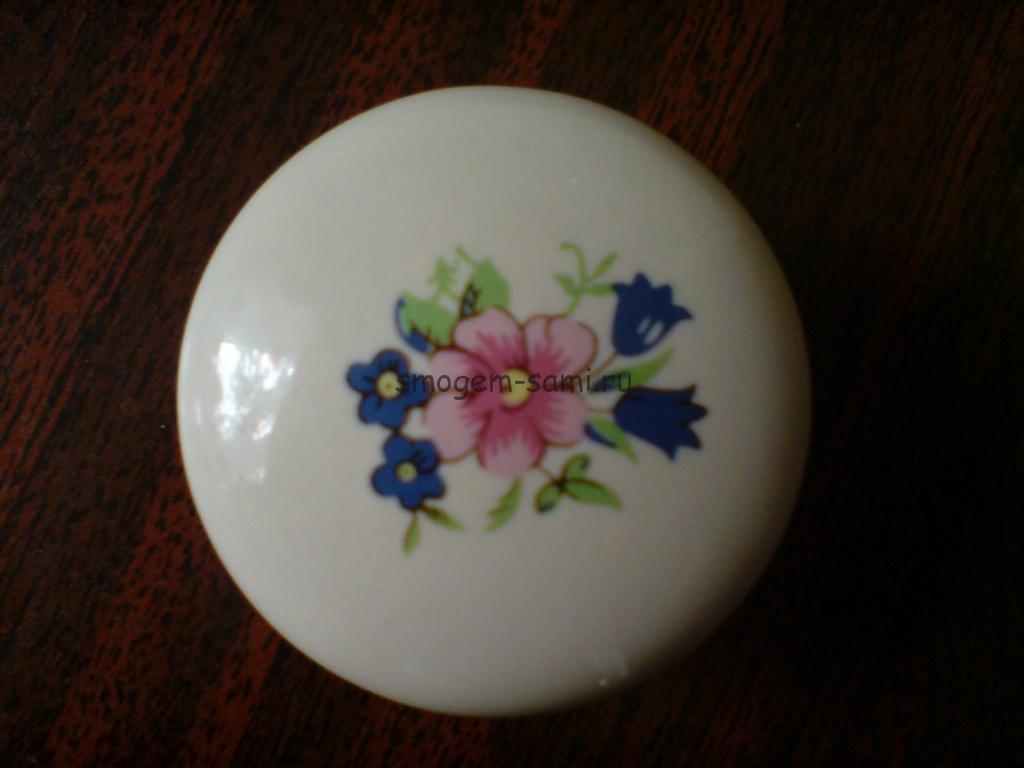
 The latter performs an exclusively aesthetic role and does not add strength to the boxes. To open the drawer, two handles are installed on each front panel.
 The bottom of the boxes is made of plywood 6 mm thick. Such a thickness of plywood gives the required strength and at the same time does not increase the weight of the box itself too much. To install plywood sheets in the bottom of the box, a groove is selected along the width of the plywood at a distance of one centimeter from the edge of the box with a groove cutter.
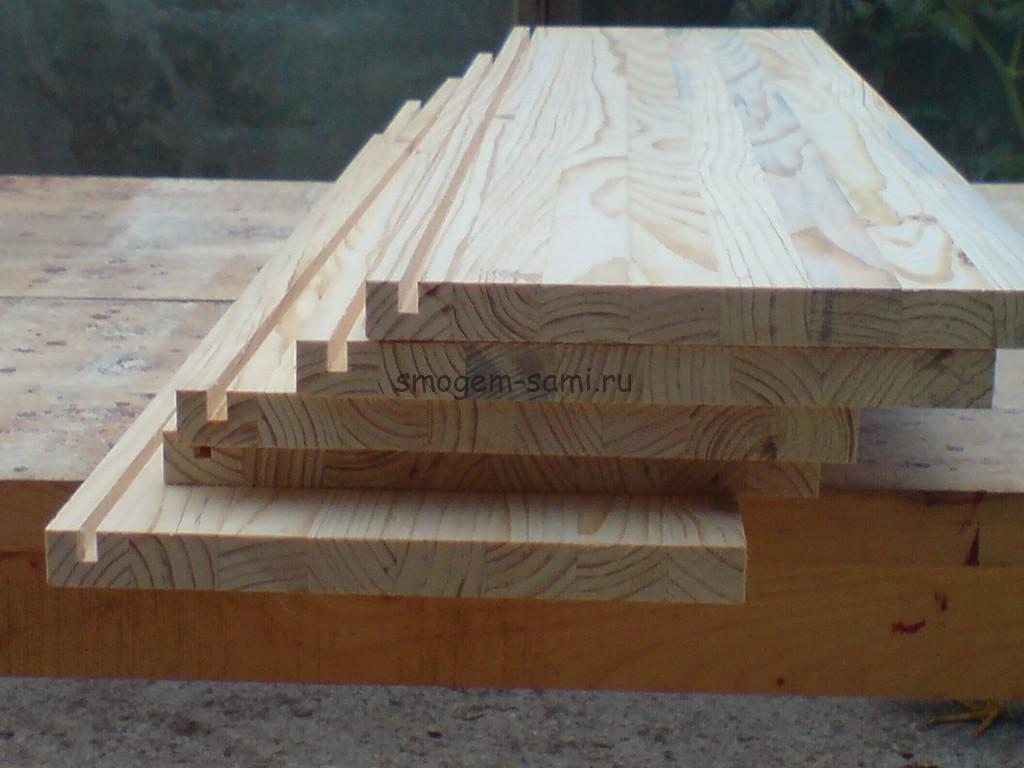 To simplify the procedure for installing the plywood bottom in the box, the edges of the plywood should be slightly sharpened with a planer.
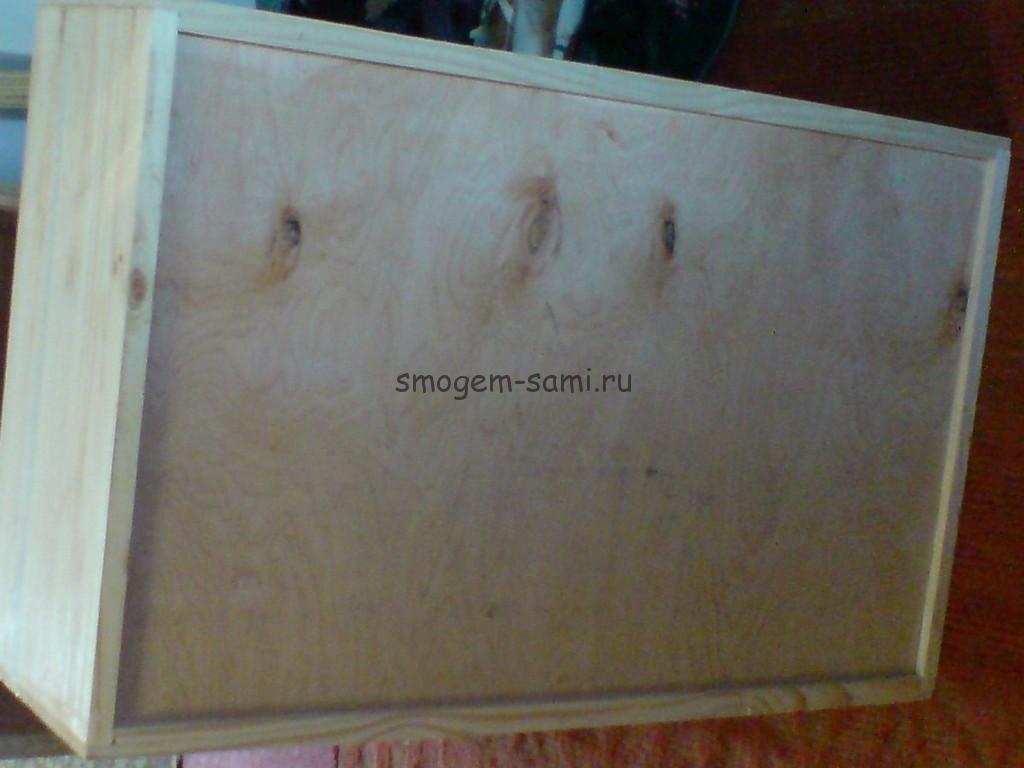
The photo shows a box with a plywood bottom already installed.
 To connect the shields into a box on the edge of long boards, a groove is selected with a width equal to the thickness of the shield and a depth of one centimeter. This is necessary to increase the bonding area and increase the strength of the connection. The boxes are assembled with self-tapping screws and glue. After the glue dries, try to insert the boxes.
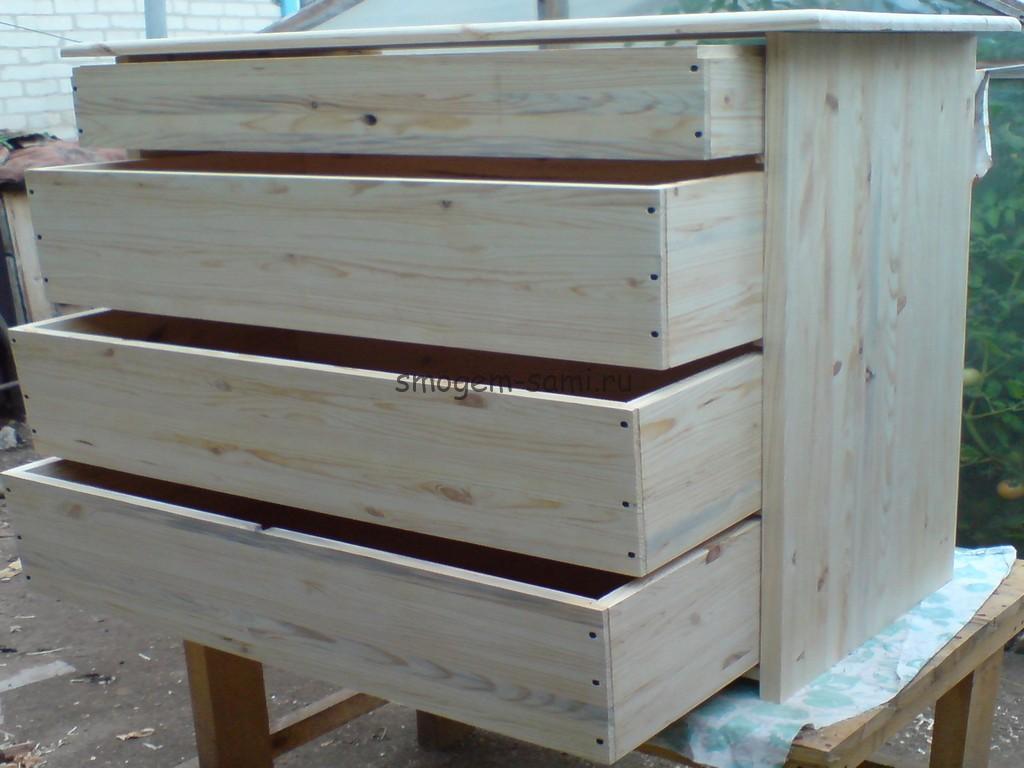 The places where the walls of the drawer rub against the walls of the chest of drawers are planed with a jointer, achieving movement of the drawers in the chest of drawers without the slightest resistance. After that, the drawers are numbered and proceed to hanging the front panels. The complexity of this operation lies in the fact that you need to fasten the front panels from the inside so that the screw head is not visible. In this case, the distance between the front panels, the chest of drawers and the floor must be exactly the same.
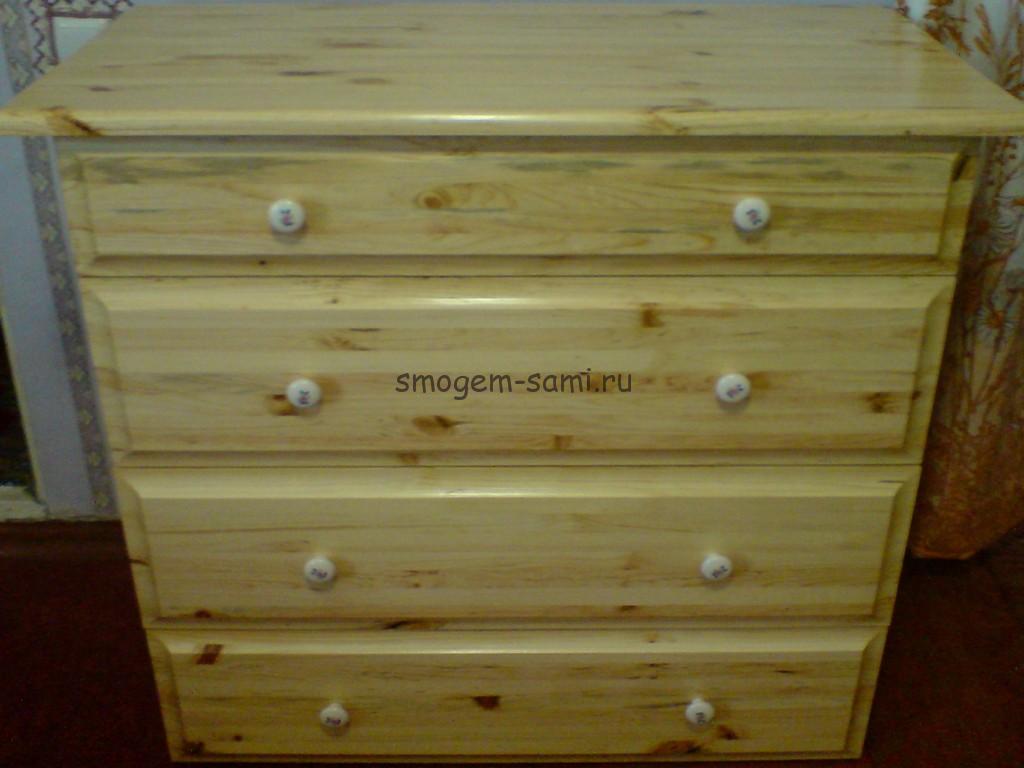
In order to achieve uniform installation of all panels, there are many tricks. You can use two objects with the same thickness to set the distance between the boxes for these objects, which will be used as distance standards. Such items can be matches, ampoules from a ballpoint pen, coins. The selected item is placed on the front panel and docked with the previous panel. Since the thickness does not change, the distance is exactly the same.
In the process of installing the front panels, handles are also installed. The place of their installation can be determined using a ruler, as well as using a fairly simple geometric calculation. In order for the two handles to be installed strictly in the center of the panel and at the same distance, proceed as follows: using a long ruler, mark the diagonals on the back of the front panels. The intersection of the lines of these diagonals is the center of the rectangle. Using a square, draw a vertical line through the resulting point. The two rectangles obtained in this way are again marked with diagonals and receive points that are located strictly in the center of the panel at the same distance from the edges. The markup is repeated for all four panels, the handles are screwed.
omit, because they are discussed separately) their advantages and disadvantages.
Option 1
To be honest, I didn’t notice any special advantages in assembling this box and I don’t use it myself. With it, the side walls are, as it were, inserted between the front and back. As a result, we get the need for edging the ends that protrude from the sides. But instead, we get the opportunity to make the fittings invisible (heads of self-tapping screws /). separately.
Option 2

It differs from the first option in the location of the walls. This time, the side walls prevail, covering the ends of the front ones. As a result, only the visible (upper) edges of the drawer can be hemmed - the front ends are hidden behind the facade, and the rear ones are invisible until the drawer is removed from the niche. The downside is visible fittings, but today there are a huge number of different kinds of plugs and stickers, so this drawback is not critical.
Option 3
It differs from the second one by the absence of the front wall, the function of which is performed by the facade. The facade itself is mounted on (see the last mounting option in the corresponding one). The main advantage of this method is the saving of material + all the advantages of the second option. Cons - the need to mill a groove under the bottom on the facade, difficulties in centering the facade itself in the box (accuracy of calculations), difficulties with installing eccentric couplers (see the article about their installation).
Option 4- General facade

with this option, several separate drawers are combined with one common facade. This technique allows you to kill several birds with one stone: visually it seems that there is only one box - there are no joints; more guides - more withstand load; the jumper between the boxes increases the overall rigidity of the box, which in some designs is a very important factor.
We figured out the main options for the location of the walls. Let's go to the bottom. Most often it is made of hardboard (hardboard).
Option 1 -the bottom is laid on,  then its dimensions should be 1-2 mm smaller than the size of the box box - it is more convenient to fix it - no protruding ends appear. The bottom is attached to the walls with self-tapping screws (I use 28 mm)
Option 2 hardboard bottom fixings into the groove
It is more time-consuming, but it allows you to hide the not quite aesthetic end of the fiberboard (although it is not particularly visible anyway), as well as hide the stiffeners by placing them under the fiberboard (see below). The disadvantages of the method include the need to mill a groove in the side walls and, possibly, the facade. (The back wall is usually made a little smaller so that you can push the bottom into the assembled box, after which it is attached to back wall self-tapping screws). The groove "eats" at least 10 mm of the depth of the box itself.
Option 3

In large boxes or in boxes that are planned to be loaded heavily, the fiberboard bottom must be padded stiffener(s), otherwise it will either bend or simply break out. Such ribs can be both external (see diagram) and internal (in this case, you will have to make fiberboard "in the groove"), longitudinal and transverse.
Option 4 Simpler, but more expensive, in terms of materials, is production of the bottom of the box from chipboard.
 In this case, the bottom is "embedded" in the box of the box and fastened to the end with self-tapping screws, or better, with confirmations. Such a bottom is more durable - it will not bend or break out. Yes, and it looks much more aesthetically pleasing than the option with a stiffener.
And finally, I will give another way to increase the load capacity of the box several times (it is applicable only for ball guides).
You can equip the box with not one, but two sets of guides, due to which its load capacity will increase by 2 times. But at the same time, he will walk a little tighter, and the markings will have to be paid closer attention.