We study the cone of the needle for wear (in the form of a rim at the tip). If we do not find signs of wear, then we wash the valve and seat (wash the fuel filter first) and check the tightness of the needle again. We replace the defective and worn needle with a new one. It is possible to restore the valve's performance by slightly increasing the hole in the seat, but this operation requires accuracy, locksmith skills and does not always bring success.
Dismantling and checking parts of the carburetor cover.
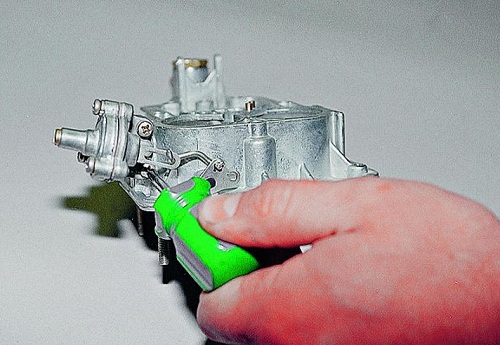
If the starting device is working, then the stem will return to its original position only after the channel is opened. And if the starter is leaking, then ...
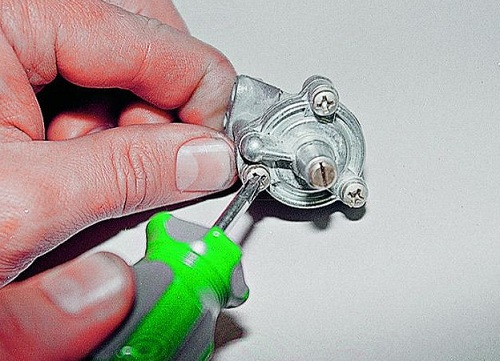
5. ... unscrew the three screws with a screwdriver ...
We assemble the top cover of the carburetor body in the reverse order. Adjust the fuel level in the float chamber and the amount of opening of the air damper.
Pneumatic throttle valve repair.

We check the pneumatic actuator in the same way as the starting device and, in case of a malfunction, change the diaphragm of the pneumatic actuator by analogy with the starting device.
We press on the diaphragm rod and close the inlet channel with a finger. 
If the pneumatic actuator is in good condition, the rod will return to its original position after the opening of the input channel. The pneumatic actuator housing should be disassembled only if necessary, since it will be necessary to select the length of the thrust empirically. If the pneumatic drive mechanism of the second damper was disassembled, the length of its rod should be adjusted:
4. Loosen the locknut on the rod ...

We insert the pin into the stem and fix the connection with the retaining ring.
6. We press the pneumatic drive rod, sinking the rod into the diaphragm mechanism housing. (When the shutter of the first chamber is closed, the second must remain closed).
In frequent cases, a malfunction of the pneumatic drive is caused by insufficient tightness of the channels through which the vacuum is supplied to the diaphragm. In this case, you need to check the bottom surface of the carburetor body (see Disassembly and repair of the carburetor body). When overtightening the carburetor mounting nuts, under the influence of temperature, the plane can be “behaved”. In this case, the required vacuum is not created and the shutter of the second chamber does not open or does not open completely, with a delay.
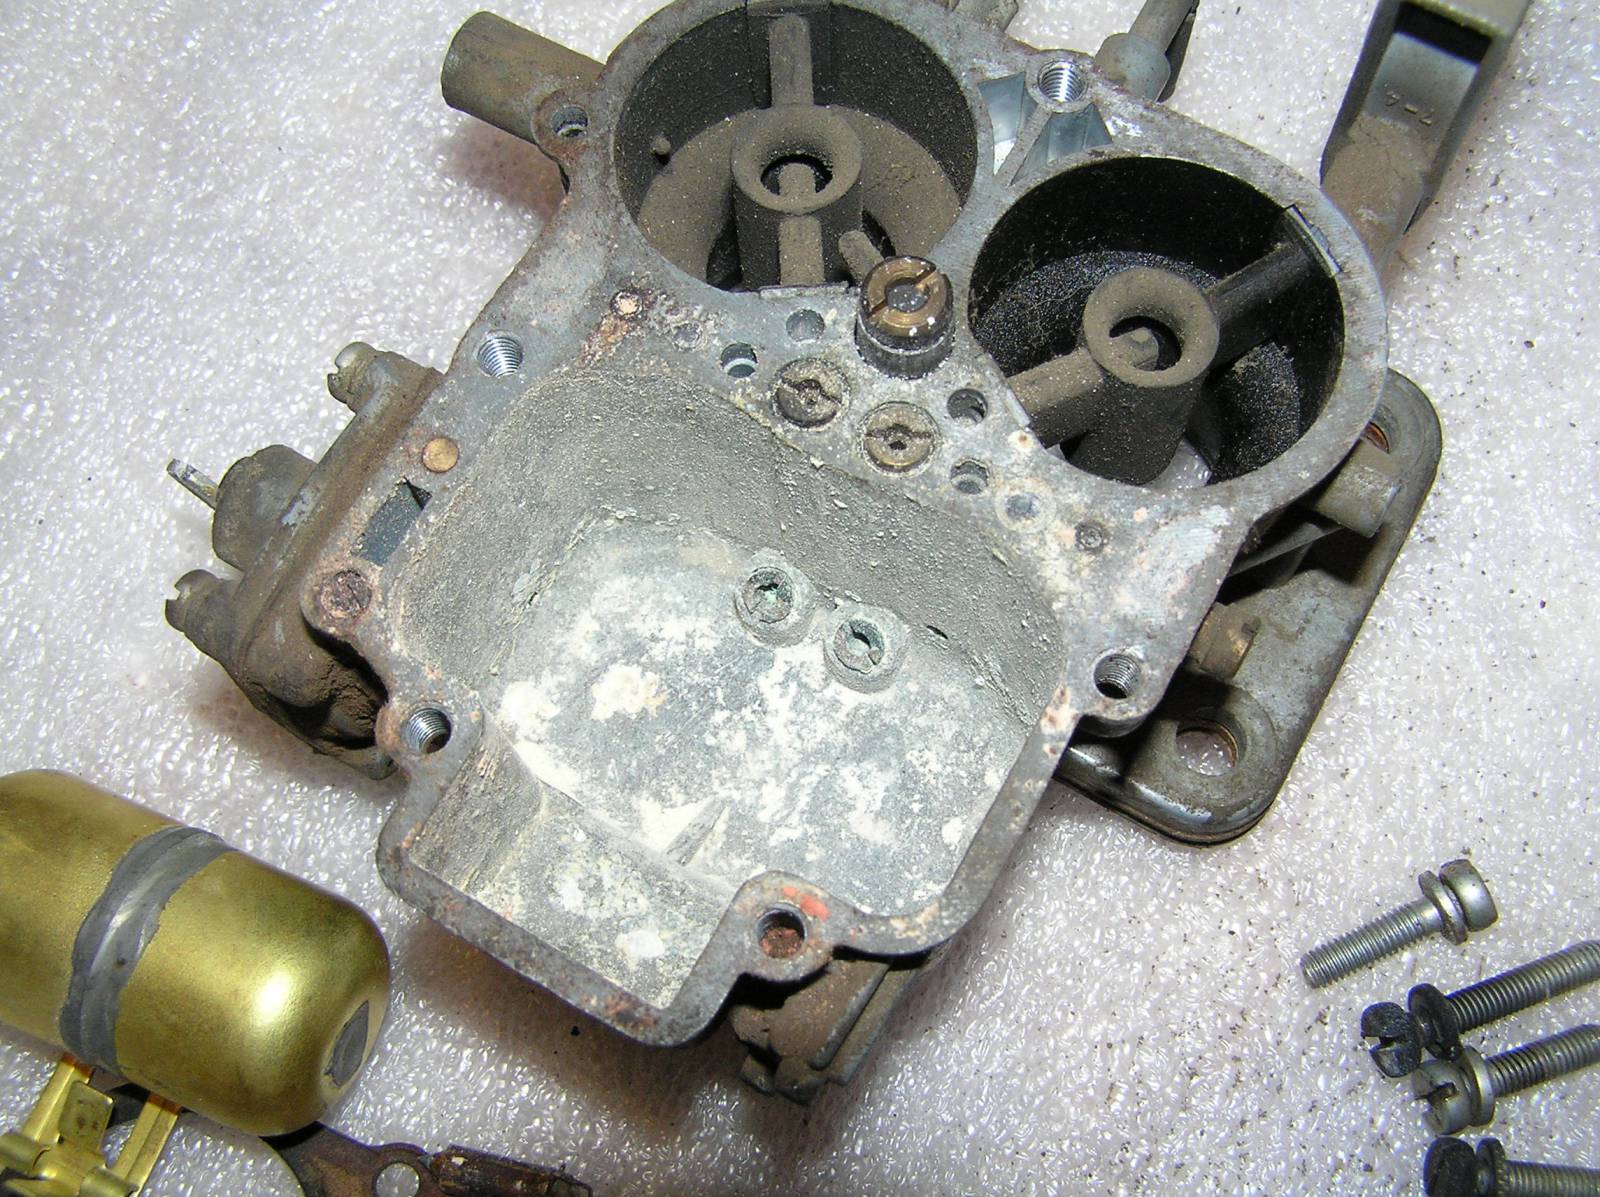
Dismantling and repair of the carburetor body.

 We wash the jet with the body in acetone and blow it with compressed air. We replace the torn sealing rubber ring with a new one.
12. Remove the heat-insulating gasket. 
13. Unscrew the accelerator pump valve. 
14. We take out the atomizer with a valve and sealing gaskets made of soft metal from the housing.
All this is washed in acetone and blown with compressed air.
15. Unscrew the air jets. 
16. We take out the emulsion tubes of the main dosing system from the channels. It may be that they themselves do not fall out of the channels. In this case, we screw an M4 tap into their holes and remove them. 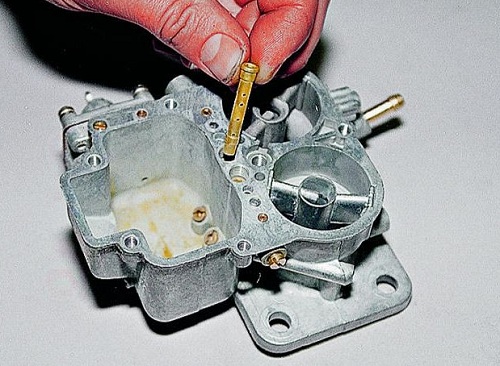 17. Unscrew the main fuel jets.
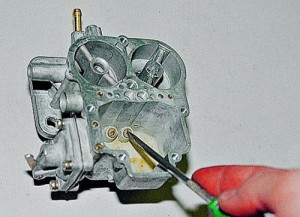
18. We unscrew the body of the fuel jet of the transition system. 
19. Remove the fuel jet from the housing. 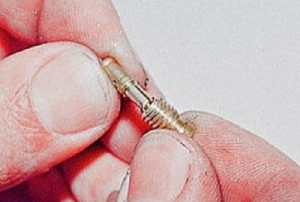
20. Unscrew the adjusting screw of the accelerator pump.
21. Using a screwdriver, unscrew the four bolts securing the accelerator pump cover. 
22. Remove the cover, diaphragm and pull out the spring. 
23. Carefully knock out diffusers ...
24. ... and pull them up.
Emulsion tubes, jets and other removed parts, except for gaskets, diaphragms and o-rings, are washed in acetone and blown with compressed air.
25. We apply an even ruler to the base of the case and look at the clearance of the curvature of the case.
The plane of the body must be flat. If there is a surface curvature, we take out the adapter tubes, for this we select drills of a slightly smaller diameter than the tube holes. We insert the drill into the tube so that the drill is tight, it is allowed to wind fine-grained sanding paper.
26. Using a pliers, we pull out the tubes.
If the gap between the ruler and the plane of the body is not more than a millimeter, you can level the base. We fix the body in a powerful vice. Previously, under the vise jaws, we lay plywood or a wooden block so as not to damage the upper surface of the carburetor. If the surface is heavily deformed, then we first straighten it, with light blows of a hammer, through a wooden block or with a mallet at the bent corners of the base. We do this carefully so as not to break off a piece of the body. After rough editing, we level the surface with a wide velvet file. This must also be done carefully, keeping the file parallel to the plane of the base, without “filling up” at the edges. We constantly control the process by applying a ruler to the surface. Next, we wash the case in acetone and blow all the channels with compressed air. We assemble the carburetor body in the reverse order.
The jets of the first and second chambers have a different calibration and must be installed each in its place.
Dismantling and repair of the throttle body.
We wash the spool and throttle body in acetone or solvent and blow the body channels with compressed air.
17. We slightly open the shutters and look at the state of the vias, if necessary, clean them with a thin copper wire. 
18. We will assemble the throttle body in the reverse order, paying special attention to the correct position of the levers on the axis. Before tightening the nuts, make sure that the limiter lever is located below the protrusion of the second chamber throttle lever. 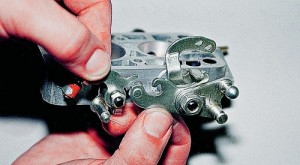
We tighten the quality screw into place until it stops (wetting its rubber ring with engine oil) and unscrew it by the number of turns made during disassembly. For reliable system operation idle move throttle valves tightly close their channels - without a gap. A barely noticeable gap is acceptable, which can only be seen when looking at the light through the shutters. In some cases, it is possible to eliminate the gap by changing the position of the damper in the axle slot. But this is done as a last resort. New carburetor adjusted.
19. We slightly open the damper and grind off the screw threads with a needle file - the thread is crushed at the factory. You will need new screws to assemble the assembly. 
20. Unscrew the two screws with a screwdriver and change them to new ones. 
We release the thrust screw of the damper lever. We achieve the smallest gap around the entire perimeter of the damper by changing the position of the damper. To better fit the damper to the senks, you can sharpen the damper from the end. It is better to grind with a small flat file.
21. Before assembly, make sure that the shutters do not wedge (very important for the second chamber) - if necessary, adjust them with a stop screw. We rivet new screws for fastening the dampers.
22. We stop the thrust screws, opening their slot. 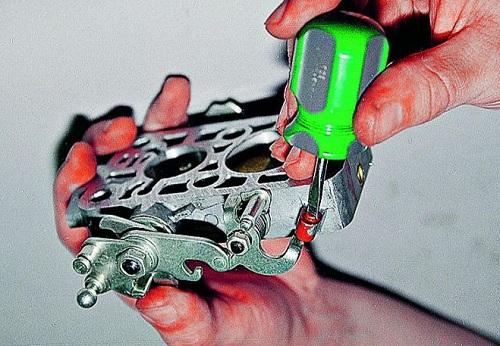
We assemble the carburetor, changing damaged and deformed gaskets.
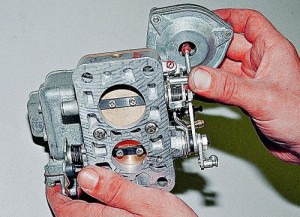
23. When we install the cover on the carburetor body, we make sure that the float does not touch the walls of the float chamber.
Do not overtighten the cover screws to avoid deformation.
Cars without an injector are still relevant on our roads. Moreover, their owners usually like to repair breakdowns themselves, which are already quite common with long service life. Among these breakdowns, there are malfunctions of the most complex air and gasoline supply unit. Therefore, many motorists are faced with the question of how to do a do-it-yourself carburetor repair.
Especially when interruptions in the operation of the motor begin, while it is not possible to configure such a complex unit. In practice, it fails, and for several reasons. Let's list them.
- The service life of the node due to the complexity of the channel design is small.
- Regular use of bad gasoline adversely affects the parts, channels, surfaces of the assembly unit.
- The ingress of crankcase gases into the unit when the engine components are worn out also has an effect.
- Dirt particles entering, for example, through the air filter housing, can have an abrasive effect, which can cause surface defects.
How to make repairs for the "classics"
Initially, we will discuss the carburetor repair instructions from 2107. The following tools will come in handy for work:
- screwdrivers;
- spanners;
- pliers;
- ruler.
Also learn about and.
Repair of the VAZ 2107 carburetor begins with the dismantling of the assembly from the car. It is produced in the following sequence.
- First of all, we dismantle the air filter housing together with the filter element by unscrewing the nuts.
- Having unscrewed the fasteners, disconnect the throttle cable and the air damper cable.
- Detach the crankcase exhaust hose.
- After loosening the clamp, remove the fuel hose.
- Disconnect the vacuum regulator hose.
- Disconnect the air valve from the economizer.
- We dismantle the microswitch from the terminals.
- Using a screwdriver, we press the tip from the damper drive rod, after which we take out the return spring.
- We dismantle the entire assembly.
Now, to repair the carburetor from the VAZ 2107 with our own hands, we need to disassemble it, while replacing the defective parts with new spare parts (they are sometimes sold as a special repair kit for repairing the VAZ 2105 - 2107), and you may also have to process the filler plane. Let's describe how to do it all.
- We dismantle the three-arm lever, spring and rod.
- We dismantle the cover, as well as the body from the throttle valves. Replace gasket if necessary.
- Carefully dismantle the float by pulling out the axle.
- We unscrew the needle fuel valve, as well as fuel jets from the float chamber. We replace parts if necessary.
- We turn off the fuel jet of the idle system. We replace it if necessary.
- Having unscrewed the accelerator pump bolt, dismantle the pump cover, diaphragm and spring. These parts can also be replaced.
- We take out the diffusers that worked on the dampers.
- Unscrew the mixture amount screw.
- We wash all disassembled metal parts in acetone.
- We apply a ruler with an edge to the plane of the upper housing, which is joined to another plane of the damper mounting housing. Checking for curvature. By the way, if before that it was not possible to really set up a stable idle speed, the reason for this could be just this curvature, which gives air leakage. If necessary, we process the plane with an emery wheel manually, without the electric drive of the circle, having previously removed the adapter tubes from the plane. We do this operation very carefully.
- We assemble in the reverse order, however, as well as mounting on a car.
We add that the repair of the carburetor from the VAZ 2106 is done in exactly the same way, since the assembly is the same, under the brand name DAAZ 2107. Generally speaking, the repair of the VAZ 2105 is done in the same way, because again the brand of the assembly is the same.
Differences for front-wheel drive
And now let's consider what are the features of the process when it is necessary to repair the VAZ 2109 carburetor. 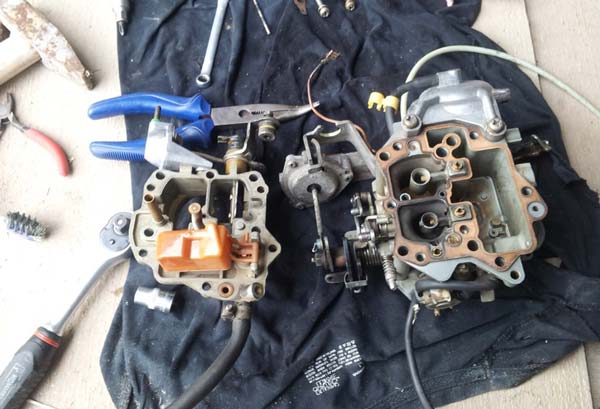
With the front-wheel drive Lada, a unit called Solex was used, which was somewhat improved compared to DAAZ 2107. It is dismantled from the car according to the already described scenario. Let's see what are the differences from the above manuals when disassembling and repairing a carburetor from a VAZ 2109. The same tools are needed. We move through the points in the same way and look at the differences.
- Removing the lever.
- The cover and housing are removed from the throttle valves in the same way as the previous instructions.
- The float chamber here is arranged in a similar way - we disassemble it.
- We unscrew similar fuel jets plus a needle valve.
- The fuel jet of the idle system is here certainly replaced by a solenoid valve, we unscrew the valve with a wrench. Instead, we install a new one later - this is desirable.
- The accelerator pump is disassembled in a similar way, its parts, especially the diaphragm, are replaced with new ones.
- Remove diffusers.
- The mixture quantity screw is of a different type here, we will also dismantle it.
- We wash the parts that are not worn out in acetone.
- If necessary, we process the plane of the upper case, according to the above recommendations.
- We do the assembly, moving back through the points, this also applies to mounting on a car.
As you can see, the instruction differs little from the one given earlier. Here it must be added that when repairing a carburetor, most often it is necessary to replace jets, because due to their small size, coupled with stringent requirements for their work, the life of these parts is short. 
In addition, it is important to know that a carburetor with the brand 2108 was actually installed on the "nines", so the repair of the carburetor from the VAZ 2108 is carried out exactly according to the instructions given. In addition, the modifications of the "eights" and "nines" have the same unit, but modified, with slightly different gaps. Therefore, repairs in 21083 are done in the same way, but with the settings they are guided by slightly different gap sizes. Their values must be taken from the technical documentation. The same applies to the repair of 21099.
Settings after installation must be made.
Something about cost and non-repairability
Of course, not everyone can repair such a complex mechanism as a carburetor. Many motorists are more likely to resort to the services of car services. Let's see how much money they have to shell out. Here is the average data for major cities of the Russian Federation.
| City | Price |
| Moscow | 2500 rub. |
| St. Petersburg | 2500 rub. |
| Yekaterinburg | 1800 rub. |
| Samara | 1700 rub. |
| Krasnodar | 1800 rub. |
These prices are indicated approximately for the repair of a type 2108 carburetor. The cost is rather big, however, it is about two times lower than buying a new unit. Although sometimes you can not do without a purchase. After all, there are cases when repair and adjustment will not help the carburetor.
For example, the processing of curved planes, which was discussed above, may be useless due to the general so-called "fatigue" of the metal. It is not uncommon to develop threaded holes for jets. In addition, the combination of many minor defects in the unit can persuade the owner to buy a new one.
For decades, the carburetor mechanisms of VAZ 2106/2107 cars have ensured the stable operation of the power units of the car. However, regardless of the year of manufacture and configuration, the carburetor requires special attention to maintenance. In most cases, it is up to the driver to repair or carry out adjustment work, but it is recommended to be extremely careful.
What models are installed on VAZ 2106/2107 cars
All types of carburetor mechanisms in the equipment of the VAZ 2106/2107 are focused on reducing fuel consumption and giving the car maximum dynamism. In addition, an important role is played by such an indicator as environmental friendliness. For a decade, AvtoVAZ engineers have preferred the most environmentally friendly types of carburetors.
Carburettors of three different models were installed on modern VAZ 2106/2107, as well as on manufactured cars of past years:
Manufacturer - Dimitrovgrad Automotive Plant (or DAAZ). It should be noted that the company produced carburetors under license from Weber. Structurally, these devices were as simple as possible in operation and further maintenance. In addition, their main advantage was to provide excellent speed performance for cars of the sixth and seventh VAZ models. At the same time, DAAZ carburetors consume a very large amount of gasoline - from 10 to 14 liters per 100 kilometers.
Producer - DAAZ, modification "Ozone". This is a more advanced version of the first type of DAAZ, which has high environmental performance. The device provides good acceleration performance and consumes less than 10 liters of fuel per 100 kilometers. However, the disadvantage of this model is the equipment of its second camera. A pneumatic valve plays an important role in its work, which, in case of contamination or poor-quality adjustment, can stop the carburetor from working.
Manufacturer - DAAZ, modification 21053, which is produced under license from Solex. One of the most modern species carburetors for equipping the VAZ 2106/2107. The most environmentally friendly and productive. It has a more complex design, the first in the DAAZ line is equipped with a fuel return system, which makes it as economical as possible. However, the Solex is demanding on the quality of gasoline - otherwise the fuel jets clog very quickly.
Modern VAZ 2107 models are equipped with such a unit.
Common in the design of carburetors for the VAZ "six" and VAZ "seven"
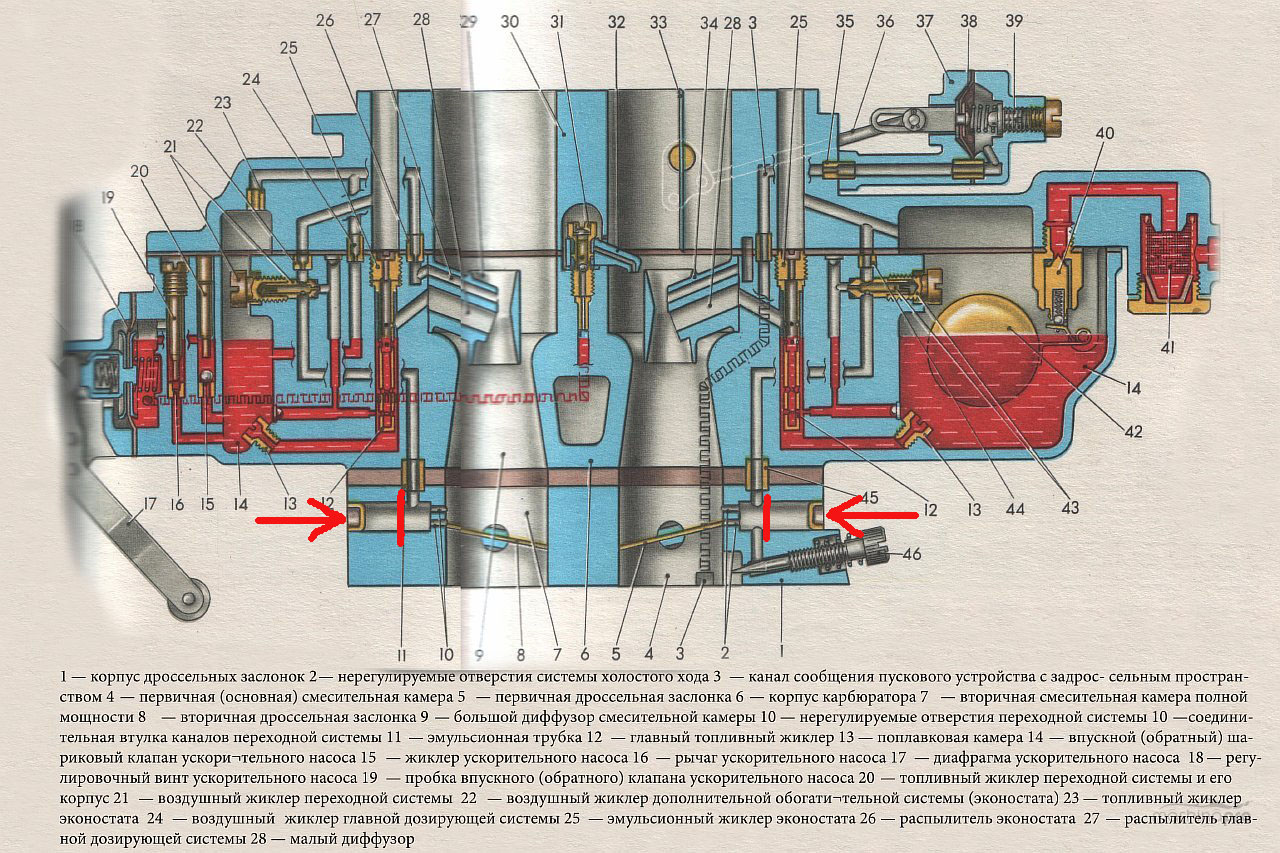
The carburetor mechanisms that all VAZ 2106/2107 models are equipped with throughout the entire period of car production are two-chamber, that is, they have two internal combustion chambers. Structurally, all carburetors have three indivisible parts:
at the top there is a cover of the device, which protects the mechanism from dirt, and fuel fittings;
the middle part is a housing, inside which the chambers and diffusers themselves are located, transfers the air-fuel mixture to the engine;
in the lower part there is a float compartment and throttle valves.
In the operation of DAAZ carburetors, small details are of great importance - gaskets, jets, float, economizer or dampers. All elements of the system are interconnected and the presence of failures in one part will inevitably lead to a breakdown of the entire device.
The DAAZ carburetor on the VAZ 2106/2107 works according to the following principle:
Gasoline enters the float chamber through the inlet valve.
The required fuel level is regulated by the needle of the forced idle economizer or the power stroke economizer - in any case, the fuel enters the chamber in a strictly defined proportion.
In the chamber (or PBC), gasoline is crushed into tiny pieces and mixed with air.
With an increase in torque during acceleration, combustion chamber No. 2 can also be activated.
After the formation of the air-fuel mixture, the pump sends it to the diffusers, and through them to the motor.
That is, the main task of the carburetor is the formation of an air-fuel mixture in a strictly adjusted proportion to ensure the smooth operation of the engine.
The presence of many small elements ensures reliable operation
How to repair a carburetor with your own hands
Repair work on the VAZ 2106/2107 carburetor involves the removal and disassembly of the mechanism. In this case, the repair includes all two stages:
Flushing (cleaning, blowing) of elements from soot and adhering dirt.
Replacement of worn or failed parts.
Before carrying out any actions with the unit, you must firmly make sure that the carburetor is faulty. Often, incorrect operation of other systems can affect the performance of the carburetor mechanism.
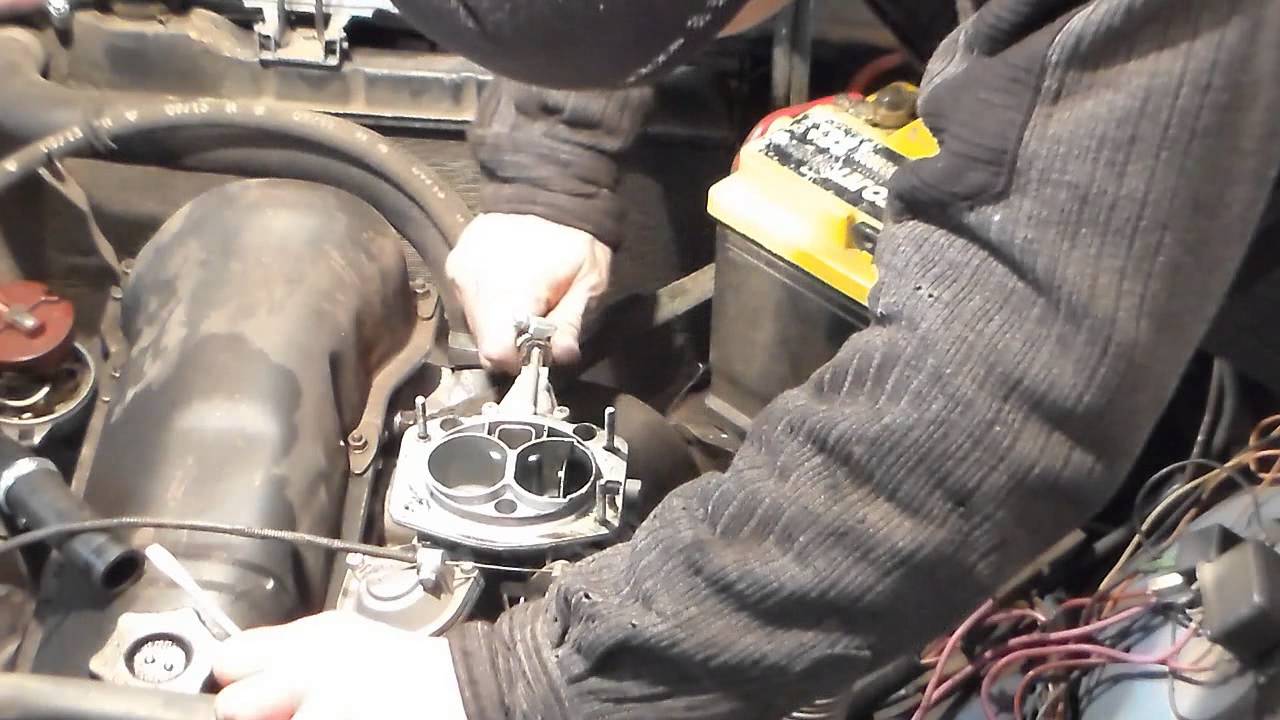
The carburetor is under the hood, above the engine.
Fault definition
DAAZ carburetors of any modification are designed to work stably regardless of operating modes. However, it is the change of modes (for example, starting “cold” or accelerating when overtaking) that can show the first malfunctions in the operation of the device. The carburetor is clearly defective if:
at idle there are failures in the operation of the motor;
while driving, a time interval was noticed between pressing the gas pedal and accelerating the car;
jerks in the engine at high speeds;
a series of jerks when overtaking;
gasoline consumption has increased significantly;
Difficulties in starting the engine after long stops.
Each of these signs, as well as their combination, indicates that there is a problem in the carburetor, repairs or adjustments are necessary.
overflows
One of the most common problems with carburetor engines is the so-called transfusion. An excess amount of fuel is supplied inside the device, and the check valve, for some reason, is not able to divert excess gasoline back to the tank. Therefore, under the carburetor and on it, the driver may notice drops of fuel.
shoots
This concept is inextricably linked with transfusion. If the carburetor starts to shoot (or sneeze) - that is, jerk sharply while driving and even ignite - there is a fuel leak. The mechanism needs to be flushed.
Gasoline is not supplied
The problem can lie both in the carburetor itself (the jets are seriously clogged or the pump is broken), and in the supply hoses. It is recommended to blow out the fuel supply pipe and test the operation of the fuel pump. If they function normally, you will have to remove the carburetor and flush it.
Secondary combustion chamber not working
The failure of PIC No. 2 will immediately affect the dynamism of the car: it loses almost 50% of its original speed characteristics. The point is sticking of the throttle valve, which regulates the supply of fuel to the chamber cavity. You will have to disassemble the mechanism and replace the damper with a new one.
Video: how to repair a carburetor on a VAZ 2106
How to remove the unit
Indeed, this question can take an inexperienced owner of the "six" or "seven" by surprise. But the dismantling procedure itself is not considered difficult. The main thing is to remember or write down the connection points of different hoses, since the reverse installation can be difficult during the first experience.
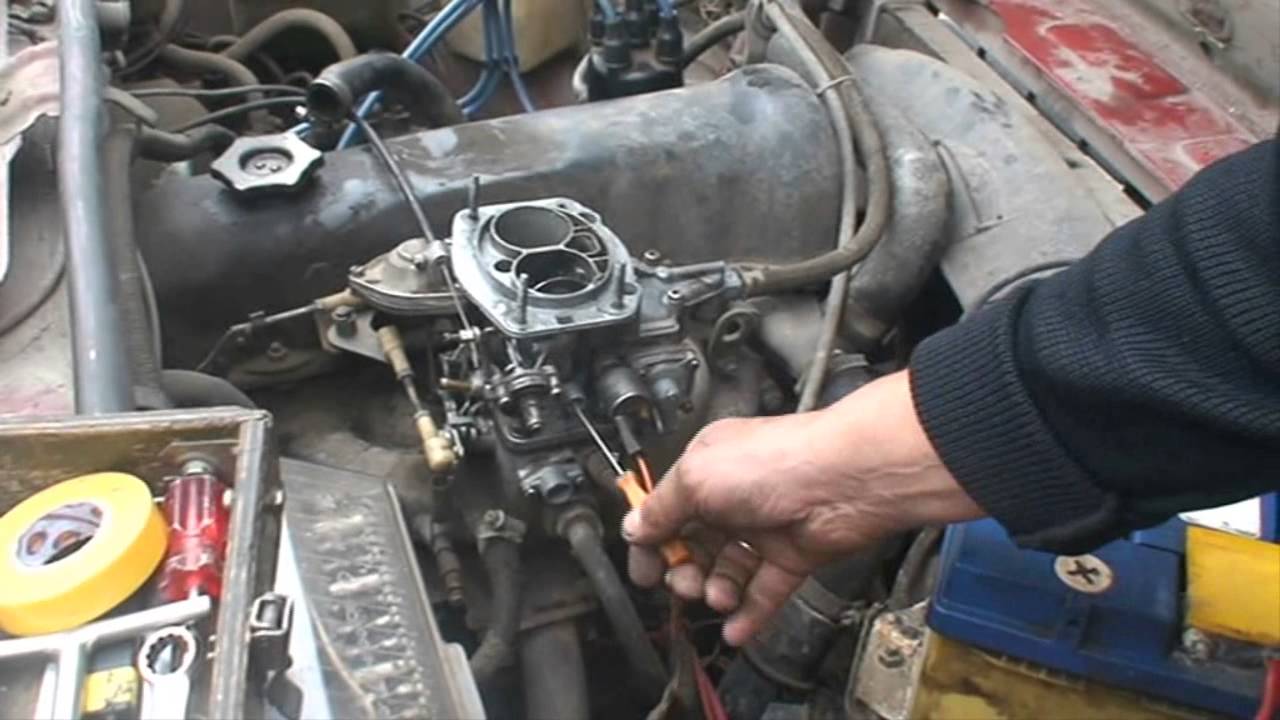
It is important to disconnect the fuel lines and wires in series
The preparatory stage includes removing the air filter box, as the filter will prevent free access to the carburetor. Further work takes no more than 10 minutes:
First, two thin wires are disconnected from the carburetor body - the first ensures the operation of the air damper, and the second is connected to the throttle.
The return spring and its retainer are immediately disconnected.
The next step is to disconnect the positive idle economizer wire.
Loosen the clamp on the wide gas supply pipe and remove the hose itself. After it, you can remove the fuel return hose.
Ventilation and vacuum hoses can be disconnected from the fittings in the upper part of the housing.
It is recommended to close the open hole in the collector for the duration of work with soft tissues or a special plug, which can be purchased at a car dealership. This will ensure the cleanliness of the motor and prevent dirt from getting inside the power unit.
Flushing DAAZ without disassembly
The traditional method of washing carburetors is its complete disassembly into separate components, which is not always possible for an inexperienced VAZ owner to do. To simplify the procedure, a technique was created for flushing and cleaning the carburetor without disassembling it into components. This technique is based on the use of special aerosols in cans. Aerosols produced by ABRO and Mannol are considered the most affordable cleaners for carburetors - they can be bought at any car dealership at a cost of 100–150 rubles.
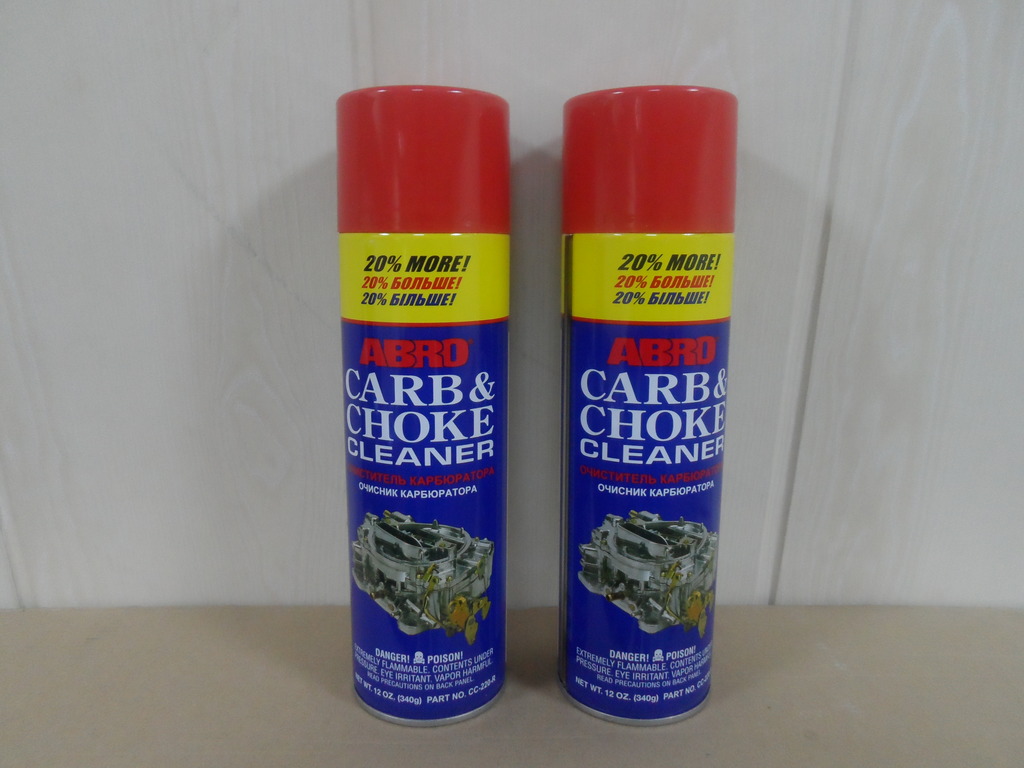
The cartridges are equipped with a thin tube for access to all parts of the carburetor
These cleaners do an excellent job of cleaning carburetor mechanisms, and they are also very easy to use. To flush the carburetor, it is recommended to turn off the engine, let it cool down and proceed with the procedure:
Remove the air filter box on the car, set it aside.
Unscrew the solenoid valve from the carburetor body.
Put a special narrow nozzle on the aerosol can and treat the jet channels, the first and second chambers, dampers and all visible elements of the carburetor assembly with liquid.
After that, spray the aerosol on the outer parts of the mechanism.
If in one procedure the carburetor did not have time to properly clean it, then you can process it again with the same aerosol.
After such cleaning, the VAZ 2108/2109 will significantly increase its dynamic characteristics, since dirt sticking will not interfere with the normal operation of all parts of the carburetor.
How to change the gasket
Over the years, DAAZ was equipped with gaskets made of various materials: heat-resistant cardboard, paronite, metal. The main function of the gasket is to create the most reliable and tight connection between the carburetor body and the surface of the engine intake manifold. Only in this way can the normal operation of the power unit be ensured.
After dismantling the carburetor, it is required to inspect the gasket for deformations, tears or severe dents. The manufacturer recommends changing the seal after each removal of the carburetor.

On the left - new, in the center - at the first dismantling of the carburetor, on the right - after 3 years of operation of the car
The gasket is selected according to the type of the old one. It is impossible to install a gasket from a different material or with a change in shape - it will not be able to provide a proper joint between the parts of the mechanisms.
The procedure for replacing the gasket is not difficult:
A new gasket is mounted on the carburetor mounting studs.
Before this, you need to clean the landing site from soot and dirt.
It is necessary to install the gasket in the same position in which the old one was.
Then install the carburetor on it and tighten the fixing nuts until it stops.
DIY adjustment
It is in the capabilities of each car owner of the "six" or "seven" to adjust the carburetor independently. Adjustment work can enhance the dynamic qualities of the car, as well as reduce gasoline consumption. Undoubtedly, these are important indicators for any car owner, so you should responsibly adjust the carburetor.
Preparatory stage
Before starting work, you need to carefully prepare. This stage is necessary so that nothing distracts the driver during adjustment and adjustment.
First, it is recommended to prepare the workplace. The carburetor must be installed on a flat and hard surface, it is better to stock up on rags in advance, as gasoline leaks are possible. In addition, care must be taken to ensure that the room in which the adjustment is planned is well ventilated and has high-quality lighting.
The second moment of preparation is a set of necessary tools. You will need to prepare in advance a set of wrenches and two screwdrivers - a Phillips and a flat one with a narrow blade.
Attention! Adjustment work is carried out only after the carburetor has been washed, worn elements have been replaced and the device has been installed on the motor.
How to enrich or lean a mixture
Enrichment or depletion of the air-fuel mixture must be carried out at idle engine speed:
Start the engine and wait until it warms up to its operating temperature.
Tighten the screws for the quality and quantity of fuel to the stop.
Referring to the idle speed data given in the VAZ service book, set the required number of revolutions by adjusting the screws in one direction or another.
That is, the principle of adjusting the mixture is to set the idle speed recommended by the manufacturer by reducing or increasing the enrichment of the mixture (quality screw) and reducing / increasing the amount of the mixture (quantity screw).

At the bottom of the tube is a quality screw, and a little to the right in a smaller diameter tube is a quantity screw
How to cut gas mileage
The main element in the carburetor is the float. After you have adjusted the enrichment / depletion of the mixture, the float will invariably stand on its axis. However, it may be slightly above the norm - in this case, the fuel consumption will increase. In addition, float adjustment is also necessary in order to reduce the toxicity of gas emissions, since due to poor-quality tightness of VAZ cars, part of the gases can enter the passenger compartment.
Adjustment of the float mechanism is carried out on a completely cooled motor. In order to get to it, you will need to remove the air filter box and unscrew the carburetor cover:
The float tongue needs to be adjusted.
Adjustment of the clamps and axle mounts allows you to set the desired stroke.
Then it is necessary to install a cover on the carburetor and screw the filter box into place.
Adjustment of the float tongue is ensured by screws and clamps
How to put the carburetor back
After the device has been flushed and repaired, the carburetor will need to be reinstalled. To do this, first a new seal is applied to the installation site, the carburetor itself is installed on it. Nuts are screwed onto four fastening studs, ensuring a snug fit of the carburetor body to the engine manifold:
After that, you will need to connect two thin hoses for vacuum and ventilation to two fittings that are located at the top of the carburetor.
A fuel supply hose is connected to the inlet valve, it is recommended to replace the clamp with a new product.
A return hose is screwed on the back side.
It is better to install the throttle return spring before connecting the throttle and air.
Installation and connection of the DAAZ carburetor is considered complete.
The basic removal/reinstallation, flushing and carburetor adjustment operations are available to drivers of all skill levels and experience. It should be borne in mind that the mechanisms are considered rather capricious, therefore, all stages of the procedures you carry out will require increased concentration.
Even in the recent past, before the advent of injectors, VAZ cars were equipped with several types of carburetors, namely Solex, Ozone and Weber. Throughout the entire period of operation, a lot of positive feedback has been heard about them, and over time, the popularity of these models has only increased. However, any device needs careful maintenance, in relation to it it is necessary to carry out cleaning, tuning, and sometimes repair - adjusting the 2107 carburetor is no exception.
The functioning of carburetors from several different manufacturers is carried out according to the same principle, and they are designed to create a fuel-air mixture with its supply to the combustion chamber, where the mixture itself ignites.
There are three types of carburetors:
2. Needle.
3. Bubble- used relatively rarely.
How to improve the carburetor VAZ 2107
If there are certain complaints about the operation of the car in the form of a fuzzy response to the increased gas supply, sluggishly gaining momentum, in this case, you can do the tuning of the VAZ 2107 carburetor. will increase.
Step by step actions:
1. Purchase a repair kit, preferably DAAZovsky.
2. Disassemble the carburetor. Pick up the middle part with the main diffusers, and use paper with the finest abrasive to polish them. As a result of these actions, it will be possible to reduce the loss of aerodynamics at the air inlet. For a similar purpose, processing of small diffusers is carried out - installed above the main diffusers of atomizers. In the lower part, the diffuser must be made narrower, but carefully so that the emulsion channel does not open. After that they are polished.
3. The next step is to refine the throttle valves at the bottom of the carburetor. The bolts that secure the damper to the axis are made under the countersunk. To this end, the damper is held fully open, the bolts are sawn. In this place, you can also not overdo it, so as not to completely remove the bolt head.
4. The ends on the dampers are turned, the corners are sharpened. In this case, it is important not to regrind the damper so as not to disturb its fit to the chamber wall. Similar actions must be carried out with two dampers - after that they are polished.
5. The assembly of the lower and middle parts of the carburetor is in progress with the installation of a fresh gasket.
6. Jets are selected. In order to improve the dynamics of acceleration, it is important to refine the enrichment of the mixture. The first chamber can be left unchanged, and in the second, the fuel main jet is replaced, instead of the 150th, the 162nd is installed.
7. In the first chamber, the 40th "nose" of the accelerator pump can be replaced by the 50th. This way it will be possible to win during overclocking, and in combination with the changes made with the second chamber, to achieve a sharp overclocking.
Useful advice
Performing a general repair of a VAZ 2107 car, thanks to the above carburetor tuning, it will be possible to achieve improved acceleration dynamics with almost the same fuel consumption. We can say that the refinement of the carburetor is recommended for those who wish to use gasoline economically.
Additionally, to improve the air passage, you can resort to installing a low-pressure filter, but with a standard engine and a "zero" filter installed on it, the result will not change much.
Do-it-yourself carburetor repair 2107
- The main thing to do is to carefully inspect the device, then thoroughly clean it and wash it, removing dirt and other imperfections.
- Wash the float chamber and clean the strainer.
- Remove blockages from air jets.
- Adjust the float system, trigger and idle speed.
Useful advice
It is necessary to control the strainer located in front of the float chamber every 60 thousand kilometers.
Below you can watch a video on how to repair a VAZ 2107 carburetor with your own hands.