Not to look nervous! Adults, keep your children away from the monitor screen.
After an accident through my fault, Fordissimo promised a new chain in order to forget all the grievances.
After 2 days I called a friend, everything was ordered, when the spare parts arrived, I immediately drove it to be repaired.
So, what was needed to replace:
- valve train chain;
- sedatives;
- tensioner;
- valve cover gasket;
- Front crankshaft seal.
Today, early in the morning, I took the car to the other end of the city and left with a calm soul in the hope that everything would be fine with me.
As you know, to change the chain, you need to remove the valve cover. Well, I was sitting, having breakfast, nothing foreshadowed trouble. Then a message came from my friend, they removed the valve cover and decided to show me what's under it ...

And there was a surprise waiting for me. You know, there is such a type of owners who carefully monitor the body and interior, but for some reason they put aside the heart of the car - the engine. The first owner of my Ford, unfortunately, was just like that.
Once, in one of the VKontakte groups, I saw an entry about an Audi TT that traveled 100 thousand km without changing the oil, and so, mine didn’t differ much from it) Conclusion: the first owner did not change the oil for about 50-70 thousand km, well, that’s right , offhand. I have xenon headlights and angel eyes in my headlights. It seems that with the money saved on an oil change, he just redid the optics a little, but what about the engine - I don’t care, it goes fine.
Honestly, I'm shocked at how it was possible to start the car so much. There are no complaints about the body and interior, everything is wonderful. But one has only to look inside - a surprise awaits you. You change the candles - a surprise, the drum pads - a surprise, you clean the throttle - again a surprise. Now also the engine.
What my friend told me: you need to change the camshaft stars, as well as flush, flush and flush the engine again. Just do what to wash. Naturally, it would be better to disassemble, clean and assemble it all, but you can try and rinse it, he says, maybe it will be possible to restore it.
In general, the first owner was not particularly involved in this machine, I feel sorry for Fordika.
My friend has not yet begun to take money for work, so the issue price is 15,000 (only spare parts)
P.S. A lot of people say to me: "I would have freaked out already, you're messing with this car so much, sell it, finally buy something better." I cannot sell it. You know, every time I do something for him, I feel gratitude, as if he wants to say thank you for at least someone starting to work with him ... And I have never received such sincere gratitude from any person.
A small report on replacing the timing chain with Duratek 1.6 8 cells. At a run of 100 thousand, the chain began to shuffle and then began to increase with mileage. I decided to change the kit. Purchased - Chain Ruville, both strips Ruville. Gears of the crankshaft, camshaft and pulley oil seal-Original.
. They did everything in the pit. Opened the valve cover, nothing critical was found
We turn off 2 nuts and 1 bolt on this thing
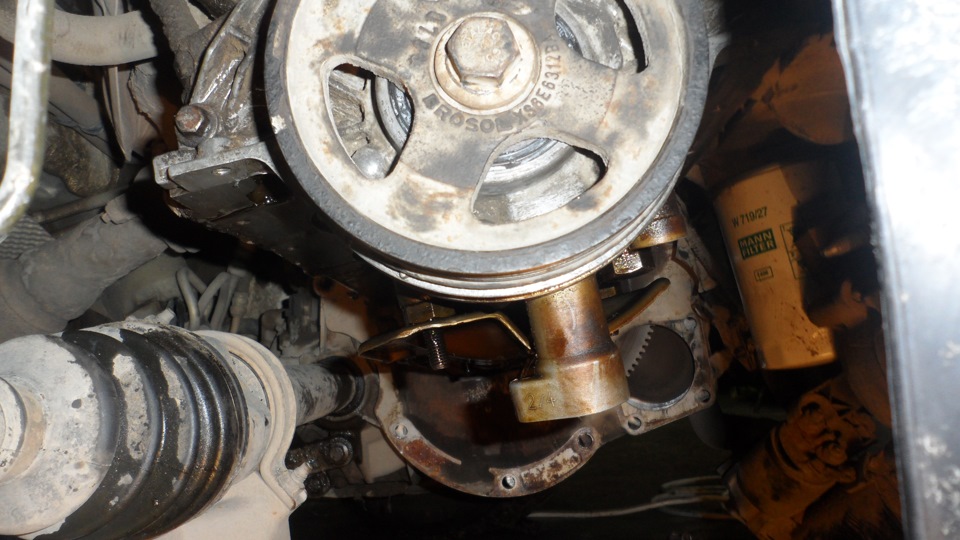
We unscrew the bolts for fastening the oil pump, the crankshaft pulley and remove the pump together with the pulley. Next, we display the timing gear of the camshaft with the triangle arrow at 12 o'clock, and the mark on the crankshaft should be like this at 6 o'clock.
Unscrew the straps and remove them. and remove the chain (look, sniff, lick and try the removed parts on the tooth. Whoever wants to put it under the pillow.) Remove the old oil seal, my pulley and pump. : Do NOT remove the pulley together with the pulley after pressing the stuffing box out of the pump! Put the pulley-pump together! Device for pressing the stuffing box together with the pulley
I didn’t take off the ban, sorry, there was no time. We put the strap chain. Now we put the pump with a pulley, first we fix the crankshaft pulley, then the pump itself.
Now you can assemble in the reverse order. Between the start and installation of the pump, I waited an interval of 4 hours for the stuffing box to shrink.
then start the engine.
Many thanks to the minder Ruslan in the help


1 Remove the decorative engine cover.
2. Disconnect a wire from the minus plug of the storage battery.
3. Remove the cylinder head cover (see "2.1.7. Ford Focus II. Replacing the cylinder head cover gasket").
4 Hang the front of the vehicle and place it on a secure stand. Remove the right front wheel.
5. Remove the mudguard of the engine compartment.
6. Remove the right front fender liner (see "11.2. Ford Focus II. Removing the engine compartment mudguard and front wheel liner").
7. Remove the A/C compressor drive belt by cutting it with a knife.
8. Remove the accessory drive belt by cutting it with a knife.
According to the manufacturer's recommendations, the accessory drive belt for removal should be cut with a knife, after which the belt becomes unusable. This is due to the fact that the belt, even after removal without damage, cannot be reused, since it is designed only for a one-time stretch when put on pulleys (adjustment, belt tension is not provided). In addition, belt replacement is regulated by a certain mileage or service life.
9. Set the piston of the 1st cylinder to the TDC position of the compression stroke (see "2.1.5. Ford Focus II. Setting the piston of the first cylinder to the TDC position of the compression stroke"),

10. Turn out bolts of fastening and remove the gauge of frequency of rotation of a cranked shaft.

11. Turn out a bolt of fastening of a pulley of a cranked shaft...

...and remove the pulley.
12. Remove the expansion tank from the brackets on the body and take it aside without disconnecting the hoses.

13. Turn out a bolt of fastening..

...and remove the drive roller.

14. Remove the three bolts securing the water pump drive pulley, after loosening the bolts ...

...and remove the pulley.
15. Support the engine securely.
16. Remove the right front suspension support of the power unit by unscrewing the two nuts securing it to the bracket on the engine and unscrewing the two bolts securing it to the engine compartment mudguard.

17. Turn out twenty three bolts of fastening of a cover of a drive of the gas-distributing mechanism...

...carefully pry off the edge of the cover with a screwdriver...

... and remove the cover of the gas distribution mechanism drive.

18. Loosen the camshaft sprocket bolts.

19. Check the installation of the piston of the 1st cylinder in the TDC position of the compression stroke.

20. Pressing the ratchet through the hole with a thin screwdriver, unlock the chain tensioner, then sink the stem by pressing on the tensioner shoe and fix the tensioner stem in the recessed position by inserting a suitable rod into the hole.

21. Turn out two bolts of fastening...

...and remove the chain tensioner.

22. Remove the chain tensioner shoe.

23. Remove one lower and one upper mounting bolt ...

...and remove the chain guide.
![]()
24. Remove the timing chain.

25. Turn out a bolt of fastening and remove a boot of a tensioner of a chain of a drive of the oil pump.

26. Turn out a bolt of fastening of an asterisk of the oil pump...

...and remove the sprocket along with the drive chain.
27. Inspect the sprockets of the crankshaft and camshafts, the condition of the tensioner shoe and chain guide. If necessary, replace defective parts.
28. Install the oil pump drive chain in the reverse order of removal.
29. Put a new timing chain on the crankshaft sprocket and camshaft sprockets.
30. Reinstall the tensioner shoe and chain guide.

31. Reinstall the chain tensioner and remove the retainer, bringing the tensioner into position.
32. Clean the seating surfaces of the timing cover and apply FORD WSE-M4G323-A4 silicone sealant or similar to the cover flange with a 3mm diameter roller.
33. Install the timing cover.
To ensure the tightness of the connection, the cover of the gas distribution mechanism drive must be installed no later than 10 minutes after applying the sealant.
34. Tighten the camshaft sprocket bolts.
35. Install all parts in the reverse order of removal. Replace the crankshaft pulley bolt with a new one, tighten it with a torque of 100 Nm (10.0 kg-cm) and then tighten it by 90 °. After installing the crankshaft pulley, remove the locking bar from the camshafts.